Learn how to make the most of your electronics while fishing.
Jason Arnold/jasonarnoldphoto.com
Every angler on the ocean grapples with electronics questions, whether it’s how to take a screen grab or how to update software. To resolve some of the most common queries anglers pose, I asked electronics makers to walk us through how to perform important functions on their multifunction displays.
The topics they chose range from how to mark and save waypoints and switch between radar modes to logging your catch and creating customized screens.
Furuno
Furuno introduced the third generation NavNet TZtouch3 displays during this February’s Miami International Boat Show. We talked to company spokesman Jeff Kauzlaric about the changes Furuno made to its user interface to make it cutting edge.
“One of the things we did is fully utilize the edge-swiping feature where you go from either left to right, right to left, top to bottom, or bottom to top,” Kauzlaric says. “What ends up happening is you’re not going through a bunch of menus. Everything is a swipe and a tap away.”
The bottom-up screen swipe brings up a layers menu. To build a custom screen, you swipe from the top down. “It’s like a car’s stereo settings, you hold the button and set the station — or in this case, the screen — you want.” On the new units, you can choose six different screens.
The new system also gives users the option to program a brief tap with two fingers or a long tap with two fingers to function as a shortcut for taking a screen capture or similar actions. Another new convenience: If you have your screen split four ways and you put your finger on one window for a long hold, that window will go full-screen. Hold your finger on the screen again and it goes back to the four-way split.
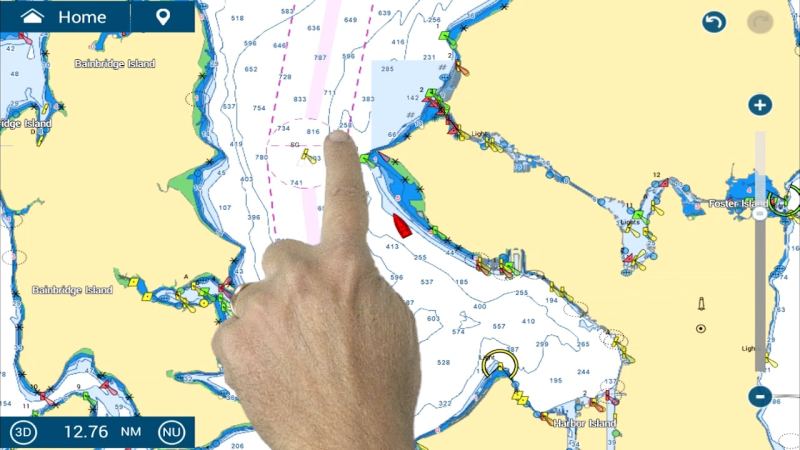
Mark and Save Waypoints
Tap a spot on the screen where you want to drop a waypoint.
Courtesy Furuno
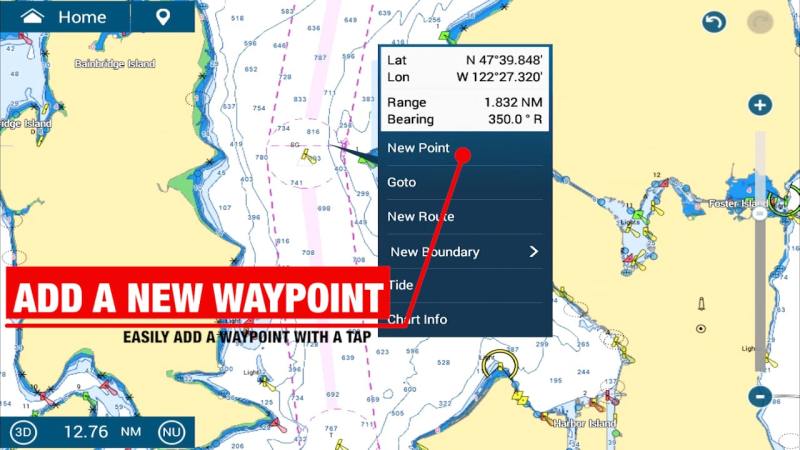
A popup window offers you options. Tap New Point.
Courtesy Furuno
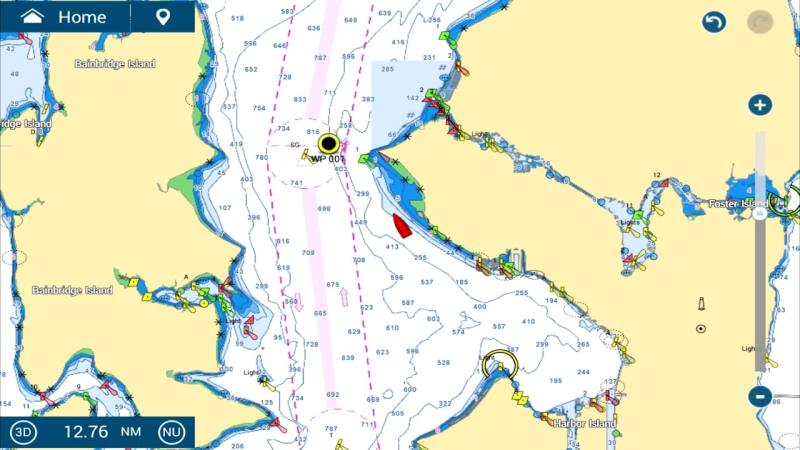
The waypoint appears. At a later time, you can go in and name the waypoint and add more information.
Courtesy Furuno
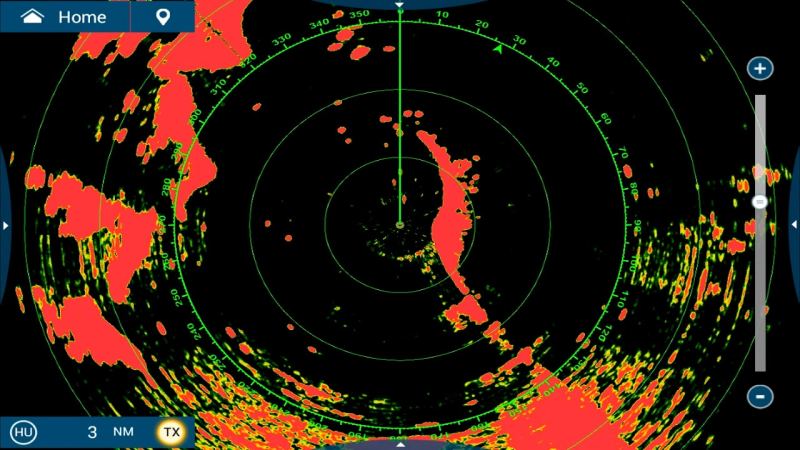
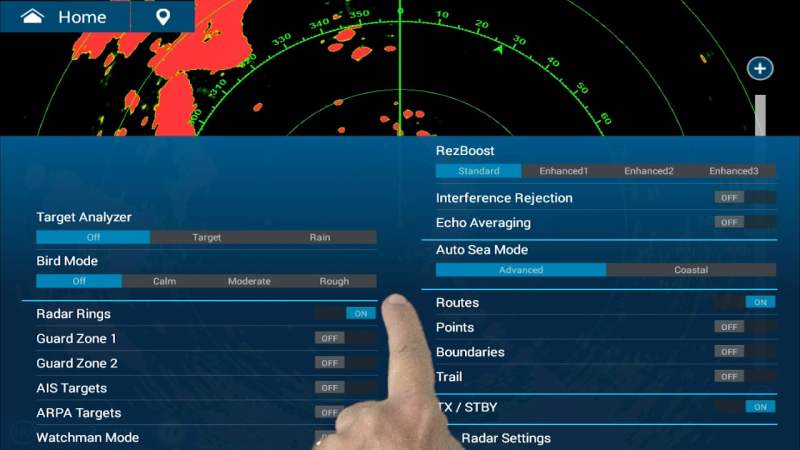
Switch Between Radar Modes
From the radar screen, locate the small arrows on each edge of the display.
Courtesy Furuno
Put your finger on the arrow at the bottom of the screen and swipe up to access the layers menu.
Courtesy Furuno
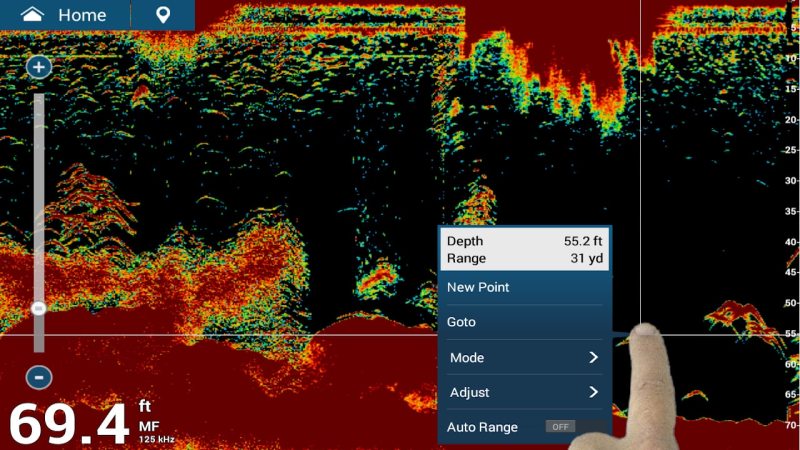
Depth/Distance to Fish Target
From a traditional fish-finder screen, tap the fish target you want to range, and a popup menu tells you depth and distance from the boat.
Courtesy Furuno
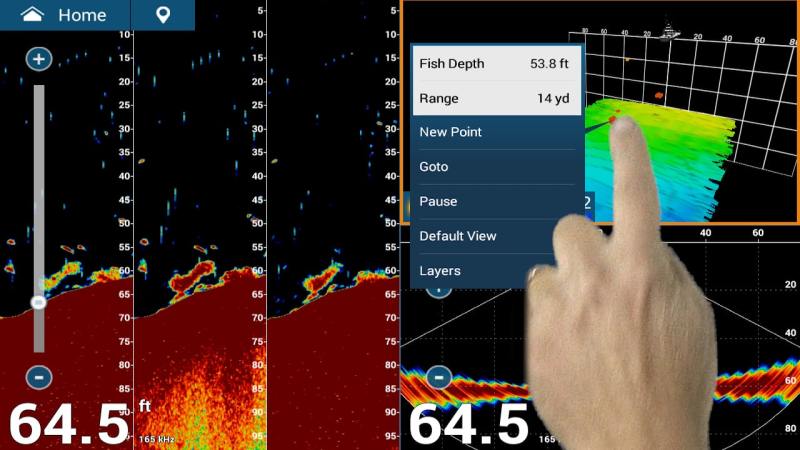
If you’re in 3D mode, do the same procedure: Tap the fish target and the depth and distance show at the top of the popup menu.
Courtesy Furuno
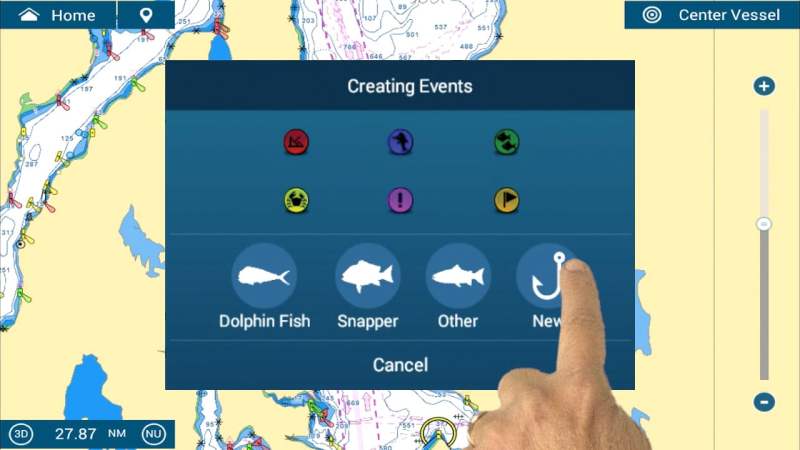
Log Your Catch
From the plotter/chart page, tap the event icon in the top left corner of the screen. That automatically drops the log point in the exact boat location and opens a popup window.
Courtesy Furuno
On the popup list, tap New or a previous species you’ve already logged.
Courtesy Furuno
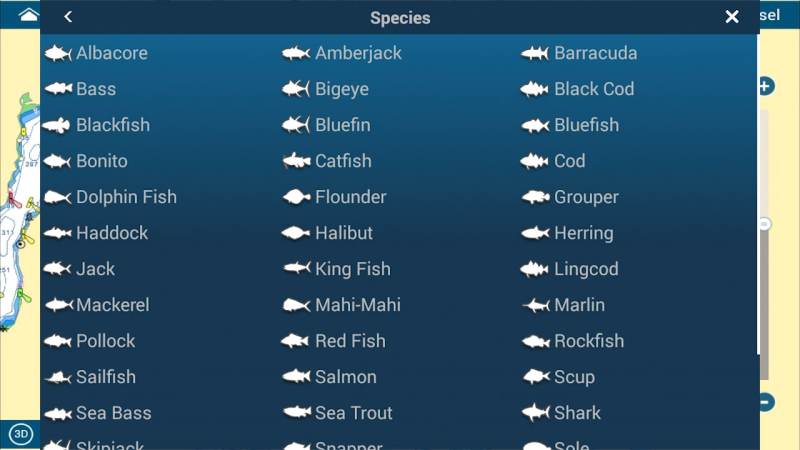
If you tapped New, select the species.
Courtesy Furuno
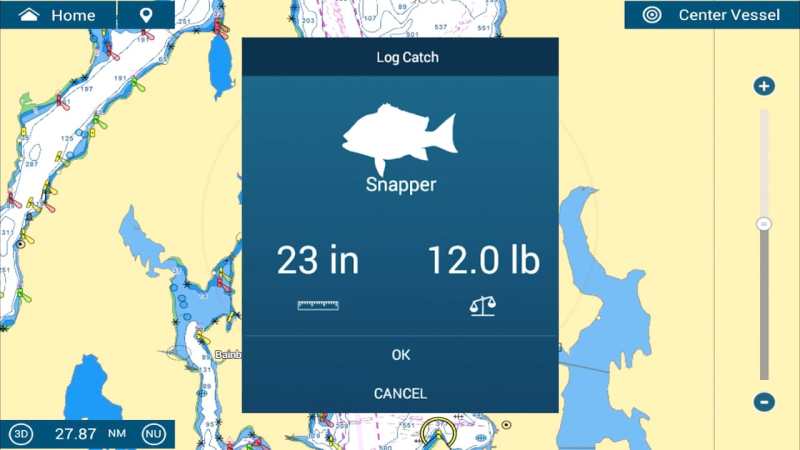
Enter the length and approximate weight.
Courtesy Furuno
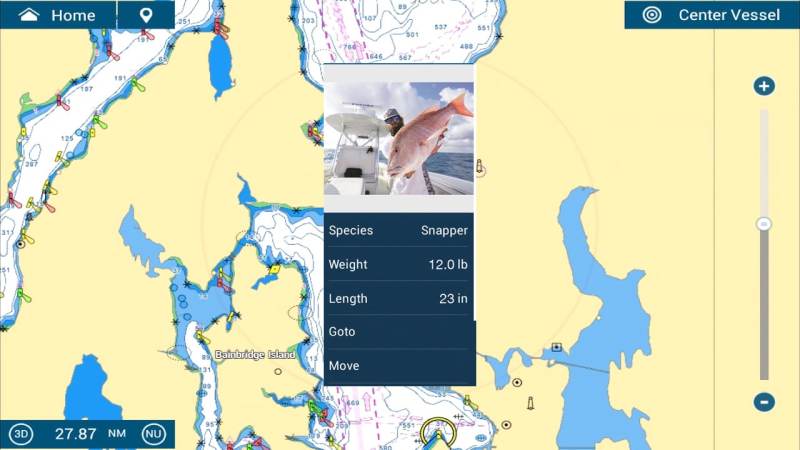
Upload an optional photo.
Courtesy Furuno
Pin Code Lock
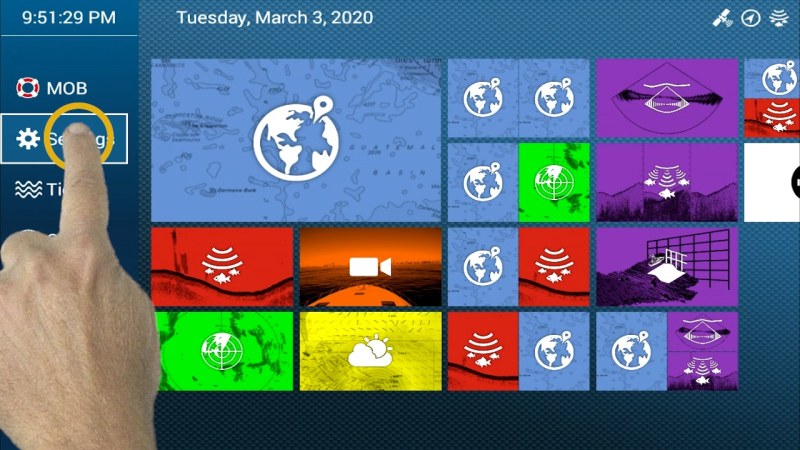
From the Home page, tap Settings, and then tap General.
Courtesy Furuno
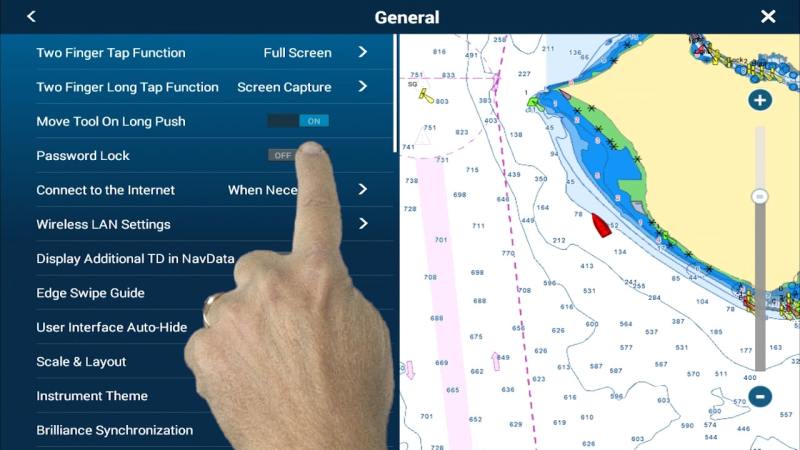
On the General settings page, tap on Password Lock. A popup message will explain that a password will be required at each startup. It warns that if you forget the password, all units in the network must be factory defaulted and all data will be lost.
Courtesy Furuno
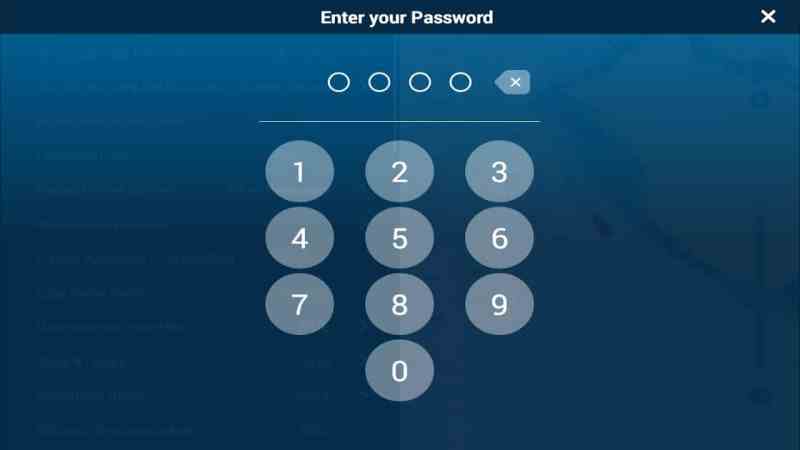
You will be prompted to enter a password twice. When you’re finished, a popup message will ask you to tap OK.
Courtesy Furuno
Garmin
Garmin’s interface has a reputation for ease of use. Here are five functions anglers commonly need and directions on how to access them.
Mark a Waypoint
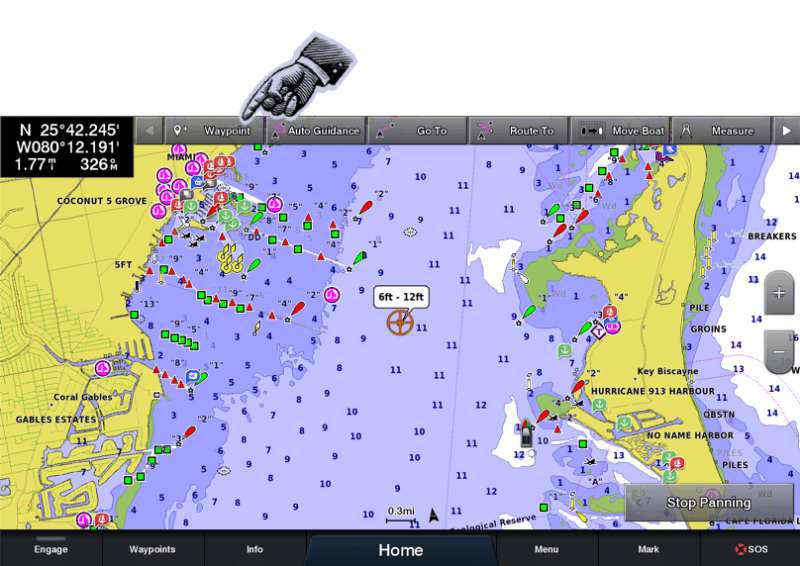
From the chart page, touch the location on the screen and tap “waypoint” on the top menu bar. At any time, you can press “mark” on the main bar and it will always mark the current boat location.
Courtesy Garmin
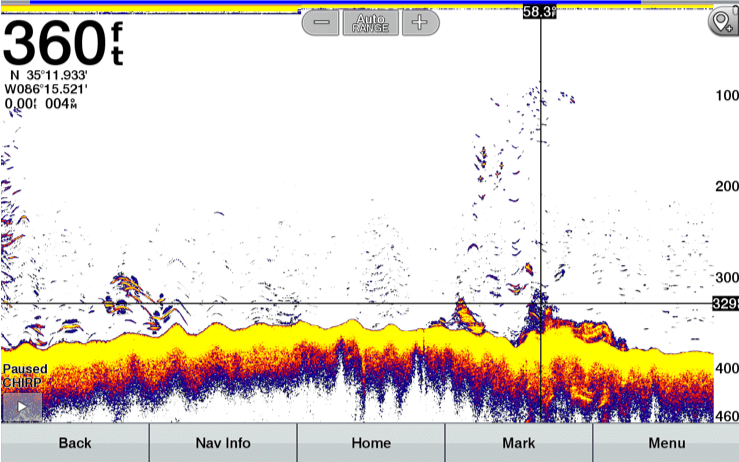
From the sonar screen, drag the crosshairs to a location and click the new waypoint button in the top right corner.
Courtesy Garmin
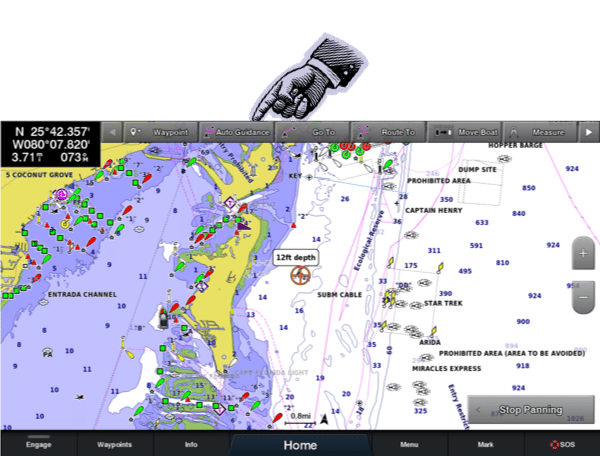
Auto Guidance
Auto guidance is built into all GPSMap and EchoMap Ultra units. That lets you quickly calculate your path to a destination and provide your ETA while underway. From a chart page, select a location with the cursor, click “auto guidance” on the top menu bar.
Courtesy Garmin
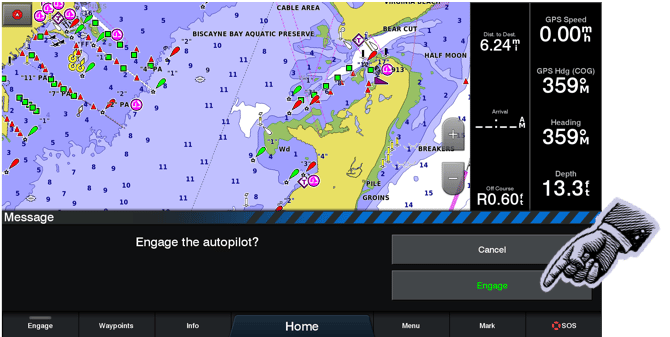
Tap “start navigation.”
Courtesy Garmin
When a popup window asks you to engage the autopilot, click engage.
Courtesy Garmin
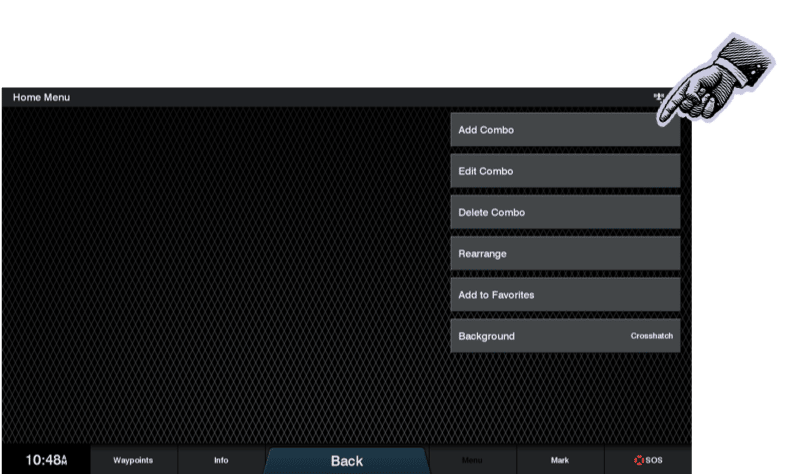
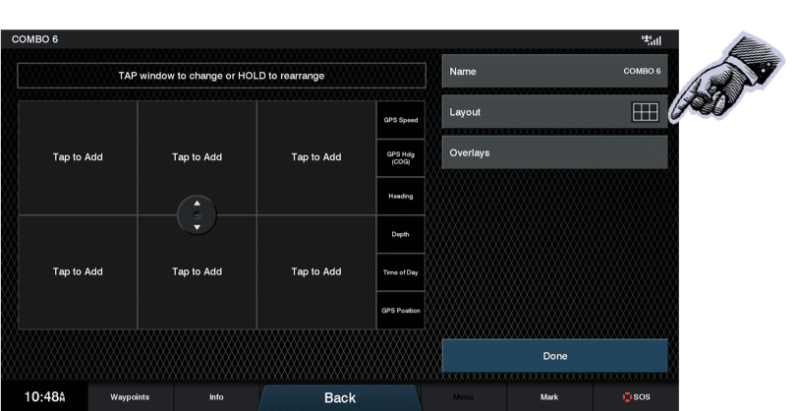
Make a Combo Screen
From the Home menu, select “add combo.”
Courtesy Garmin
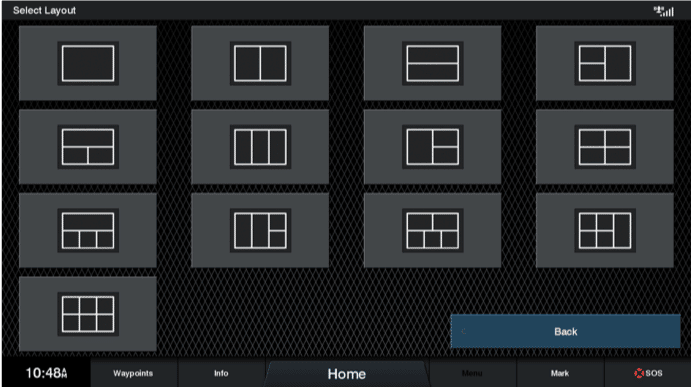
Select a layout. Many newer Garmin units are capable of display six separate screens.
Courtesy Garmin
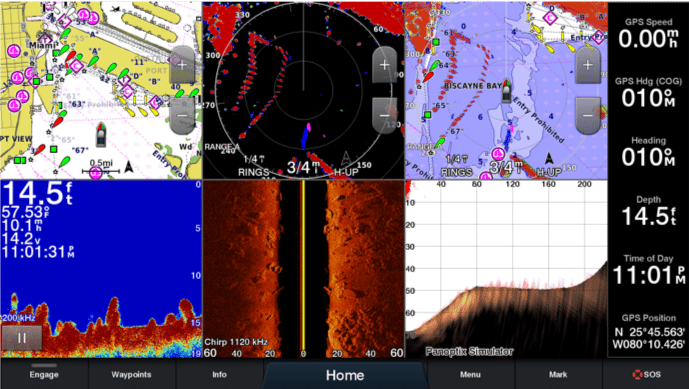
Tap each box to add sonar, radar, charts, etc.
Courtesy Garmin
The final view.
Courtesy Garmin
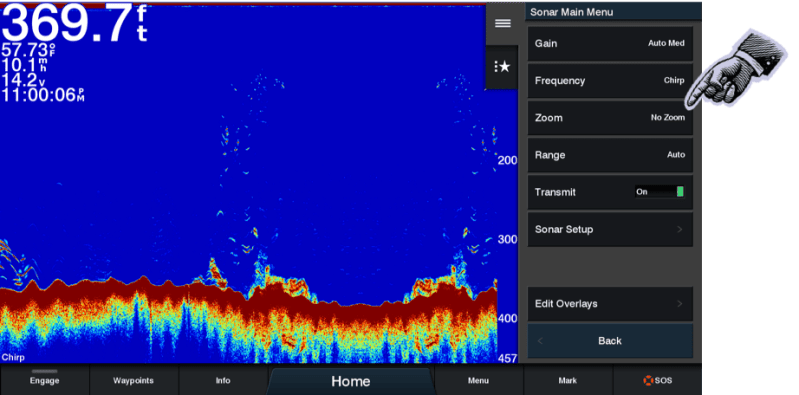
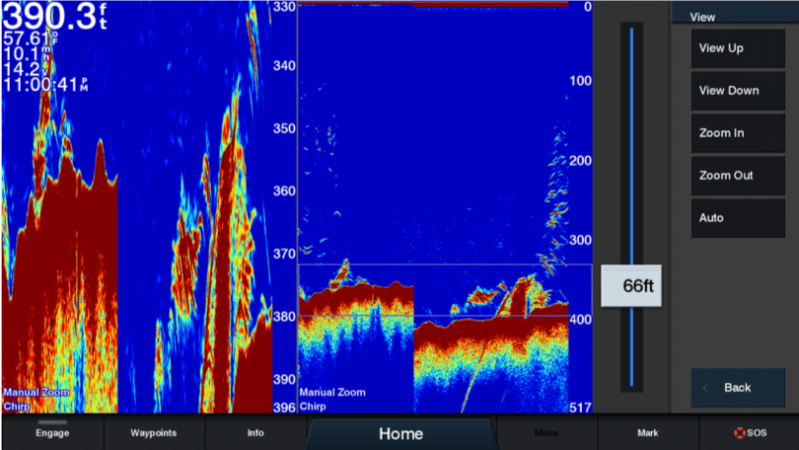
Change Sonar Views
On the sonar menu, select the Zoom option.
Courtesy Garmin
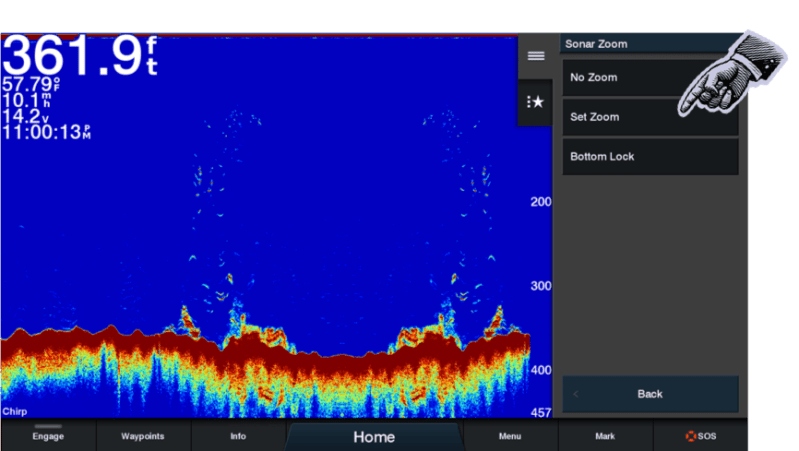
Select “Set Zoom.”
Courtesy Garmin
Use the slider and the menu to select the part of the water column you want to see.
Courtesy Garmin
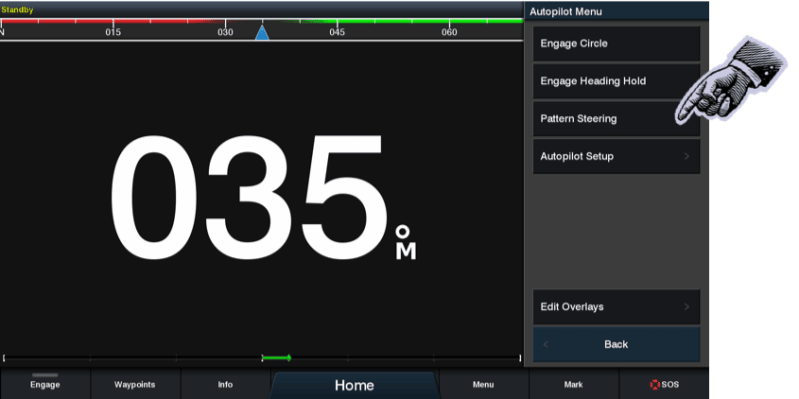
Autopilot Fishing Patterns
On the autopilot menu, select “Pattern Steering.”
Courtesy Garmin
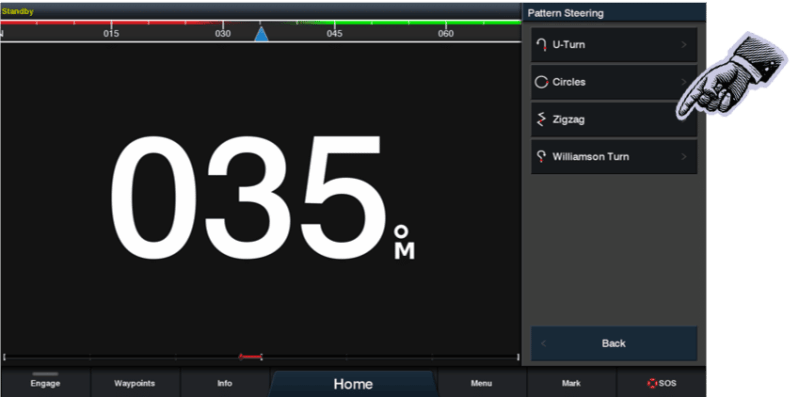
Choose one of the four patterns offered.
Courtesy Garmin
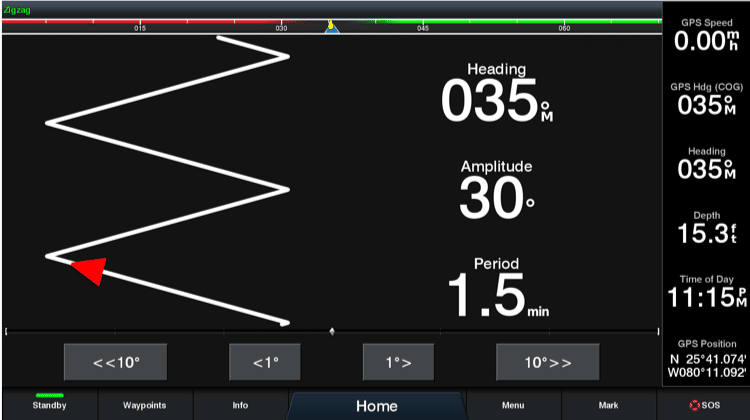
The pattern and the boat’s position show on the autopilot screen.
Courtesy Garmin
Raymarine
Raymarine has put a lot of effort into its LightHouse operating system, and its intuitive nature shows. Here are five commonly used functions on the company’s Axiom units.
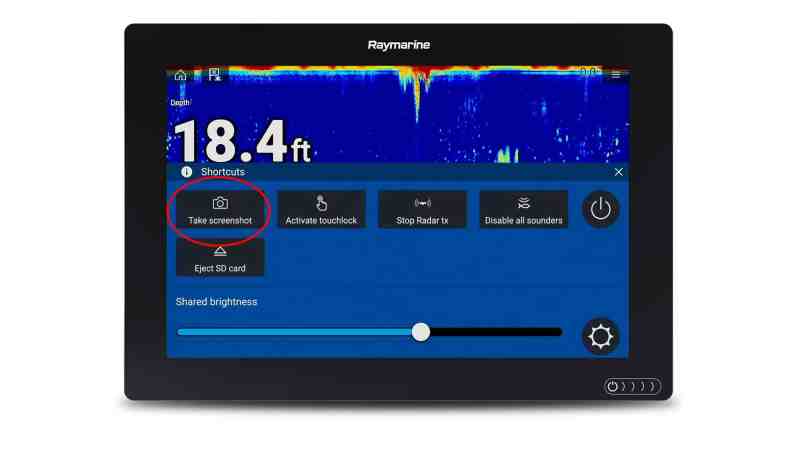
Taking Screen Grabs
When you’re on the water and see something cool on your MFD, grab a screen capture that you can save for future reference or share on social media.
Anytime the MFD is on, swipe or touch on its power key. Then, touch the “Take Screenshot” button (with the camera icon) and the screen is instantly saved to memory. You can change the default save location for all screen captures by selecting Setting -> This Display -> Screenshot file. Screenshots can save to your memory card, or to the Axiom’s internal storage. You can access your captured screens anytime from the “My Data” menu on the home screen.
Courtesy Raymarine
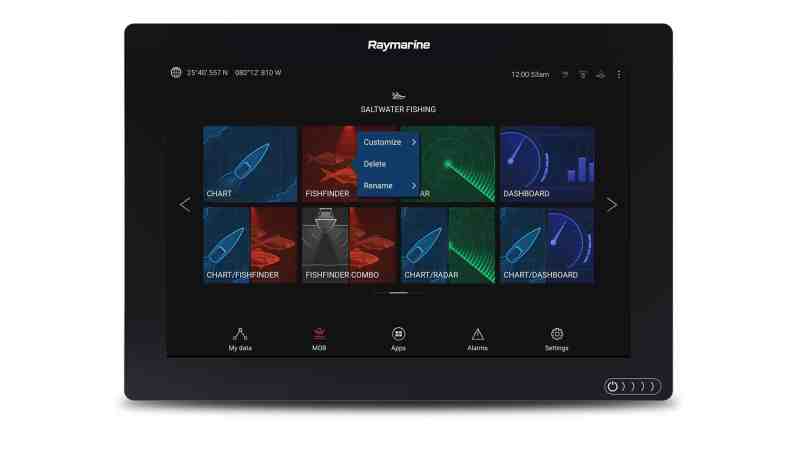
Creating Custom Layouts
Every Raymarine MFD ships with pre-configured tiles that show chart, fishfinder, sonar, video and other options. Once you get to know your system, you might want to create custom layouts that make it faster and easier to access the apps you use most.
From your MFD’s home screen, long-press on any of the application tiles and select Customize from the menu that pops up.
Courtesy Raymarine
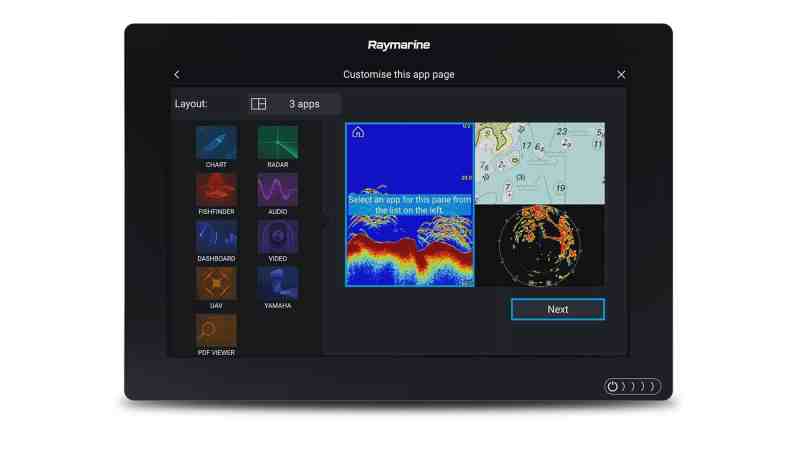
Choose the layout for your custom tile. You can show a single app full screen, or you can split the tile into smaller panes allowing you to see up to four items simultaneously.
Courtesy Raymarine
Once you’ve chosen your layout, simply touch the app icons on the left to assign them to each pane. When you’re happy with your selections press Next. The MFD will ask you to name your tile or it will assign a default name. Type a name or press Save. You will now see it on the home page.
When you choose a layout with more than one application, the system automatically splits the screen layout evenly between the apps. If you want to allocate more space to certain apps you can easily do so by adjusting the Split Ratio. Open the Menu (top right), go down to the Settings icon (it looks like a set of gears). Select the Page Settings tab, then touch Edit Split Ratio. Now, use your finger to adjust the sizing, and press Save when you’re done.
Courtesy Raymarine
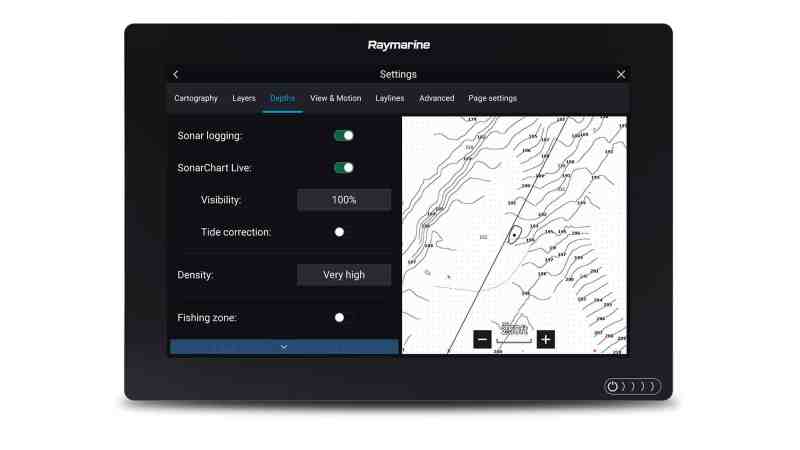
Create Custom Contour Maps
Many inshore and coastal fisherman use detailed depth-contour information to home in on underwater structure that attracts fish. Though today’s charts are more detailed than ever before, you still see areas where the full definition of underwater structure has not been mapped. Navionics’ SonarChart Live and Raymarine’s RealBathy contour mapping can create underwater maps in real time, using your boat’s sonar and GPS. To use the Navionics system, you need to have a Navionics map card and a valid subscription. The Raymarine RealBathy system is free, and no map is needed. Just insert a microSD card in your unit to save the data it collects.
In the Chart application, open the menu, select Settings and then the Depths tab. Scroll down and switch on Sonar Logging. That will reveal additional options that allow you to adjust the transparency of the overlay, correct it for tide levels, and choose where to save the data it collects. The real-time contour data is saved with 1-foot resolution, but you can adjust the amount of detail shown on-screen. Simply choose between low, medium, high or very-high density levels.
Courtesy Raymarine
RealBathy contour mapping can create a bathymetric chart completely from scratch using your depth finder and GPS. No base map necessary.
Courtesy Raymarine
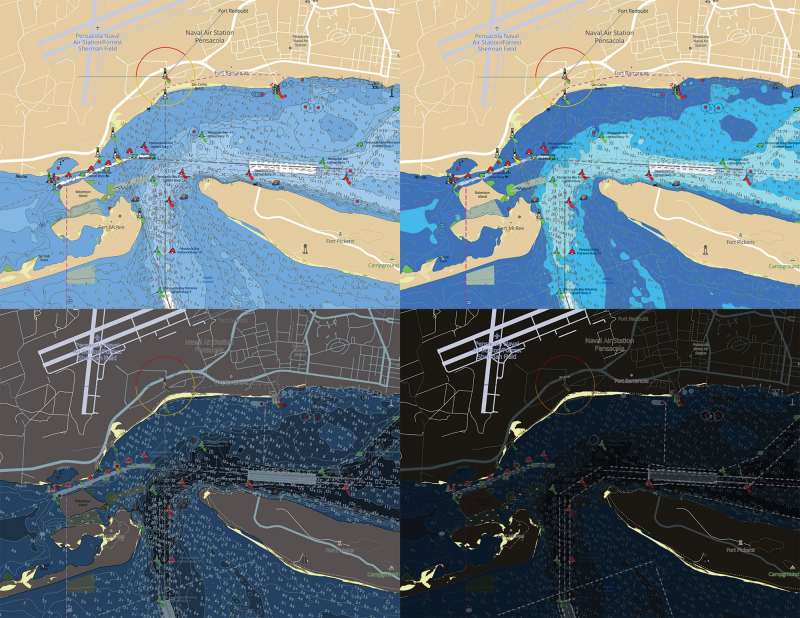
Night or Day Viewing Palettes
The latest update to Raymarine’s LightHouse 3 operating system now supports multiple color palettes that can be used to optimize the display for different lighting conditions. It changes the MFD’s menus and controls and also changes the colors of the Navionics or Raymarine LightHouse navigation charts.
Navionics charts support either a daytime or nighttime color palette, while LightHouse charts support an expanded range of colors: day, super-day (extreme brightness), dusk and night-time colors.
Courtesy Raymarine
Updating Software
Although many anglers see it as a chore, updating software regularly unlocks all kinds of new functions, and in most cases, costs you nothing. Raymarine has made it easy to keep its MFDs and their supporting components up to date. Using a Wi-Fi or mobile hotspot, connect your Raymarine MFD to the internet and it will do the rest.
From the home screen press Settings then touch the large Update Software button on the next screen. Select Check Online, connect your MFD to Wi-Fi, and it will automatically check the software level in all your connected components.
Courtesy Raymarine
You can select which components to update, or just let the MFD take care of all of them. The software is downloaded and installed with informative prompts.
Courtesy Raymarine