Saltwater fishing leaders—be they fluorocarbon or monofilament—can range in length from a few feet to the maximum that the International Game Fish Association allows of 15 feet for lines up to 20-pound test and 30 feet for pound-tests over 20. Yet, once you build or remove such long leaders from your main line, what’s the best way to coil and store them?
Over the years, I’ve fished alongside many capable first mates who run decks with expertise and precision. Part and parcel of this is keeping tackle items organized, neatly stowed and yet readily accessible. One of the best at this is Billy Hinkley, who mates for Capt. Jon Cooper out of Miami, Florida. Hinkley moves with speed and efficiency, so there’s not much time to ask questions about coiling leaders. Instead, I watched and learned.
First Step: Coiling
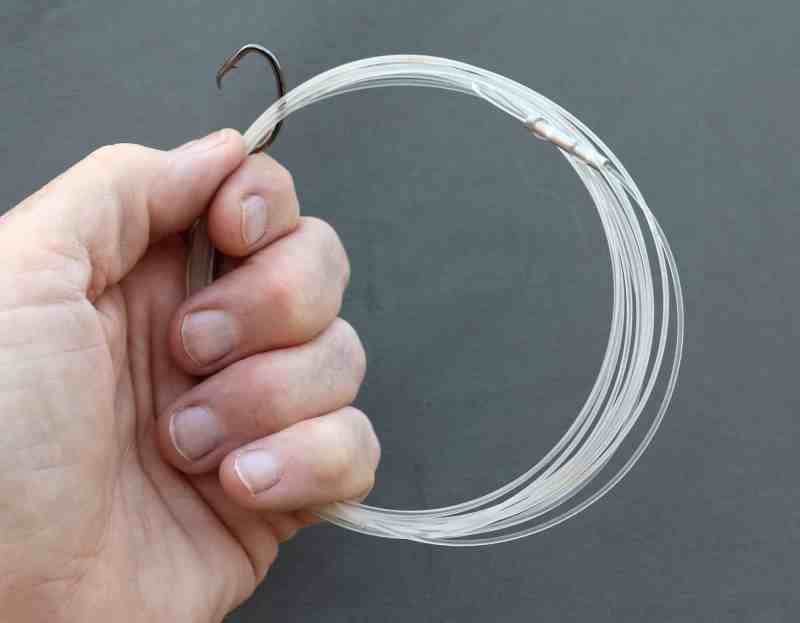
For leaders ranging up to about 150-pound test, Hinkley coils the leader around the four fingers of his left hand (right hand for southpaws), holding the loops in place with his thumb. He starts with hook or lure end of the leader, and makes sure the coils assemble in a relaxed manner without twisting or kinking. This results in a coil of about 4 or 5 inches in diameter.
With greater pound-test material ranging from 200- to 400-pound test, Hinkley coils in larger loops—anywhere from 8 to 10 inches in diameter. This helps prevent kinks in the line and renders the leader easier to manage when it comes time to uncoil it. All leaders take a “set” when coiled and tend to spring free once loosened. However, the larger loops tend to be less springy and more user friendly as you uncoil them.
Second Step: Securing
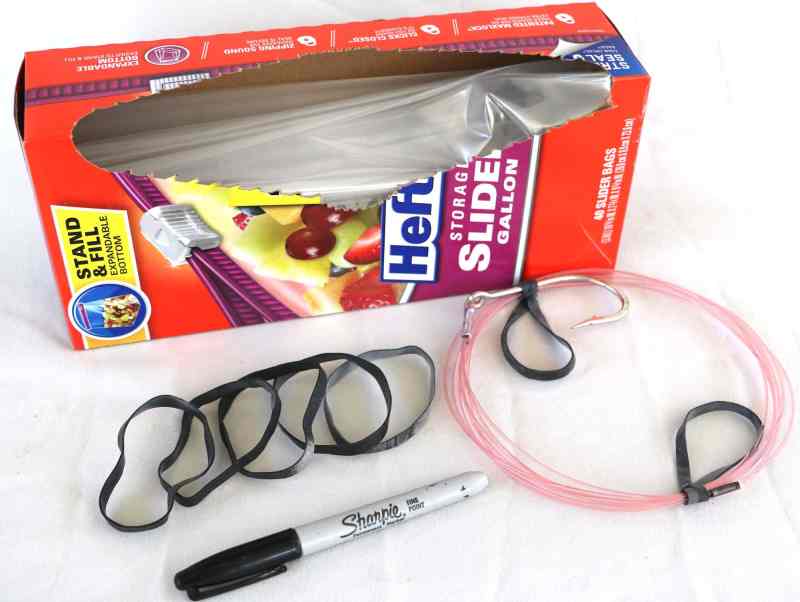
You can use a number of items to bind the leader coil and keep it from unraveling, including zip ties, Twist-Ease ties and waxed rigging thread. However, Hinkley prefers no. 64 rubber bands—the black UV-resistant bands he uses for other rigging items such as downrigger releases. He keeps five or six bands around his wrist, so they’re handy when he needs one.
Read Next: Storing Spools of Leader Line
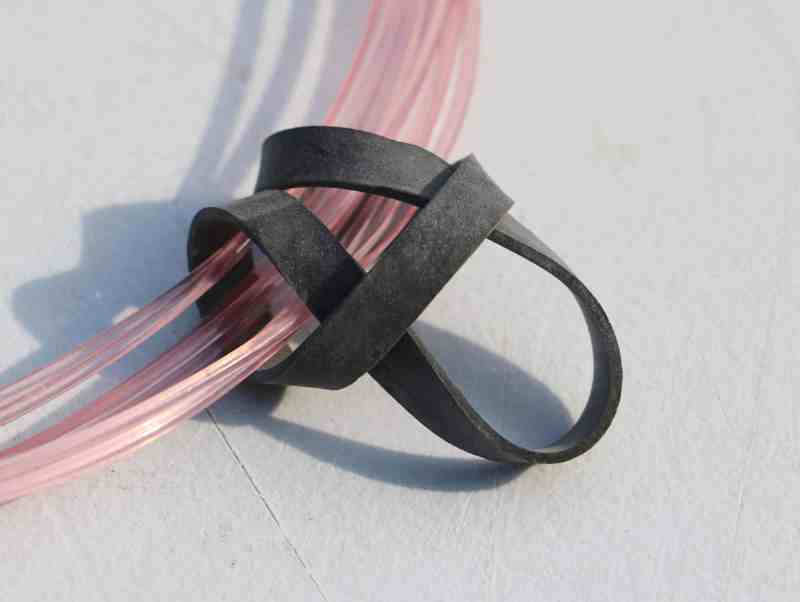
To bind a leader coil, Hinkley loops a rubber band around the leader strands and pulls it tight. That locks the rubber band in place, yet does not harm the leader material. He may use two bands on coils (one on each side) of thicker leader material. Removing the rubber bands is easy using just your fingers and avoid cutters than might damage or nick the leader material.

Final Step: Storage
To further protect leader coils from damage, place them in zippered, plastic storage bags. The sandwich-size bags are ideal for the smaller leader coils, while the gallon-size bags are well suited for larger coils. You can also note the pound-test and length of the leader on the outside of the bag using a Sharpie marker pen for future reference.


