Today’s outboard engines grant anglers the freedom to fish far from port with great reliability and peace of mind. Regular maintenance ensures that outboards continue to perform well and last as long as possible in the saltwater environment.
Some chores, such as changing a water pump or adjusting valves, might require the skills of a marine mechanic. Yet other tasks are relatively simple, requiring just a few tools, some spare time and a modicum of do-it-yourself mechanical ability. Let’s look at what you can easily handle on your own.
Flush Your Motor with Fresh Water
Using a flush-muff device is an effective way to rinse salt from the internal cooling-water passages when the boat is on a trailer. Check your owner’s manual for any special procedures, but in general terms, tilt the outboard down and slide the rubber cups of the device around the lower unit to cover the raw-water inlets on both sides.
Connect a freshwater garden hose to the flush-muff fitting and turn the faucet on until you see water squirting out of both cups. Then start the outboard, making sure it stays in neutral, and run it for about 10 to 15 minutes.
Using an outboard’s built-in flush fitting works well on boats kept in the water. Again, check your manual for specifics to your engine. Generally speaking, immediately after you shut down the engine at the dock (this ensures that the engine is still warm) and with the outboard tilted up, connect a freshwater garden hose to the flush fitting, turn the spigot on full blast and let it run for about 15 minutes. Do not turn the engine on during this process because water only trickles down to the water pump. You can damage the pump’s impeller while running the engine with this flush method.
Engine Oil Changes
Fresh oil is the key to extending the life of a four-stroke outboard. (Two-stroke outboards do not require oil changes because they automatically mix two-stroke oil with the fuel.)
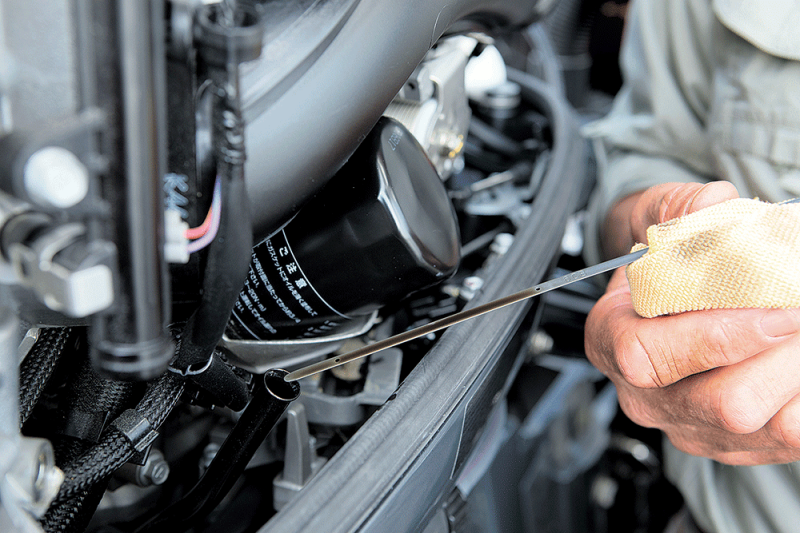
Most oil changes occur at 100-hour intervals and should also include an oil-filter change. With the boat out of the water, warm up the engine using a flush-muff device. Remove the drain plug (check your manual for the location) and catch the used oil in a drain pan. Remove the oil filter with a filter wrench and replace it with a fresh one. Hand-tighten only. Replace the drain plug.
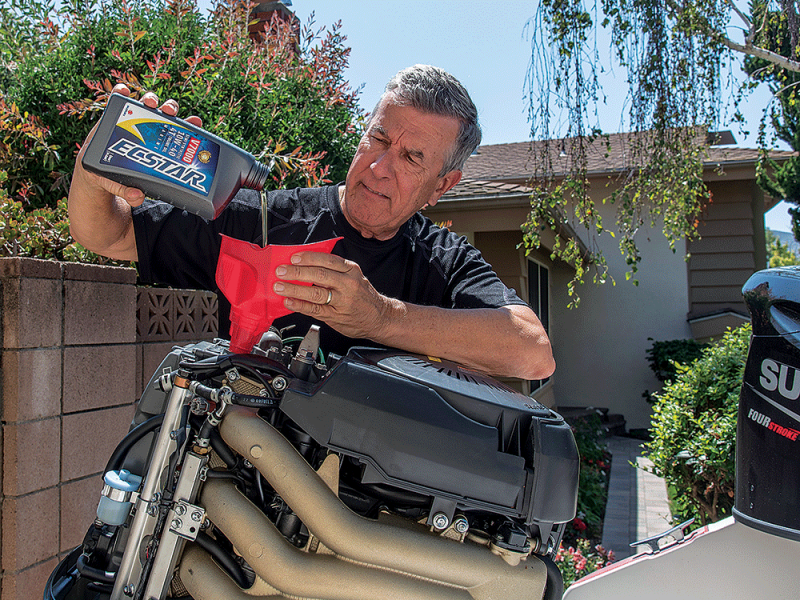
Find the fill cap for the engine oil (refer to your manual; the cap is often yellow in color) and fill the crankcase with the manufacturer’s specified viscosity grade (aka weight) oil. This is usually a multiviscosity oil, such as 10W-40. The manual might specify use of a synthetic or synthetic blend versus a straight mineral-based oil. Using the same brand of oil as the outboard (e.g., Yamalube marine engine oil for Yamaha outboards) is a good idea because the manufacturer has a vested interest in making sure your engine performs well and doesn’t come back for warranty repairs.
No matter what brand of oil you use for your four-stroke outboard, make sure it bears an FC-W rating. This means the oil has been certified by the National Marine Manufacturers Association to contain special additives that enhance lubrication and inhibit corrosion in marine applications.
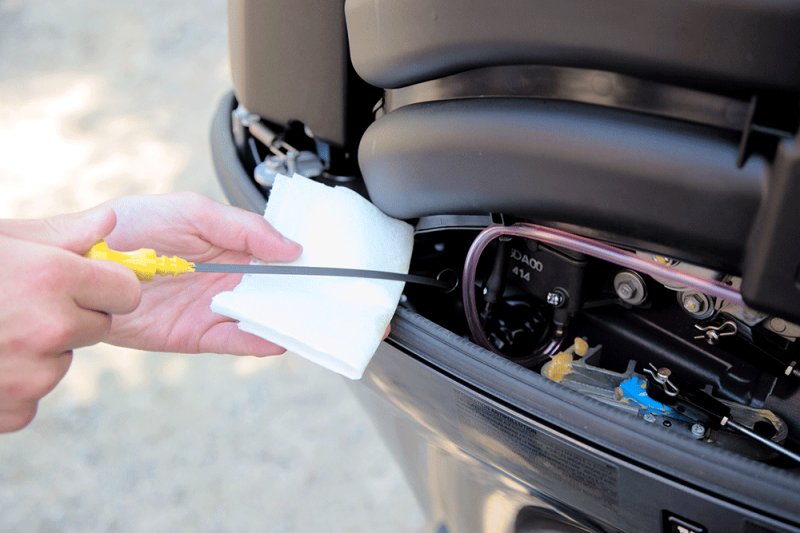
Most large outboards require around 5 to 8 quarts of oil. Check your manual to be sure. Also, avoid overfilling the crankcase with oil. A quart in excess of the capacity can be worse than a quart under because the additional pressure of too much oil can damage engine seals and create leaks. Check the dipstick (refer to the manual for the location) to make sure the crankcase is filled to the proper level.
Changing Your Gear Lube
Routinely changing the gear lube helps you detect water that might be leaking into the gear case. The recommended service interval is usually the same as with engine oil. Use the lube specified in your owner’s manual, such as SAE 90 hypoid gear oil. To drain the gear case, remove the drain plug from the bottom of the lower unit, then remove the vent plug just below the anti-ventilation plate.

Leave both plugs out and fill the gear case using a hand pump (available at most boat dealers and auto-parts stores) with the hose fitted to the drain hole at the bottom. While filling, give the prop a spin or two with your hand to help purge air from inside.
Pump in lube until it begins to spill from the vent. With the pump line still in position, replace the vent plug. Then remove the pump line and quickly replace the drain plug.
Using Grease on the Motor
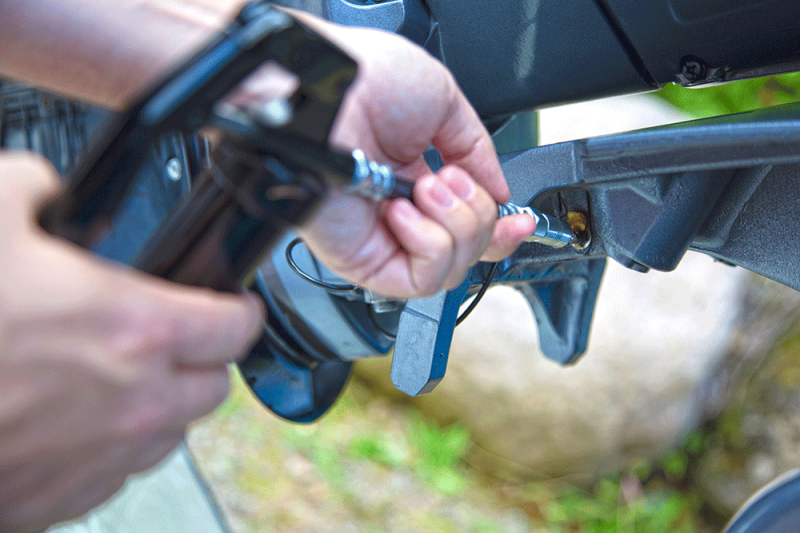
Use a grease gun to pump marine grease into the zerk fittings outlined in the manual at the recommended intervals. Zerk fittings are usually found on the outboard’s pivot tube (on which the engine rotates when it turns), steering tube and tilt-and-trim bracket.
Replacing Fuel Filters
A separate 10-micron water-separating fuel filter serves as the first line of defense in keeping water and dirt from getting to the engine. That’s why it’s important to change fuel filters per the manufacturer’s maintenance schedule. Yamaha, for example, recommends replacement every 50 hours, with the primary and in-line filters replaced every 100 hours.
Inspect the Propeller
After every trip, manually spin the propeller. If there’s fishing line wrapped on the prop shaft, you can sometimes hear a soft tick, tick, tick — the result of a piece of monofilament or fluorocarbon fishing line slapping the inside prop barrel.
Braided line is too limp to create the same sound effect, so you still need to remove the prop to inspect the shaft for a tangle of line and possible damage to the gear-case seal. Do this every other trip. If you find fluid leaking, take the motor to a shop to inspect the gear case and replace the seal.
Before reinstalling the propeller, be sure to lubricate the shaft, thrust bearing, prop nut and other hardware with marine grease to make it easy to remove everything next time around.
Zinc Replacement
Periodically inspect the sacrificial zinc anodes on your outboard. These intentionally corrode before your outboard does in order to protect the motor. Replace them when they are 50 percent gone.
Spark-Plug Service
The service interval for changing spark plugs is generally around 200 hours. Buy the right plugs, and “gap” them correctly. The gap between the center and ground electrodes will be specified in the manual; use a feeler gauge to confirm that proper gap.
Spark plugs are often set deep in the cylinder head, with individual coils (connected to the plug wires) bolted over each one. Unbolt the coil and then carefully pull the boot off of the plug. Then use a deep spark-plug wrench (often supplied in the outboard tool kit) to unscrew and remove the plug.
Using the plug wrench, insert and thread the new plug into place (be careful not to cross-thread it) and tighten snuggly. Don’t overtighten, which can strip the threads in the aluminum head. Snap the boot back on and reattach the coil. Replacing the plugs one at a time helps you keep track of where each coil and plug wire goes.
Head Protection
Periodically treating the powerhead with corrosion-inhibiting spray lends the motor protection from errant salt spray under the hood. Use a corrosion inhibitor specified by the manufacturer. Mercury Marine, for example, recommends Quicksilver Corrosion Guard (about $8 for an 11-ounce aerosol can).
The do-it-yourself route might not be for everyone. Even if you have a marine mechanic handle service, it’s important to know what’s required and why. No matter how you go about outboard maintenance, think of it as your ticket to staying on the water and catching fish.


