What if you could assemble leaders without having to tie any lines together or use a swivel? Even better, what if those connections passed seamlessly through rod guides and tested stronger than hard-to-tie knots? For many anglers on the West Coast, and growing numbers nationwide, it’s a reality.
Hollow-core braided lines have no center; they are manufactured via braiding together 12 or 16 strands of gelspun polyethylene (PE). This unique feature allows hollow braid to sew into itself, as well as leader material to sew into the braid, using special rigging needles. Connections stay 100 percent secure via a tightening effect, comparable to a Chinese finger trap. With hollow-core, knots that tie braid to braid or braid to leader are no longer necessary.
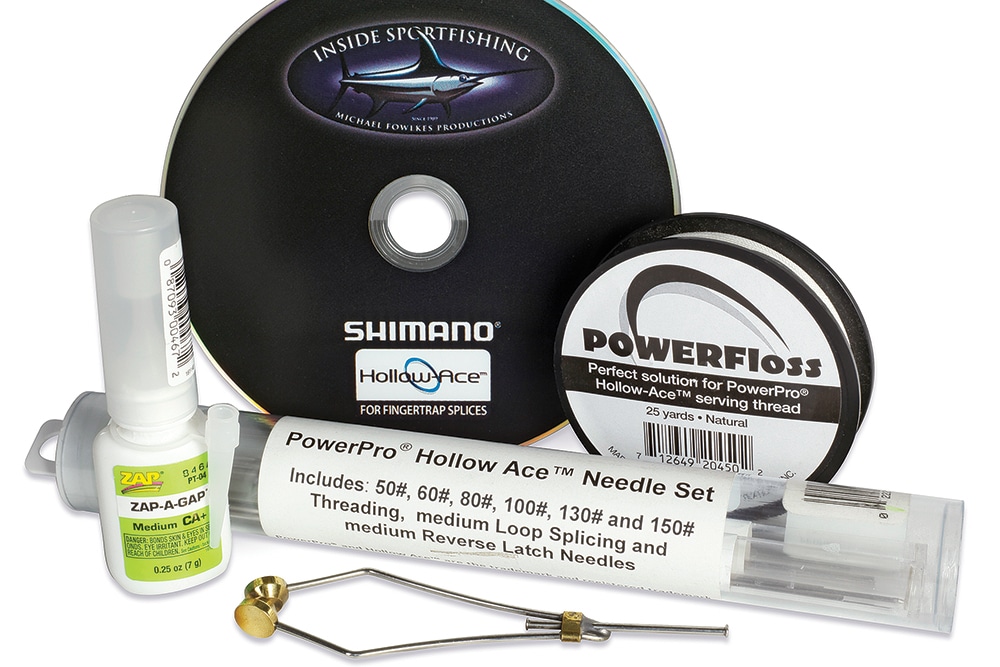
Consider exploiting hollow braid’s unique features to build quick-change wind-on leaders — it’s entirely practical and possible to construct wind-on leaders comparable in quality to premade, premium-priced options from Shimano, Sufix and other leader manufacturers. Top PE line manufacturers such as PowerPro (Hollow Ace), Cortland (C-16 Spliceable Super Braid), Toro Tamer (Spliceable Super Braid), Seaguar (Threadlock) and TUF-Line (Guide’s Choice) all offer quality hollow-core braid.
We take you step by step through the leader-building process, using photos and captions to detail how to make your own leaders. Pay vital attention to the serve connection: If the hollow braid fluffs up and the serve is not tight, the leader can actually slip out of the braid. Realize that these photos demonstrate just one of a number of reliable ways to construct a wind-on leader. Once you get the hang of it, rig up a bunch of leaders for your next trip (the one downside to hollow-core is that each leader takes time to build). If you need more help, watch these hollow-core wind-on leader video tutorials that explain each step in greater detail.

How to Rig Hollow-Core Wind-On Leaders
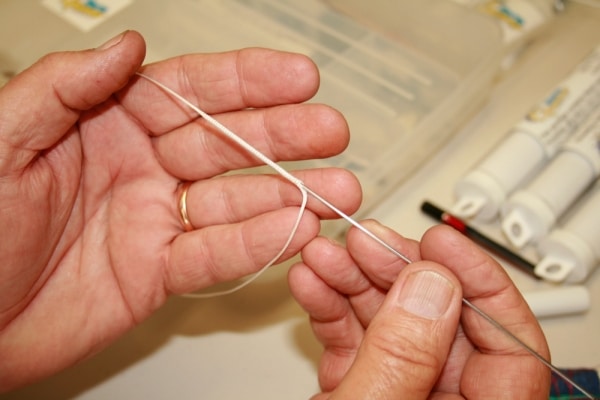
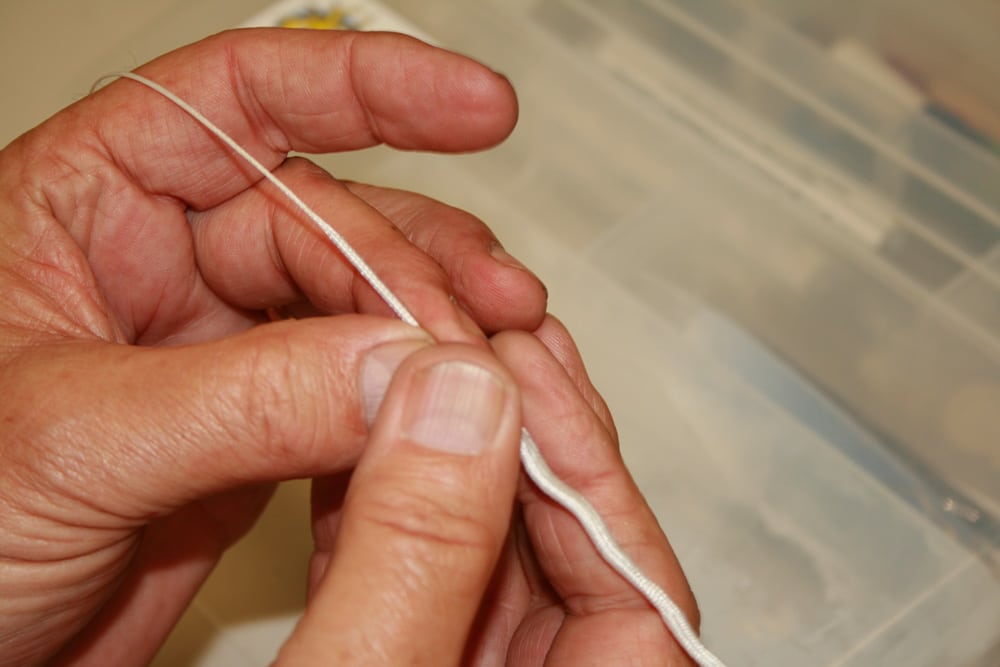
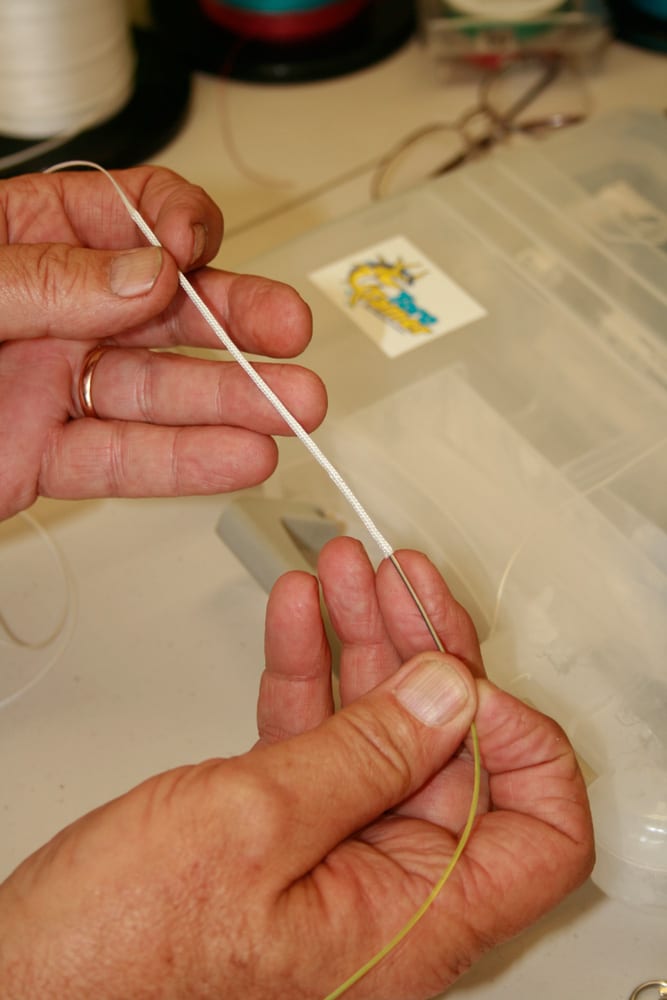
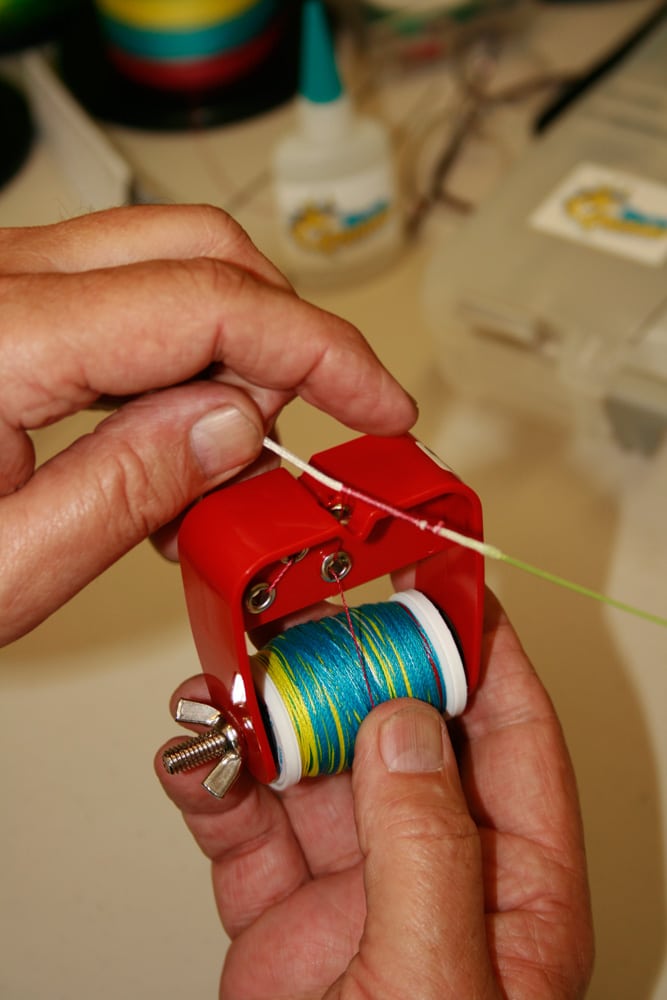
Cut a length of 8 to 12 feet of hollow-core braid. Mark Smith, owner of Charkbait, a California tackle retailer, inserts a latch needle into the braid about 8 inches shy of the middle, aiming the needle point toward the shorter length of braid.
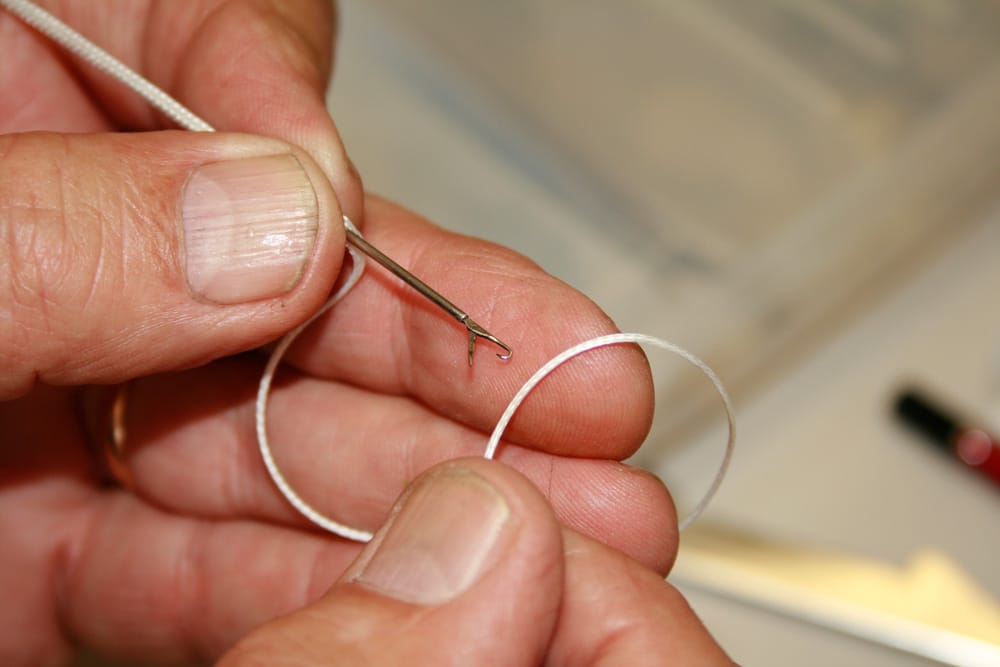
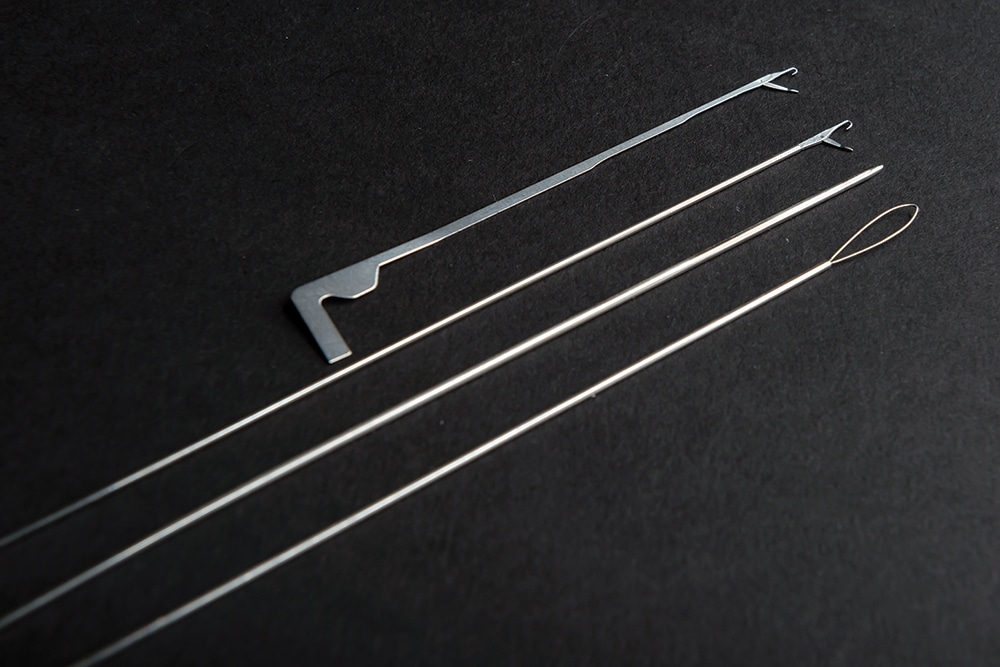
To start forming a loop, Smith grabs a section of the braid with the latch of the needle. Specialty needle kits, like those from DaHo Products, are required to perform steps in the building process.
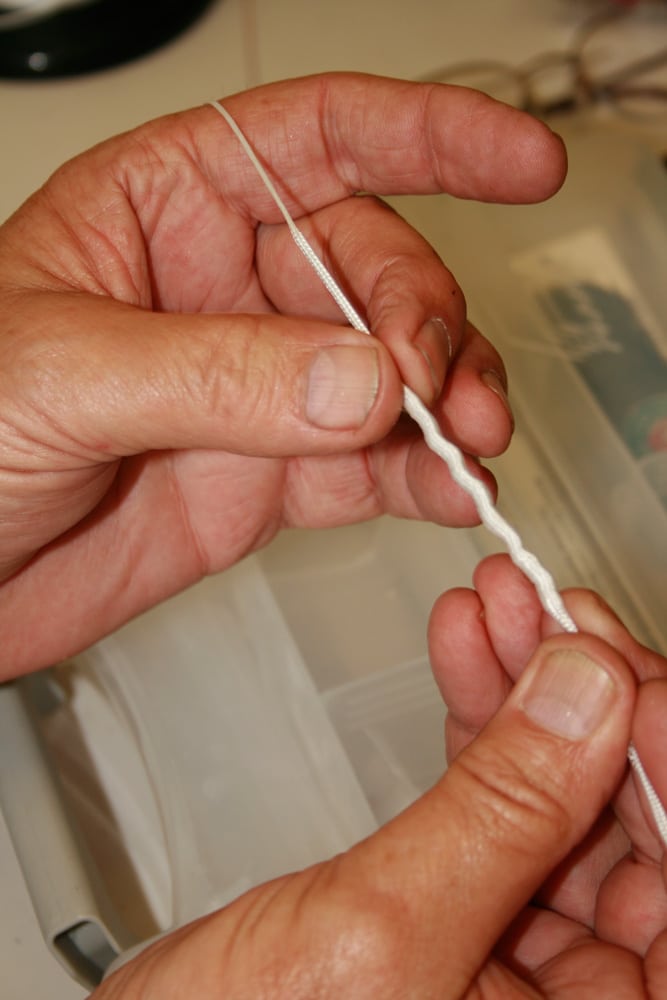
Now he pushes the needle and the loop back into the hollow braid, at the same time, working the braid over the needle with his left hand.
He continues to manipulate the needle toward the end of the braid, preferring to work the braid on top of the needle instead of punching the needle through the braid.
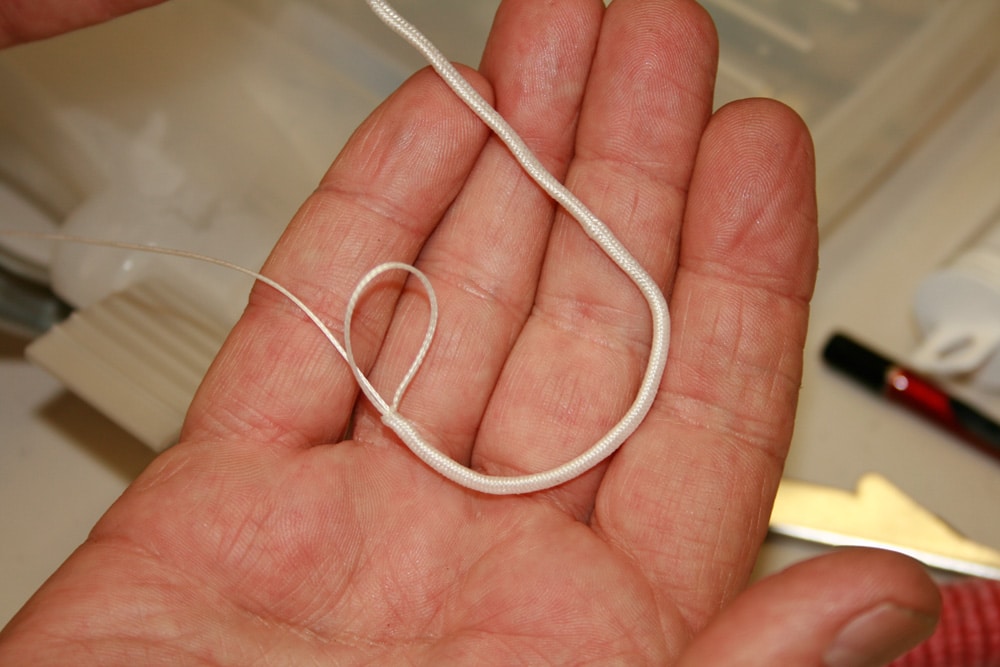
Once Smith reaches the end, he pulls the needle all the way out, dragging the latched braid along.
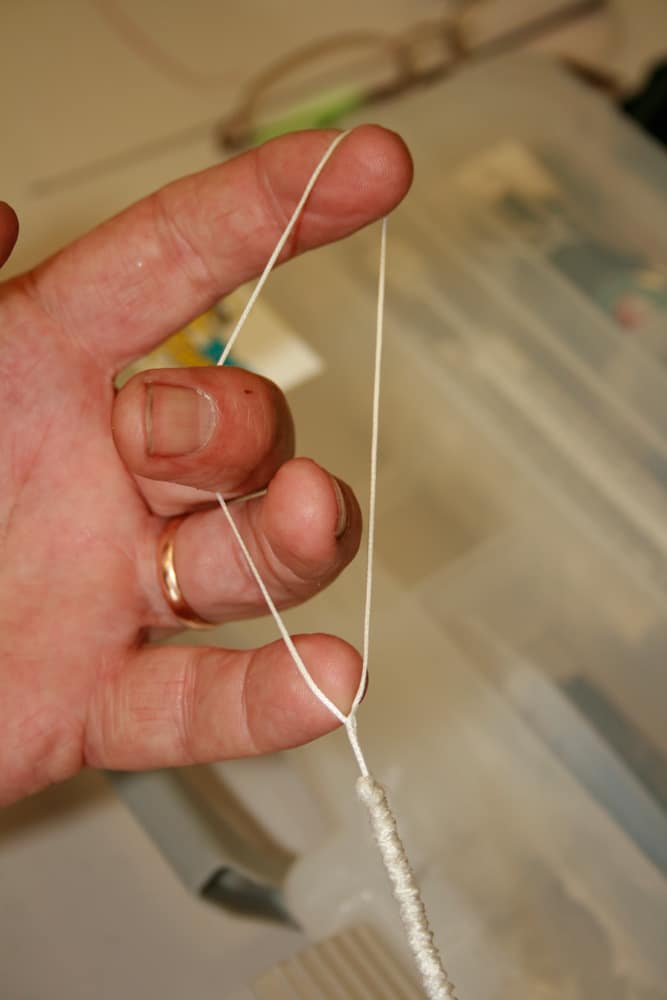
He unhooks the latch needle and pulls the loop out of the end of the braid until it measures 4 inches long (below the loop is bunched-up braid). This loop eventually connects to a looped main line via a cat’s paw connection.
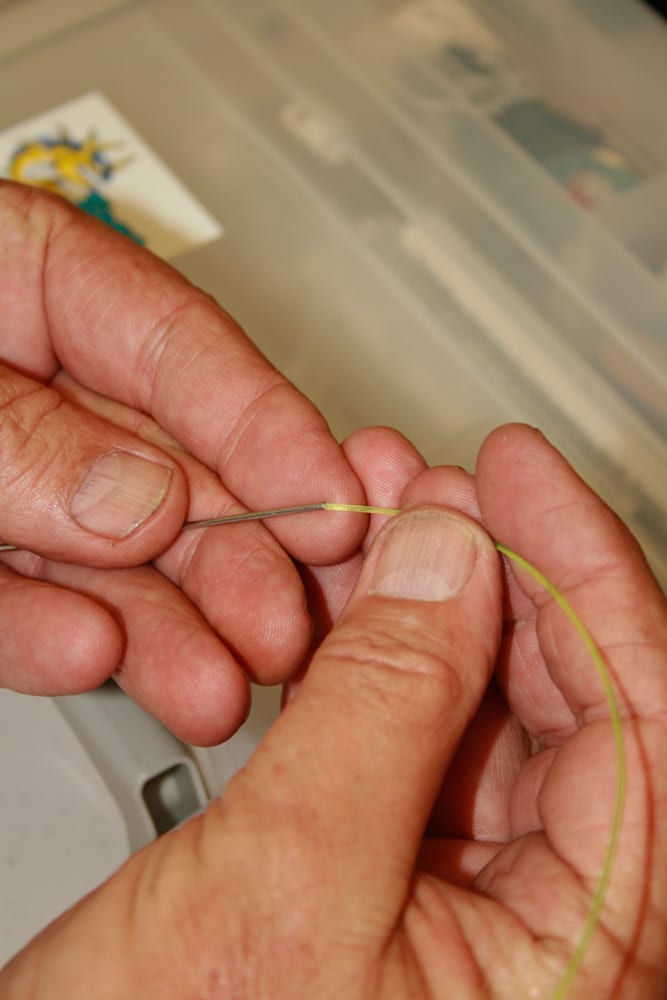
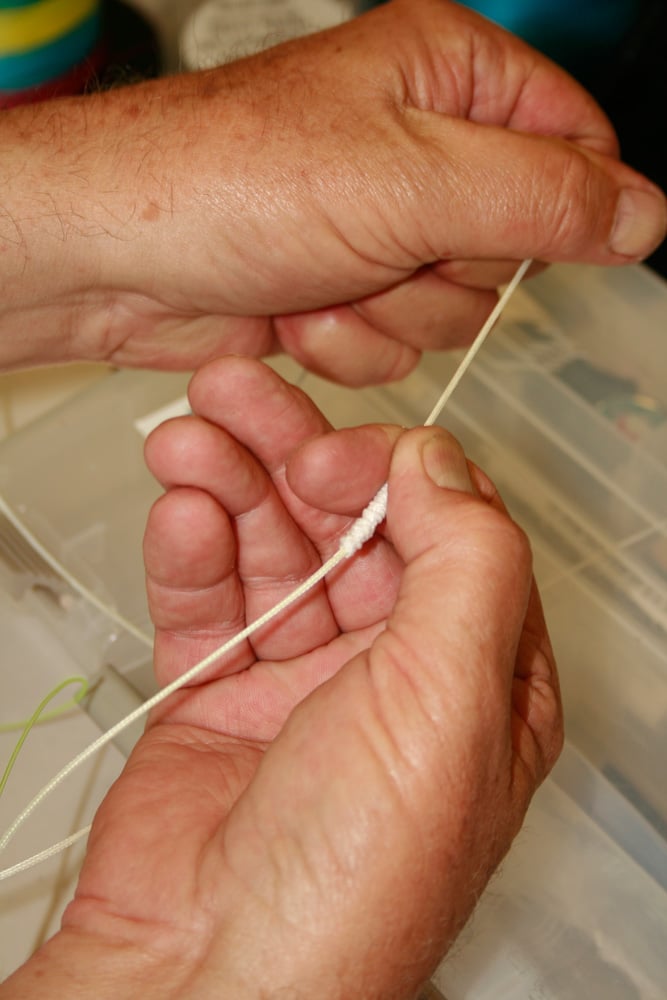
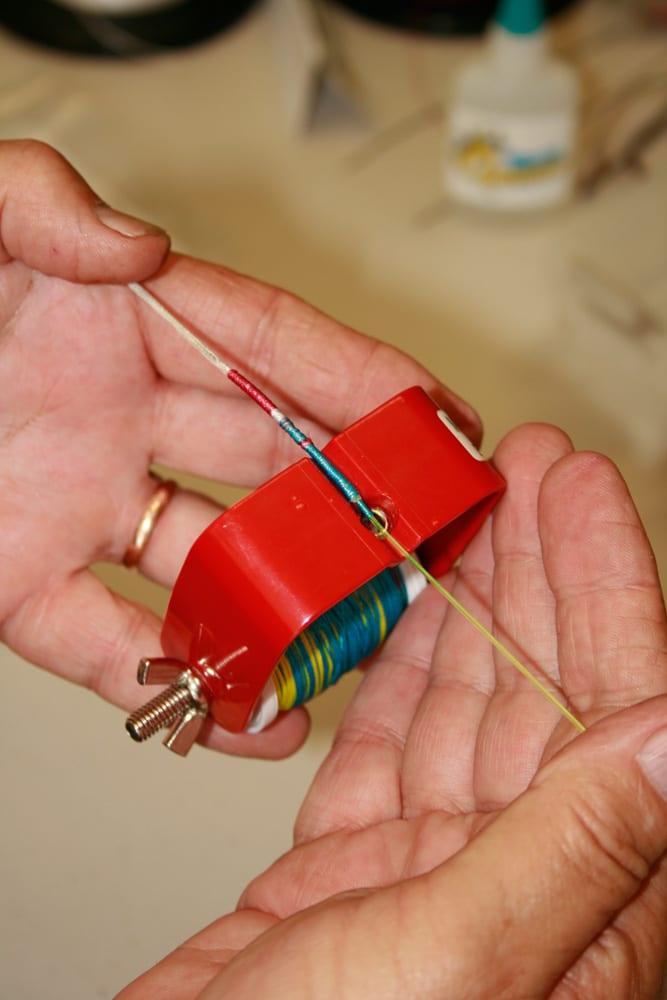
Now it’s time to thread the leader material into the hollow-core. First, Smith inserts the appropriate-size leader (both fluoro and mono work) into a hollow needle. Pick a leader pound-test that’s close in weight to the hollow-core. Leave the leader on the spool to better manage the line while threading the braid.
At the opposite end of the hollow-core, he inserts the needle into the braid and starts working it toward the looped side of the braid.
Smith uses his left hand to work the braid over the needle. Threading fluoro leader inside the hollow-core allows the braid to tighten down on the leader when pulled under pressure, similar to a Chinese finger trap.
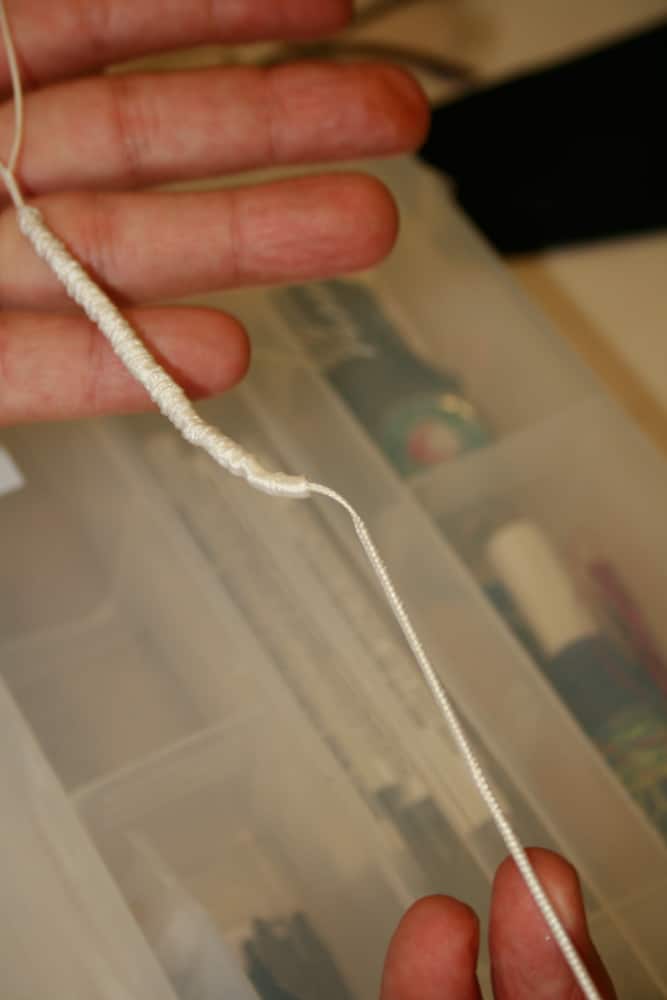
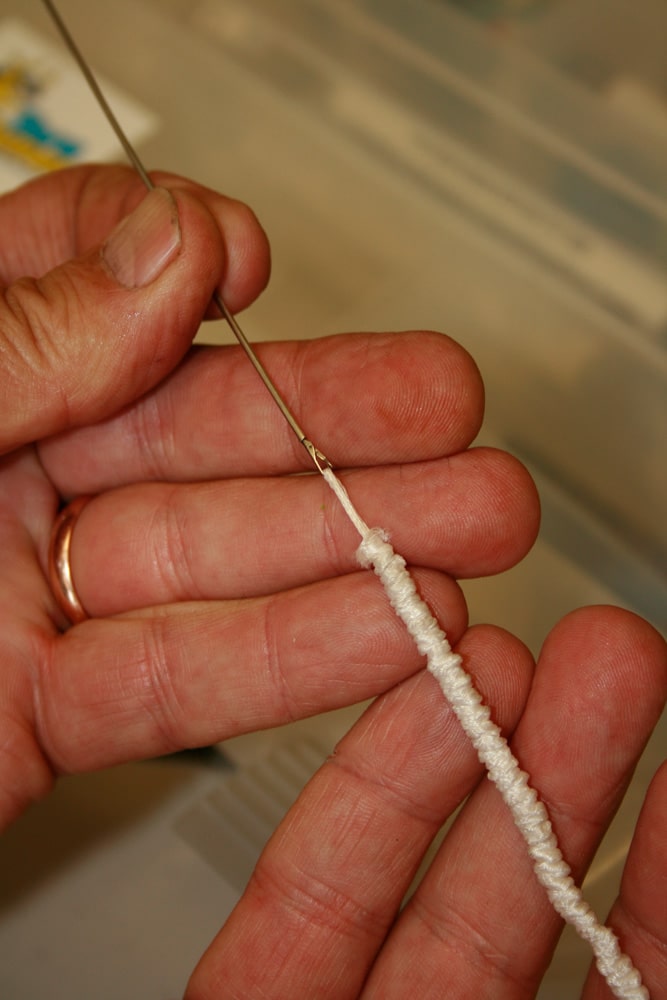
He stops threading the needle just before reaching the braid that’s bunched up near the loop. Eventually that loose braid will be forced down over the braid and on top of the leader.
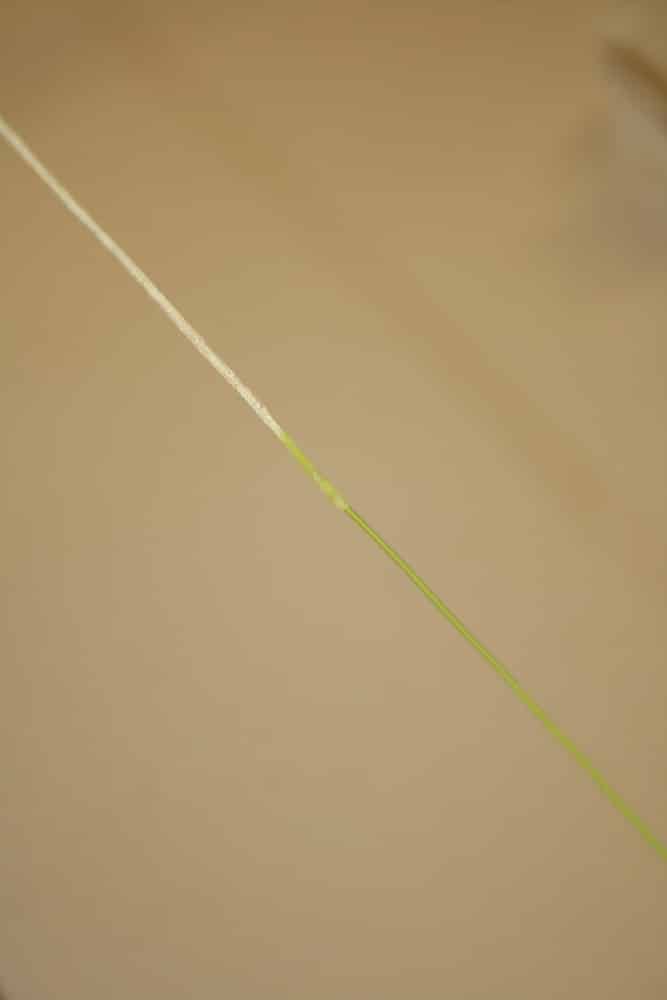
But first, Smith brings the needle out of the braid wall, just below the bunched braid at the loop. The fluorocarbon leader should not protrude from the braid but instead terminate right where the needle exited the braid.
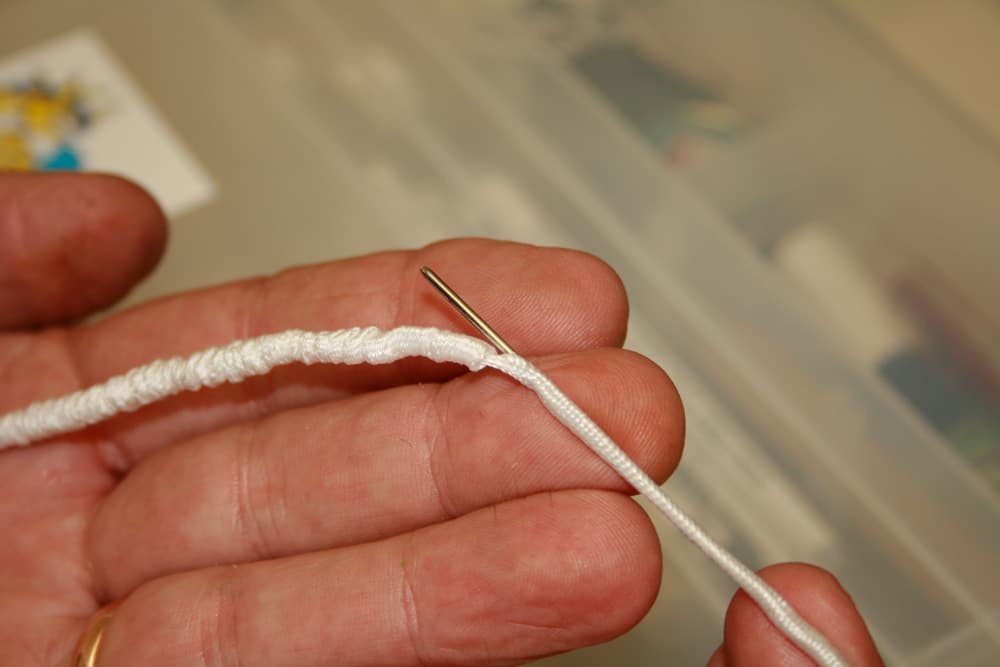
“Milk” the gathered braided line back down over the braid and leader material. The fluoro leader is now entrapped by two walls of braid, each tightening down on the leader when pulled. Both sections of braid should terminate close to the same point along the leader. If the ends differ a couple of inches, shorten the longer end with an X-Acto knife.
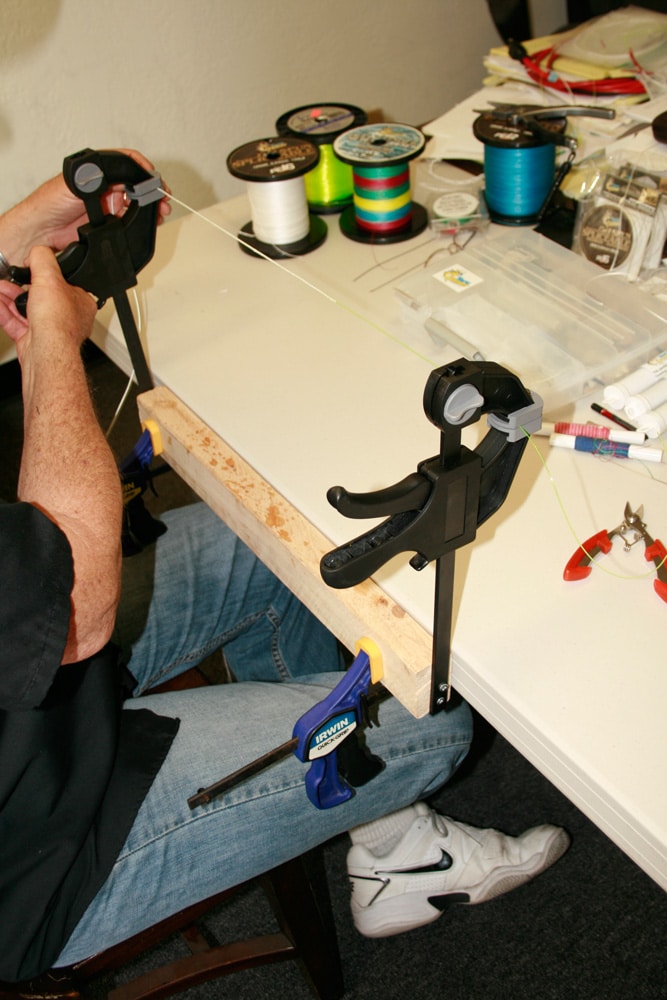
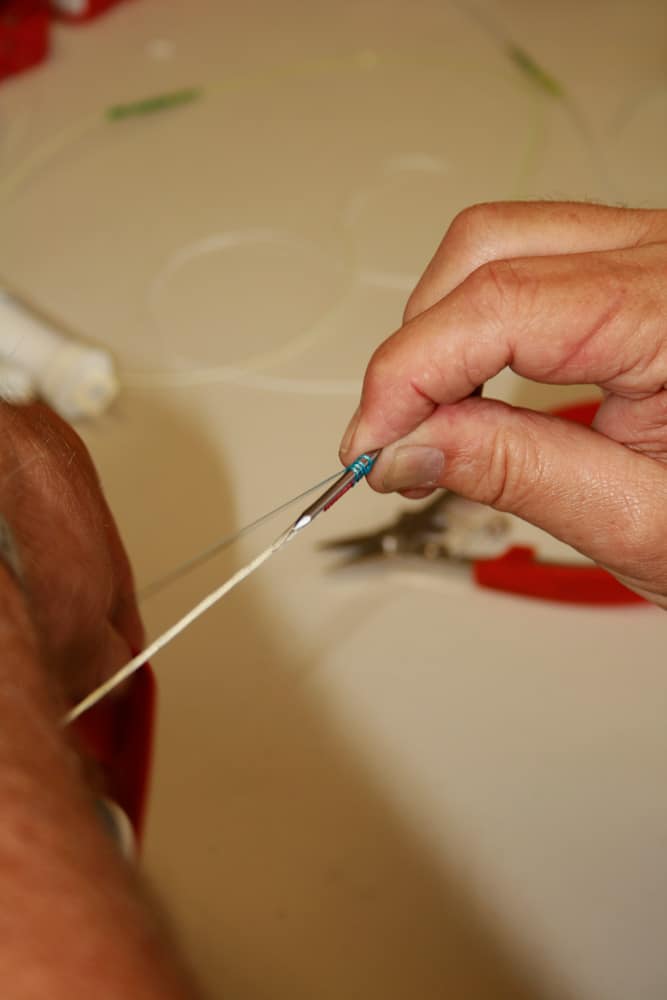
The final step is to “serve” — or bind — the connection between where the braid ends and the fluorocarbon continues. This key junction, if left loose, is a weak spot that negates the vital Chinese-fingercuff characteristics. Smith uses a “serving jig” — a pair of vicelike holders — to keep the splice taut as he works.
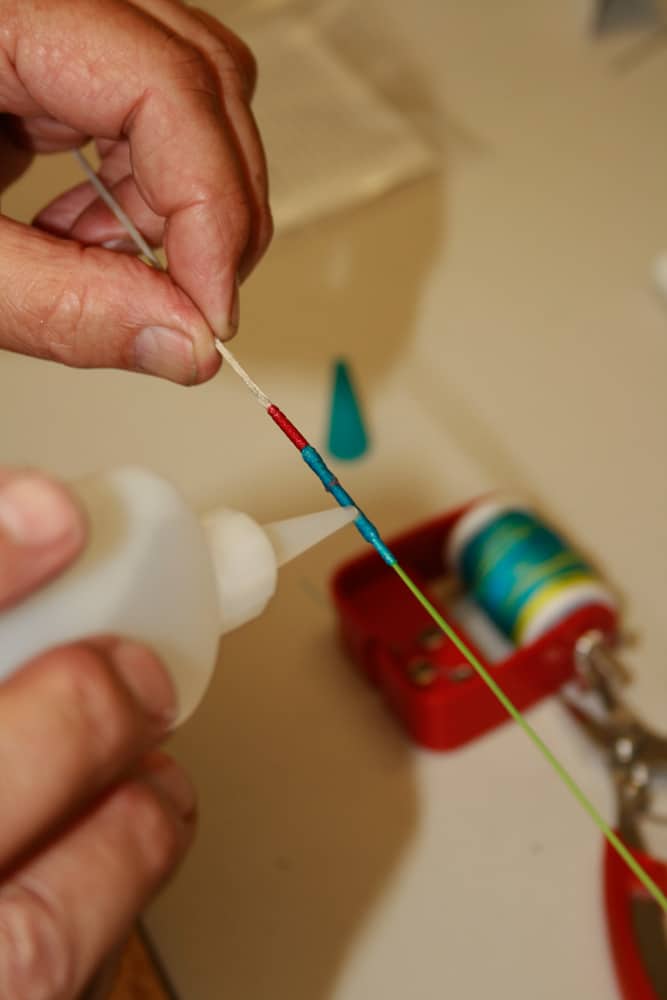
After the leader is secured to the jig, Smith applies a coat of knot adhesive to the fluorocarbon-braid connection (middle, light green section of photo).

He starts the serve by creating a nail knot with a short piece of thread around the braid, about an inch from the fluorocarbon leader. For a serving thread, PowerPro makes Power Floss to handle the job, but 15- to 50-pound braid works too. To control the thread, Smith attaches it to a serving tool (or bobbin) before starting the nail knot.
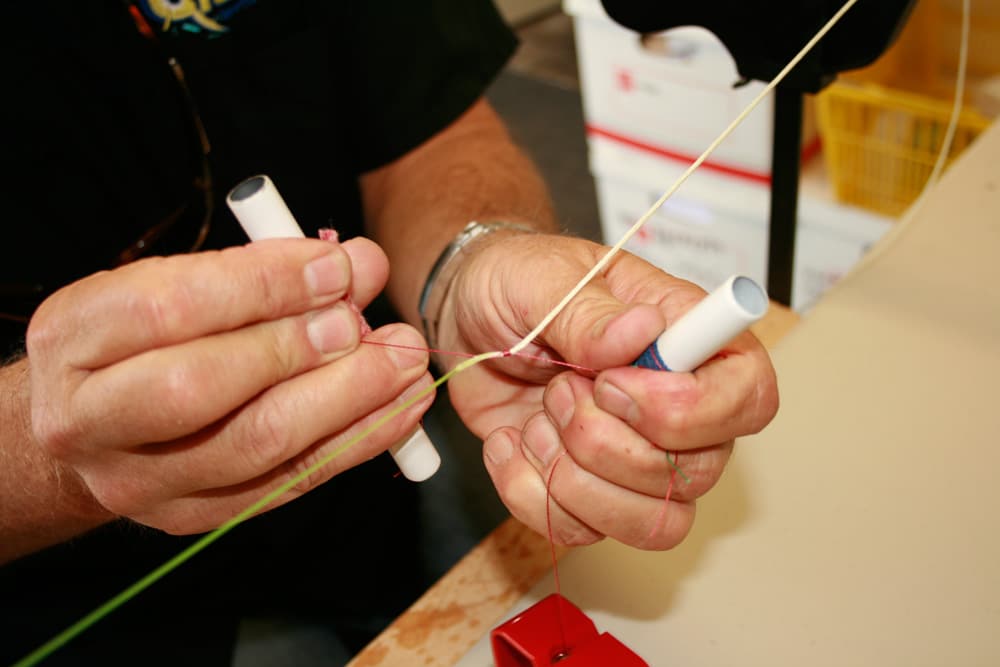
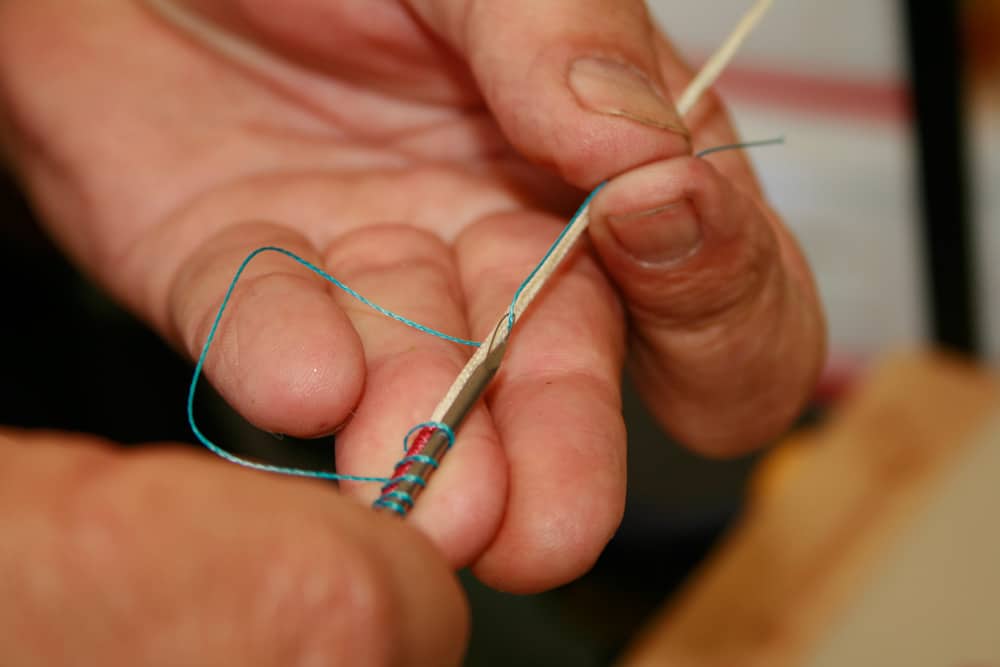
Next, he uses a pair of small dowels to maneuver and tighten the nail knot into position.
Smith uses the bobbin to wrap the junction tightly, wrapping toward the braid side at least an inch. Next, he wraps back over the initial winding, going as far as to reach the fluoro-braid link.
For heavy leaders, Smith recommends yet a third wrap headed back in the other direction.
Smith finishes the serve with a second nail knot. He wraps thread loops around the nail but uses the loop needle to pull the thread through the wraps.
Smith runs the serving thread through the loop of the needle before pulling the needle out and tightening down the knot.
Serve the Connection
Smith cuts away the tag end of the serving thread and finishes the serve with a final coat of Toro Tamer adhesive. Let the glue dry, but recognize that the glue is not keeping the splice together — it’s the serve itself. Finally, cut off whatever length of fluoro is necessary for your style of fishing — 25 feet is a versatile length.