Advertisement

How to Rig Top Shot-to-Backing Connections

Connect a mono top shot to braid backing much like a wind-on leader
Mono top shot fishing line to braid backing
Follow these step-by-step instructions to connect a mono top shot to braid backing much like a wind-on leader junction. Capt. Vincent Daniello

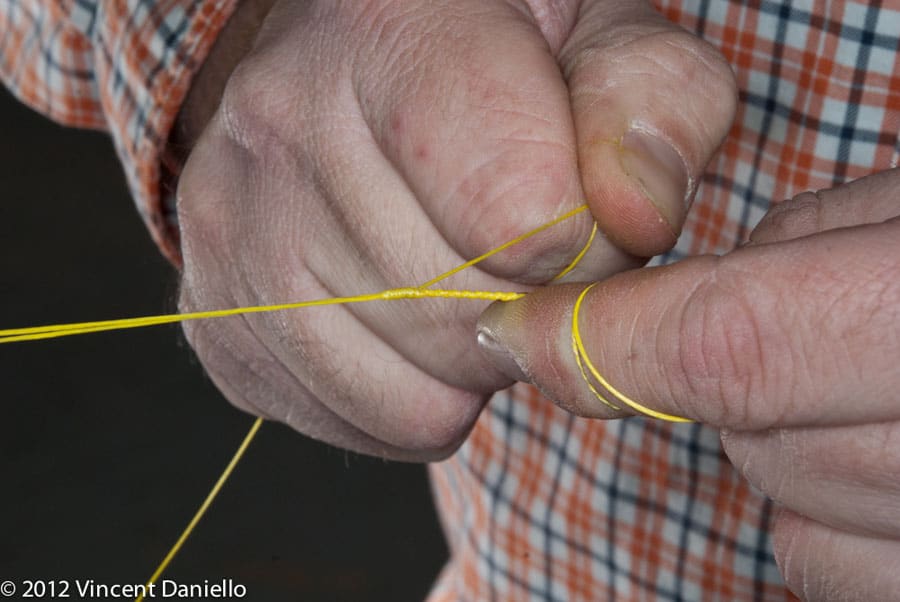
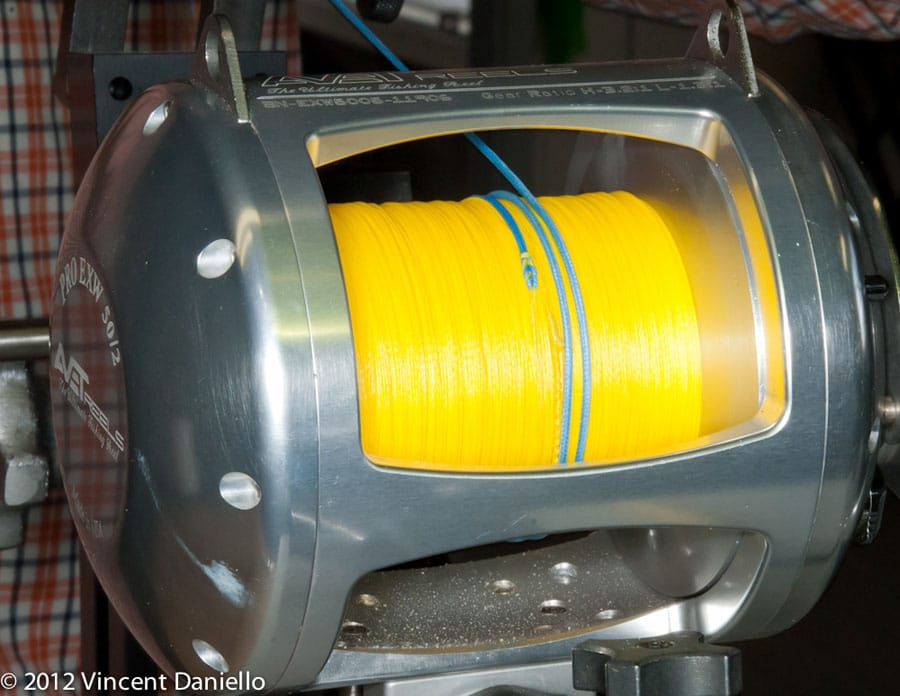
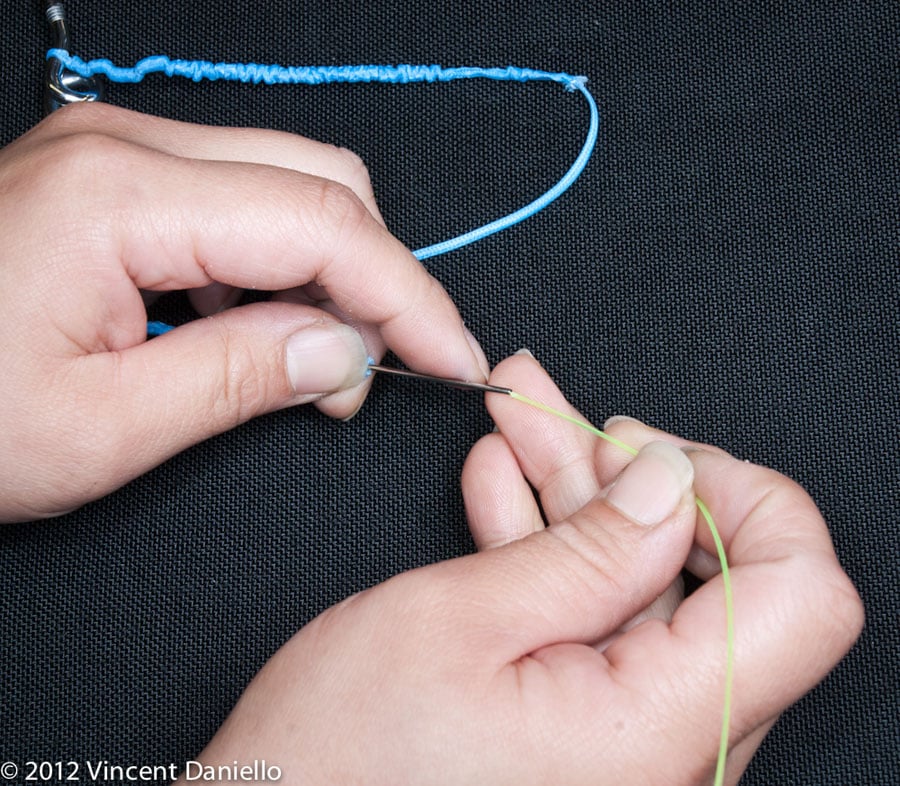
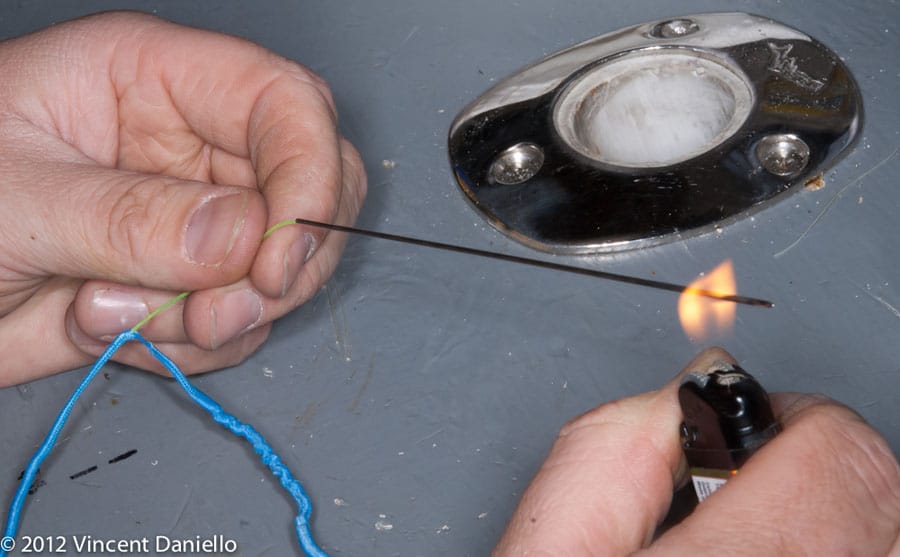
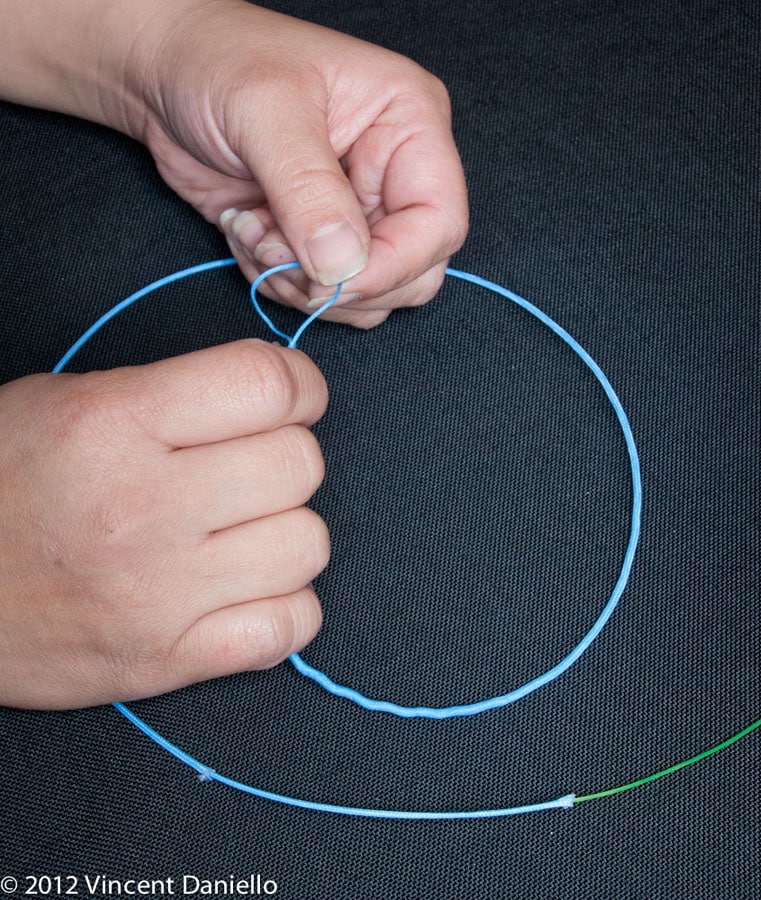
Ultrahigh molecular-weight polyethylene — the generic name for both Honeywell Spectra and DSM Dyneema fiber — has been used to make thin, strong fishing line for two decades. “Braid gives you greater capacity, more strength, better longevity and increases versatility,” says Bryce Poyer, owner of White Water Outfitters on eastern Long Island, New York. “If you change monofilament like you should, braid backing saves money over time.” Here is how Poyer connects a mono top shot to braid backing much like a wind-on leader.

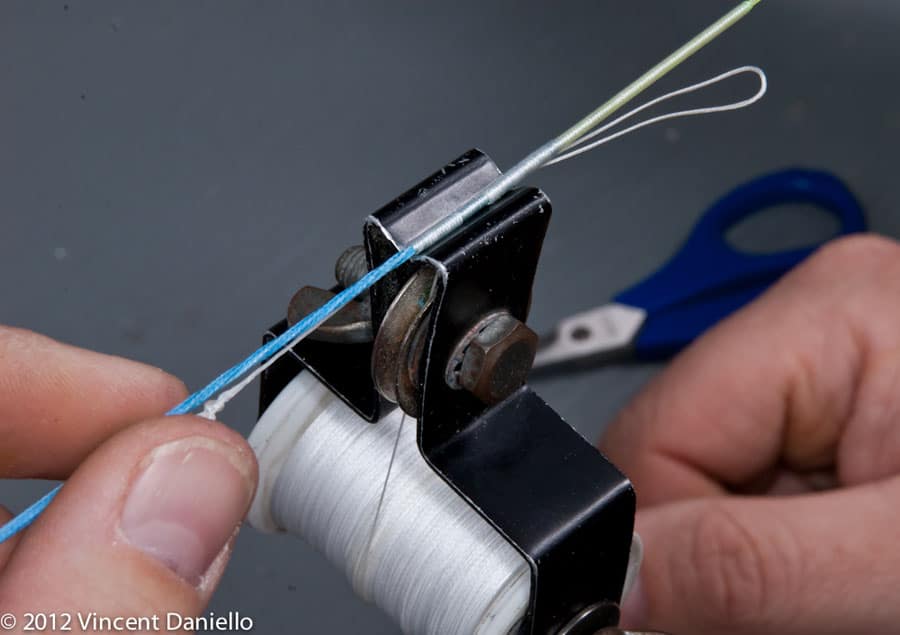
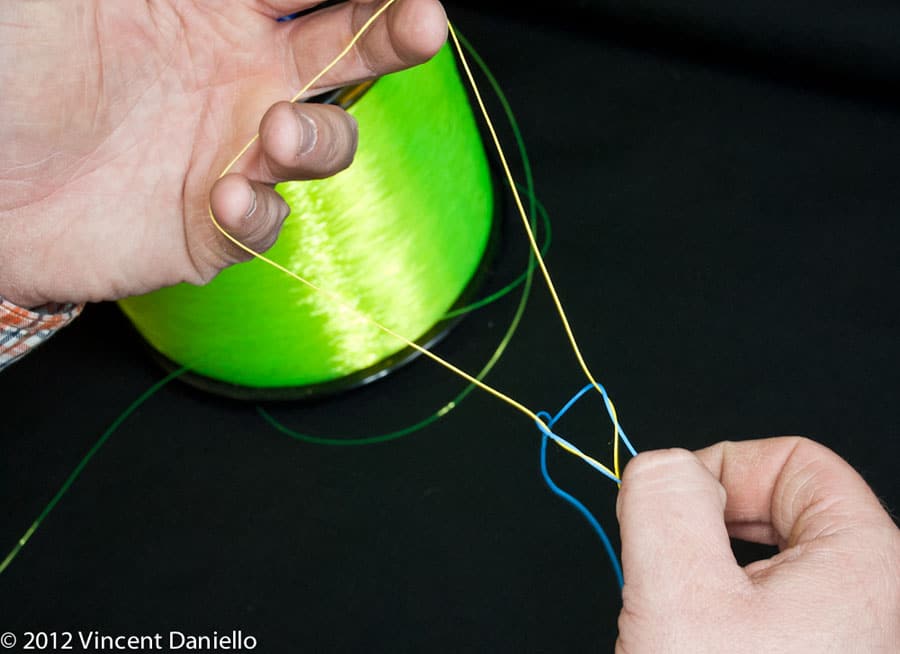
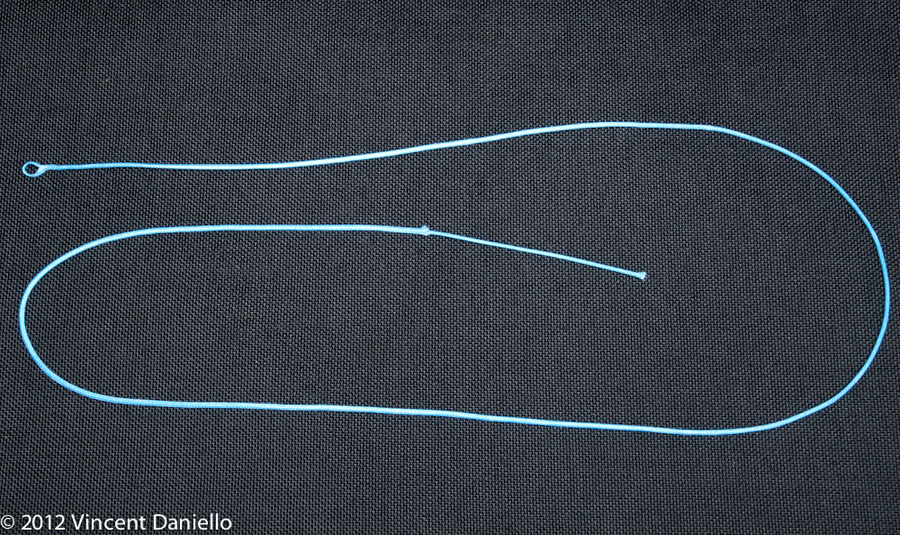
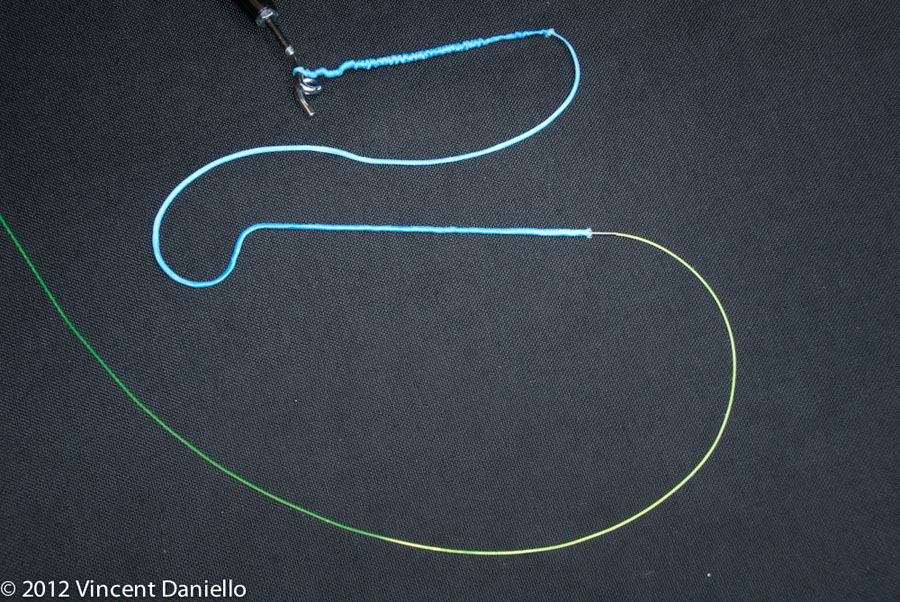
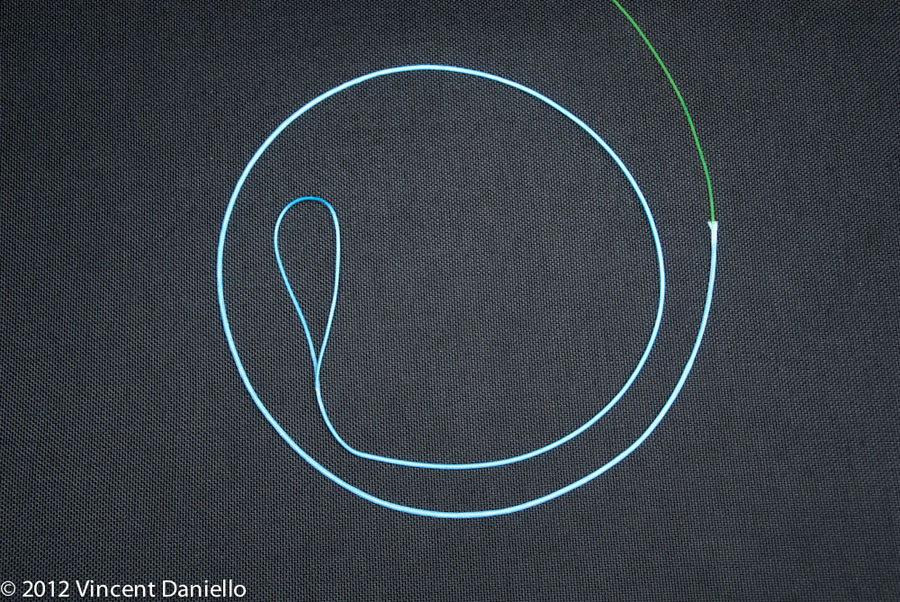
Start with about 6 feet of hollow-core braid not quite double the working strength of the monofilament. Poyer chose 100-pound Spectra braid for 60-pound mono. He says 80-pound braid would have been to thin to conveniently splice, and anything over 130-pound braid might be too loose.

How to connect mono top shot to braid backing
Using a splicing needle, insert one end of the braid roughly into the middle of the 6-foot section, threading it toward the opposite end of the braid. Capt. Vincent Daniello
How to connect mono top shot to braid backing
For top shot splices where there is no reason to limit length, Poyer likes that doubled section of braid to be between 24 and 30 inches long. Capt. Vincent Daniello
How to connect mono top shot to braid backing
At this point, with just a small loop at one end of the splice, Poyer likes the inner section of braid to be about 4 inches longer than the outer section. Capt. Vincent Daniello
How to connect mono top shot to braid backing
Insert something in that loop so it can’t retract inside the outer braid — a line leveler for spooling spinning reels is used here. Scrunch up the outer braid up out of the way. Insert the mono top shot into a hollow splicing needle, and thread that needle up toward the loop in the braid. Capt. Vincent Daniello
How to connect mono top shot to braid backing
Threaded. Capt. Vincent Daniello
Step-by-step mono top shot to braid backing fishing line connection
Poke the splicing needle out of the braid close to the outer braid that is scrunched up out of the way. Capt. Vincent Daniello
Step-by-step mono top shot to braid backing fishing line connection
If it’s difficult to keep the mono locked inside the needle, touch the DaHo needle with flame to lock the monofilament inside the needle before threading it through the braid. Touch it again with flame to release it — shown here — and then trim off that end. Capt. Vincent Daniello
Mono top shot to braid backing fishing line connection step by step
Pull several inches of mono out of the braid, remove the needle, and cut back any questionable monofilament. Rough up the end 12 inches of mono with 120- to 180-grit sandpaper. Capt. Vincent Daniello
Step-by-step mono top shot to braid backing fishing line connection
Taper the last half inch of mono almost to a point. “That transition from thin braid to thicker mono creates a hard spot. If it breaks, it’s always right there, where the monofilament ends,” Poyer says. “The smoother you make that transition, the stronger the splice.” Capt. Vincent Daniello
Mono fishing line top shot to braided backing instructions
Pull the end of the monofilament back inside the braid. At this point, the monofilament is snuggly inside of one layer of braid. Capt. Vincent Daniello
Mono fishing line top shot to braided backing instructions
Gently work the second, outer layer of braid over the inner layer and monofilament. Capt. Vincent Daniello
Mono fishing line top shot to braided backing instructions
Adjust the loop size so the outer layer of braid is about 1/4-inch longer than the inner layer of braid to help taper the final splice. Capt. Vincent Daniello
Mono fishing line top shot to braided backing instructions
At this point, Poyer locks the braid and mono into a serving jig — he uses a couple of woodworking clamps bolted to his workbench. Capt. Vincent Daniello

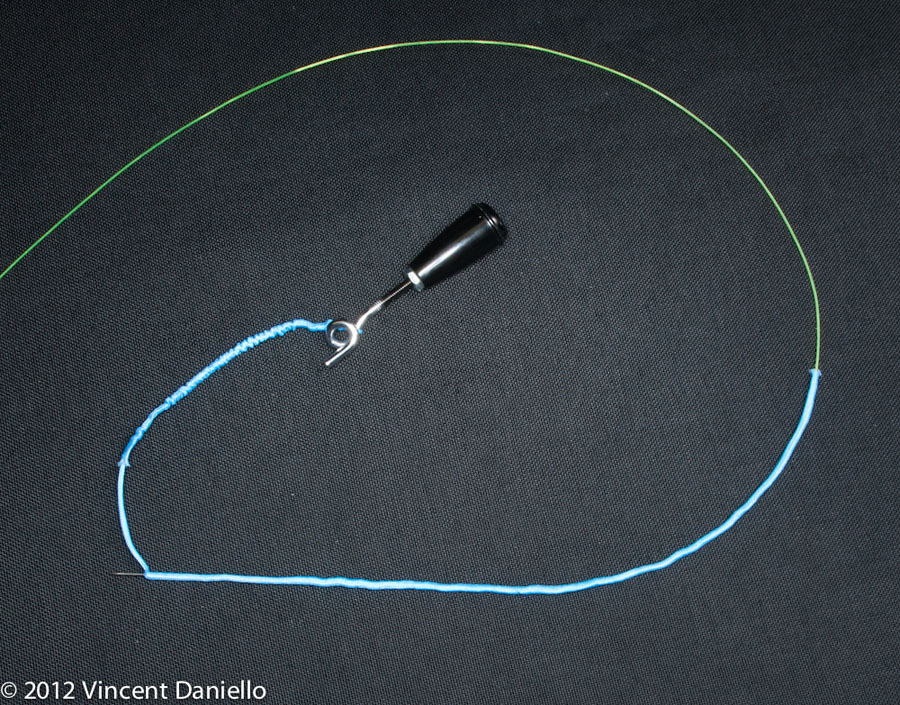
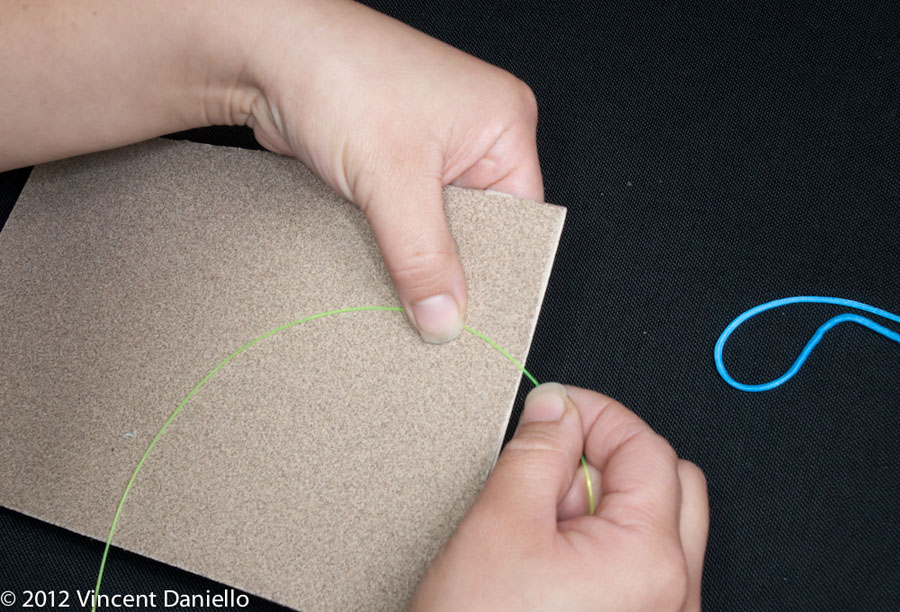
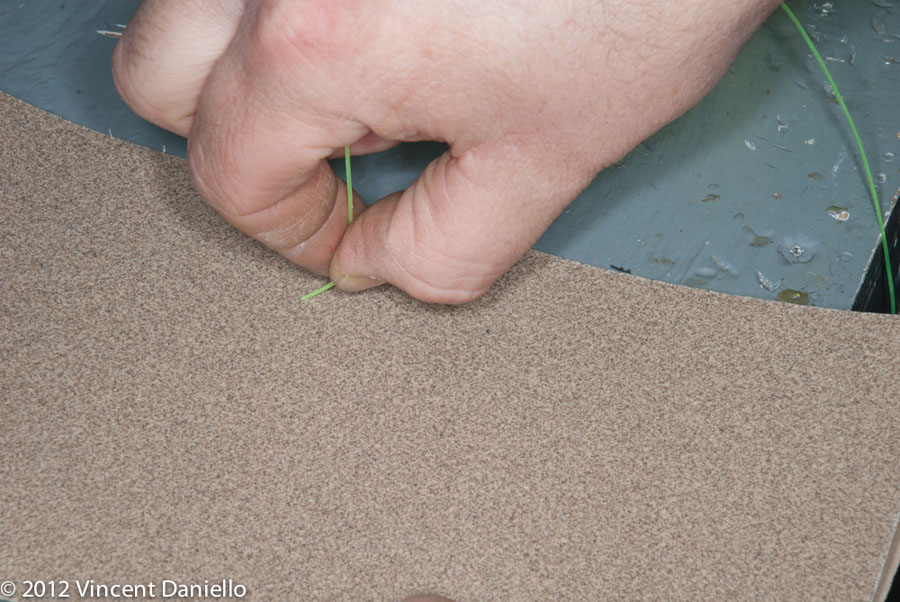
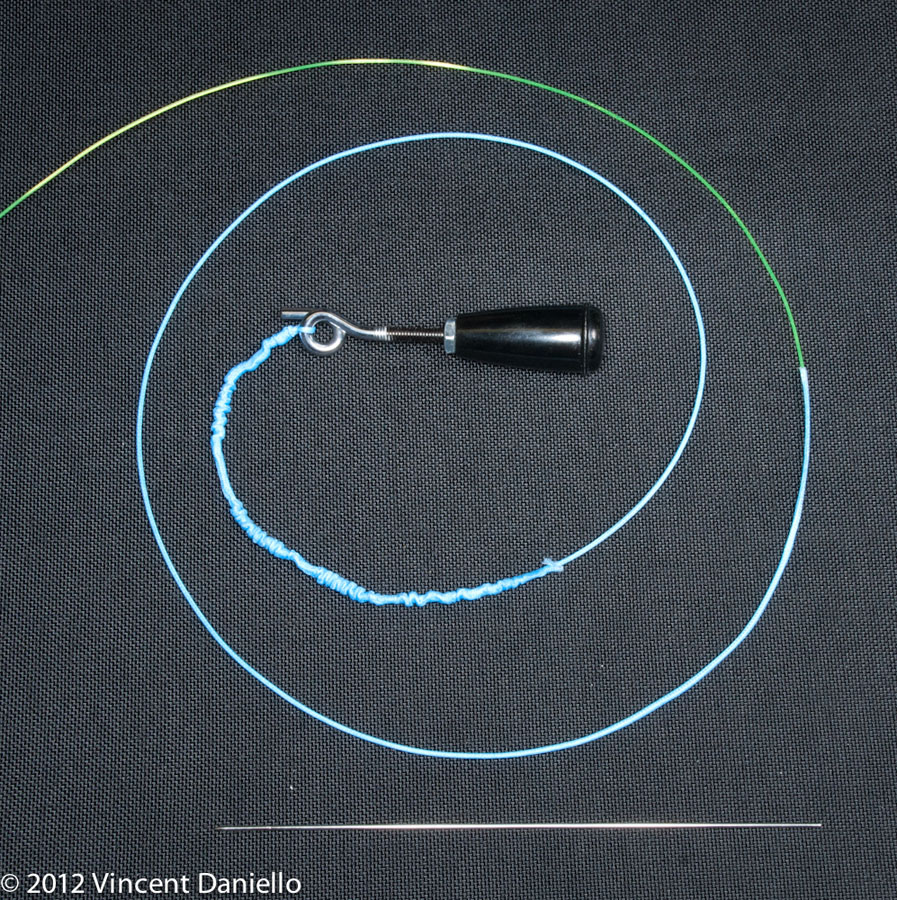
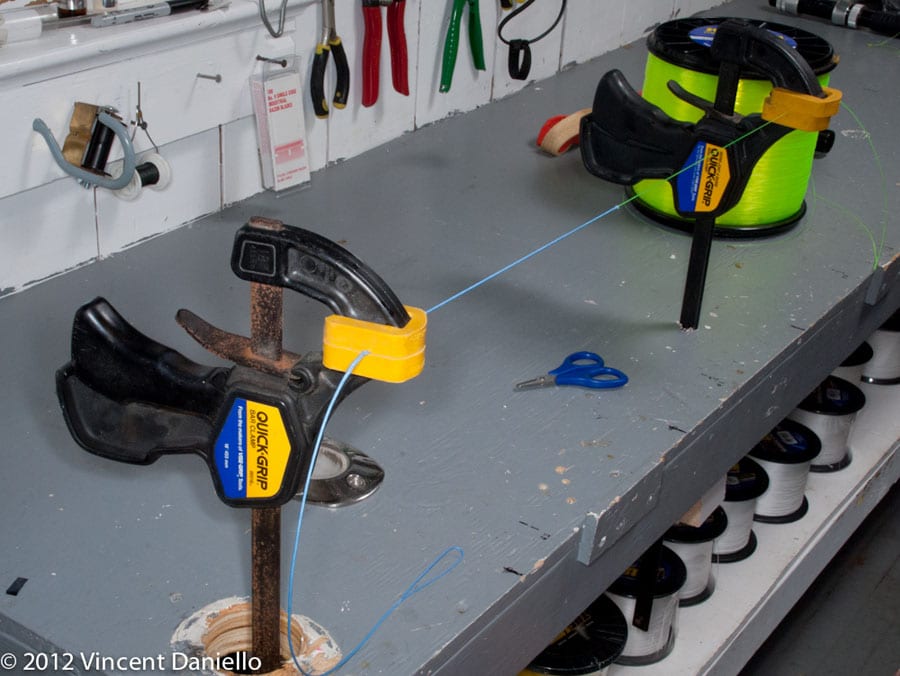
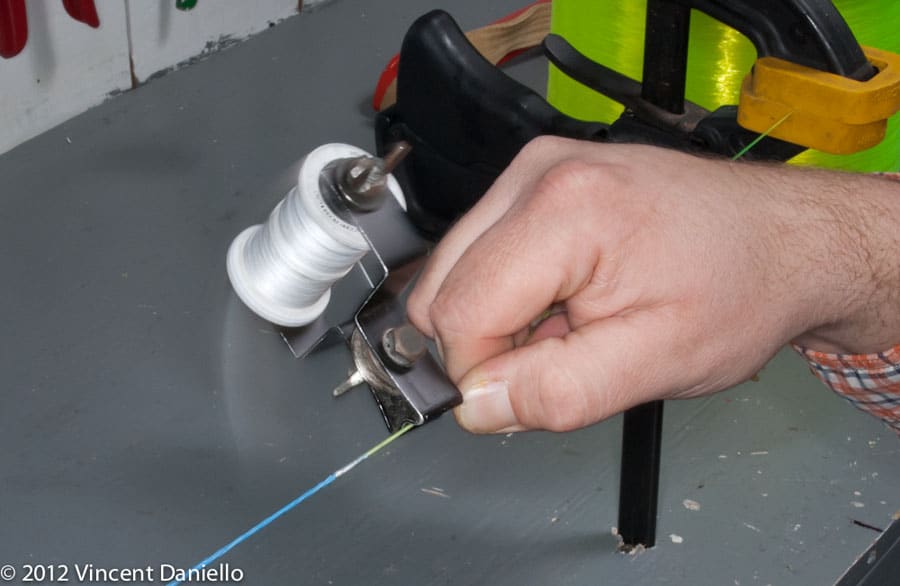
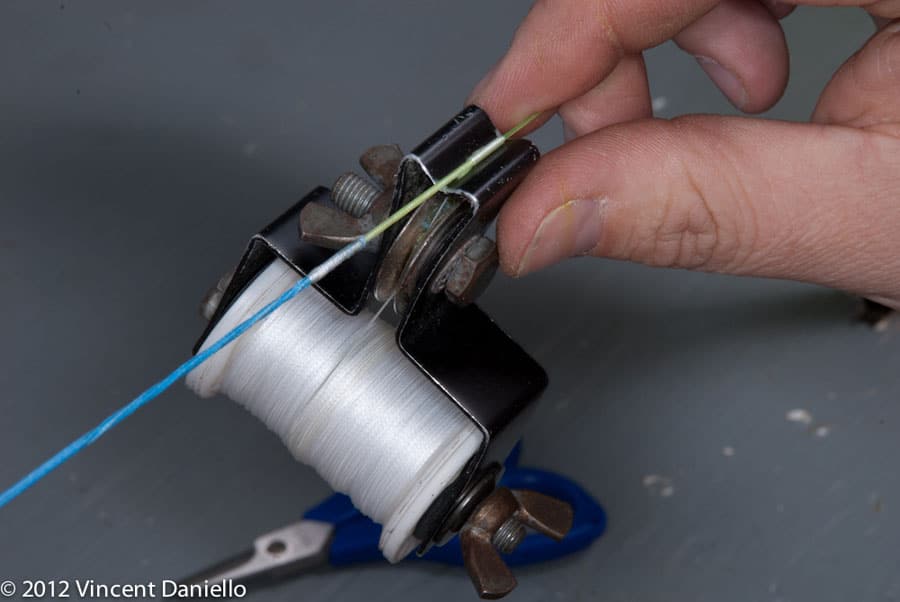
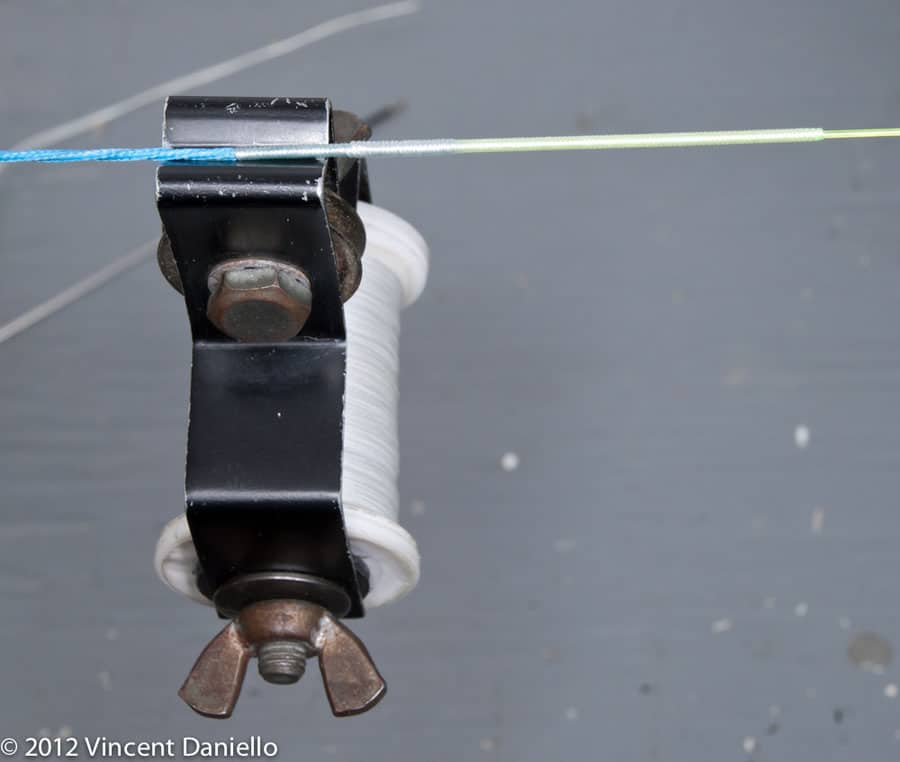
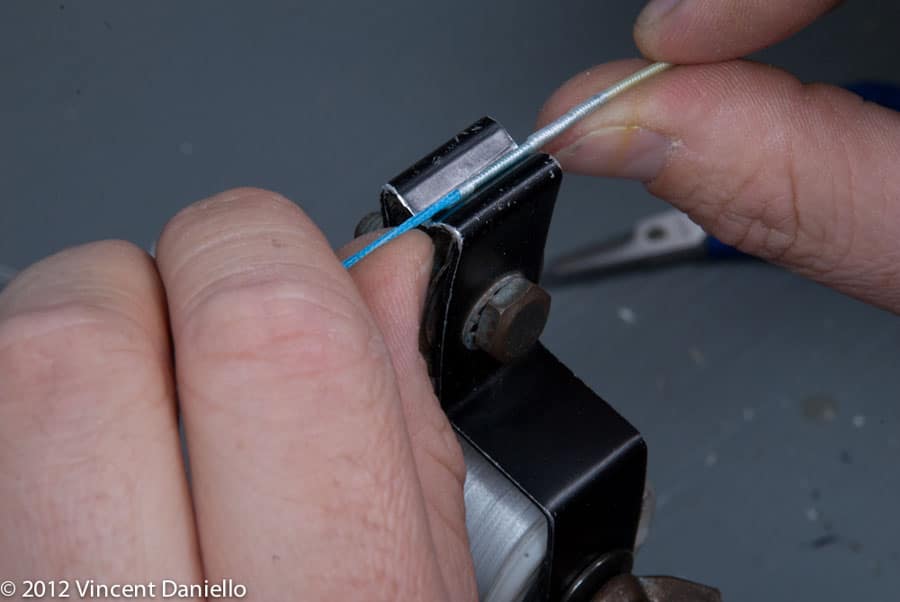
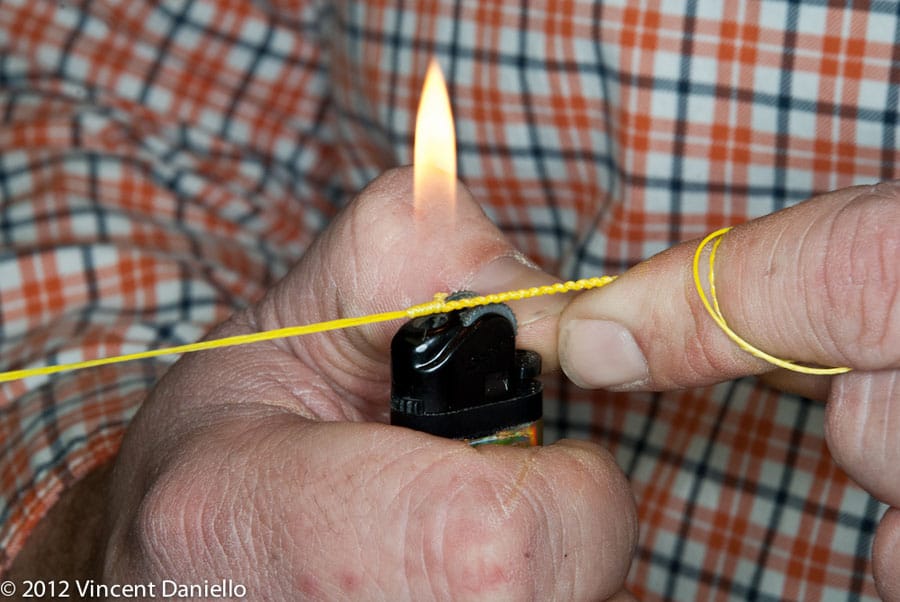
Poyer serves with braid slightly heavier than the maximum drag he expects that top shot to be subjected to — In this case, since the top shot is 60-pound test mono, he assumes it won’t see more than 30 pounds of drag, so he serves with 40-pound spectra braid.

Advertisement
Mono fishing line top shot to braided backing instructions
Serve the junction using thin braid. Capt. Vincent Daniello
Mono fishing line top shot to braided backing instructions
Starts the serving atop the braid about a half inch from the braid to mono junction, working up the braid onto the mono. Lay a few inches of serving braid parallel to the mono and wrap tightly over the top of it five or six turns. Capt. Vincent Daniello
Mono fishing line top shot to braided backing how-to
Pull the tag end of that serving braid tight and trim it off with about a quarter of an inch remaining, and then continue to serve tightly over that tag end. Capt. Vincent Daniello

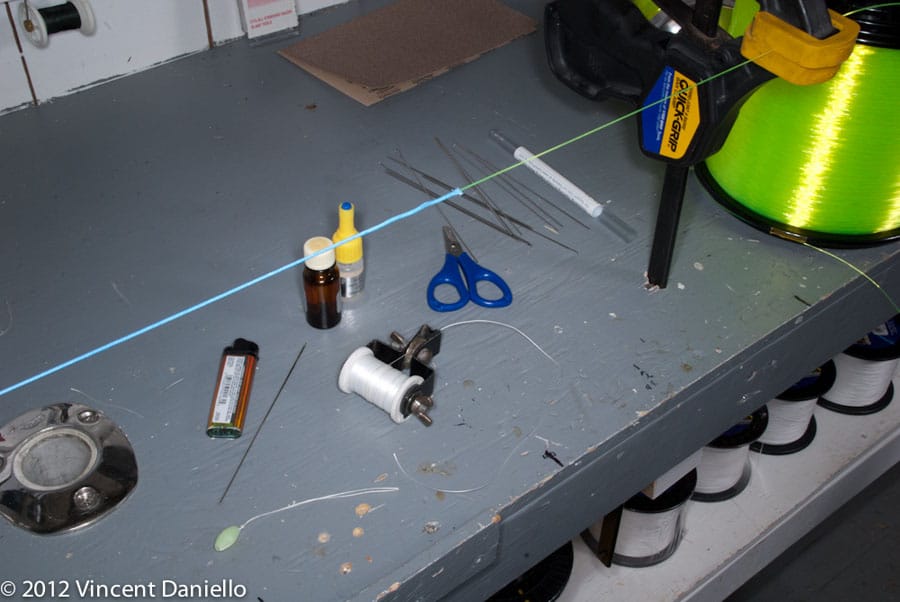
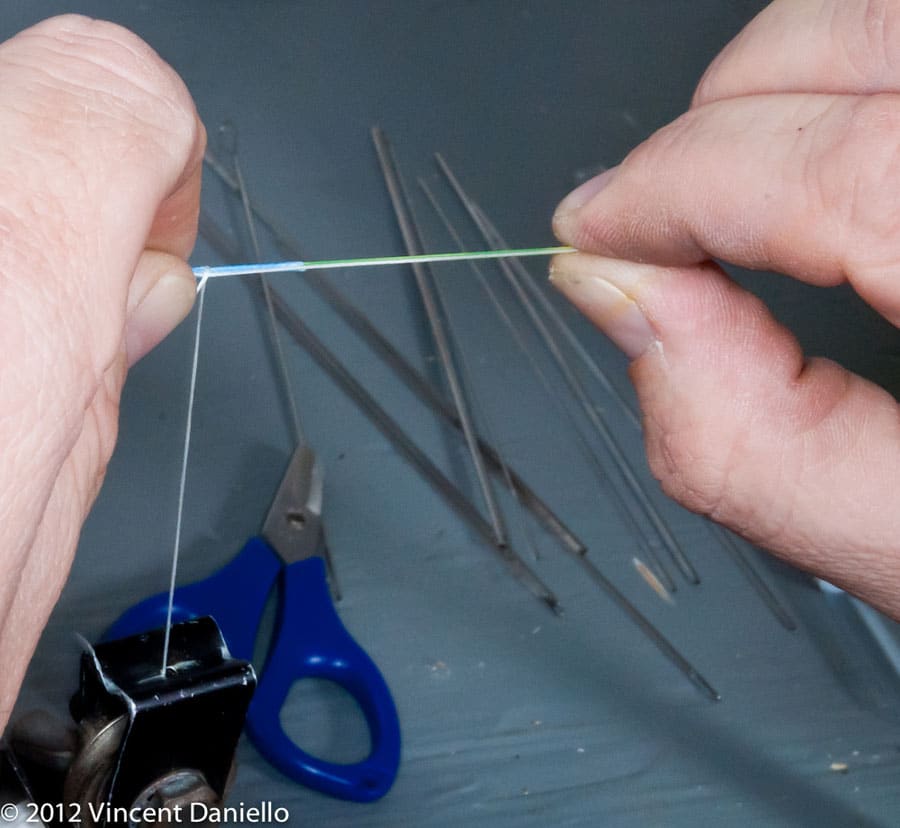
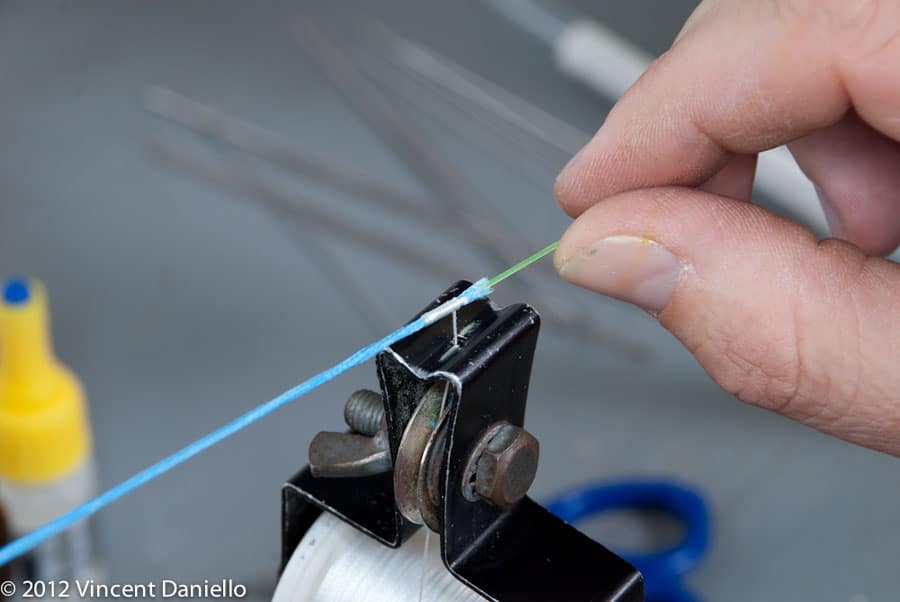
Poyer’s serving tool sells for about $15 at bow-hunting outlets.

Mono fishing line top shot to braided backing how-to
Continue to serve atop the mono. Capt. Vincent Daniello
Mono fishing line top shot to braided backing how-to
Cover about about 2 inches of mono, and then turn the serving back over itself, wrapping a second layer of serving braid over the top of his first layer. Capt. Vincent Daniello
Mono fishing line top shot to braided backing step-by-step
Continue over the entire serve and then over the braid about a half inch past the original starting point. Capt. Vincent Daniello
Mono fishing line top shot to braided backing step-by-step
Turn back over the serving again and take a few wraps. Capt. Vincent Daniello
Mono fishing line top shot to braided backing step-by-step
Lay a loop of braid parallel to the monofilament, and then serve over the top of that loop until back to the original starting point, so the entire length of serving is two layers thick, but no more than two layers thick. Capt. Vincent Daniello
Mono fishing line top shot to braided backing step-by-step
Cut the serving braid from its spool and tuck it through that loop of braid. Capt. Vincent Daniello
Mono fishing line top shot to braided backing guide
Pull the opposite end of the looped braid so the final tag end of the serving braid slips beneath the final section just served. Capt. Vincent Daniello
Mono fishing line top shot to braided backing guide
Poyer trims the end and finishes off with two-part glue from Jerry Brown Industries, first brushing on the activator and then applying the glue. Capt. Vincent Daniello
Mono fishing line top shot to braided backing guide
Poyer ties a Bimini twist in solid-braid backing. Hollow braid is spliced into a loop using the “inside-out” splice shown on DaHo’s website. Capt. Vincent Daniello
Mono fishing line top shot to braided backing guide
Make sure that loop in the backing will fit over the spool of top-shot monofilament to form a cat’s paw. Capt. Vincent Daniello
Mono fishing line top shot to braided backing guide
Colored braid mushrooms nicely with a flame to secure knot tails. White (uncolored) braid doesn’t, since it doesn’t include the wax-like color coating. Poyer prefers white braid to serve with, and even chooses white braid for the mono splice if he can, since that waxy coating does make braid a little more slippery and a bit harder to splice. Capt. Vincent Daniello
Advertisement
Advertisement