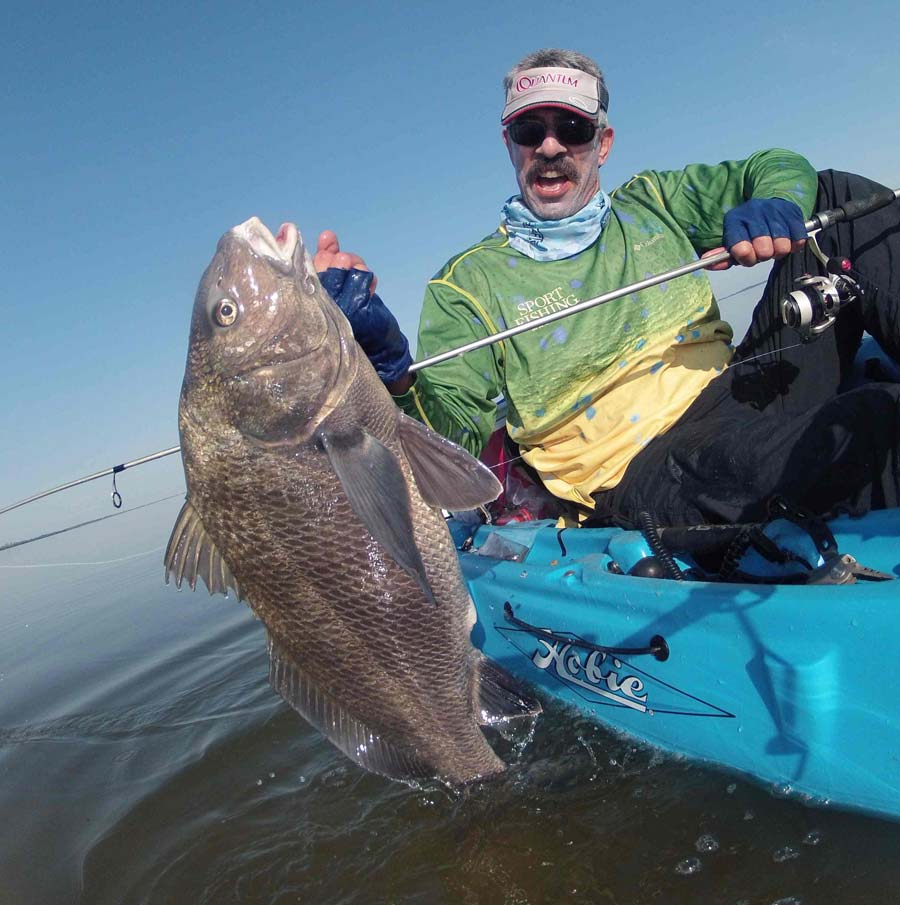
I’d like to meet the man who took this shot! Wait…. he’s me! Yep – I set my GoPro to fire off still shots every two seconds – after I had positioned it where I wanted it. Then I quickly picked up my little spinning outfit and grabbed the black drum I’d had in a holding pattern by the kayak with a BogaGrip. And voila! So here’s how I did that…Doug Olander
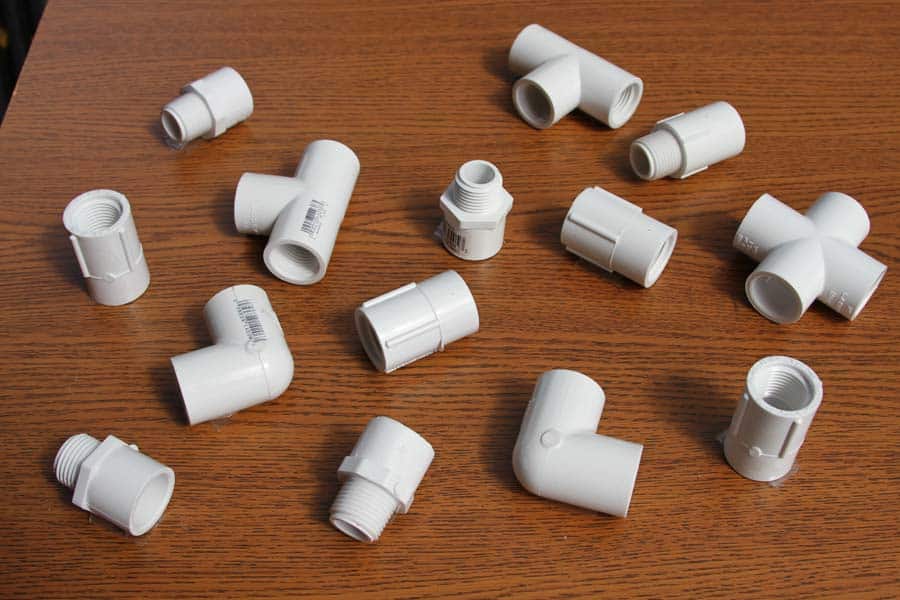
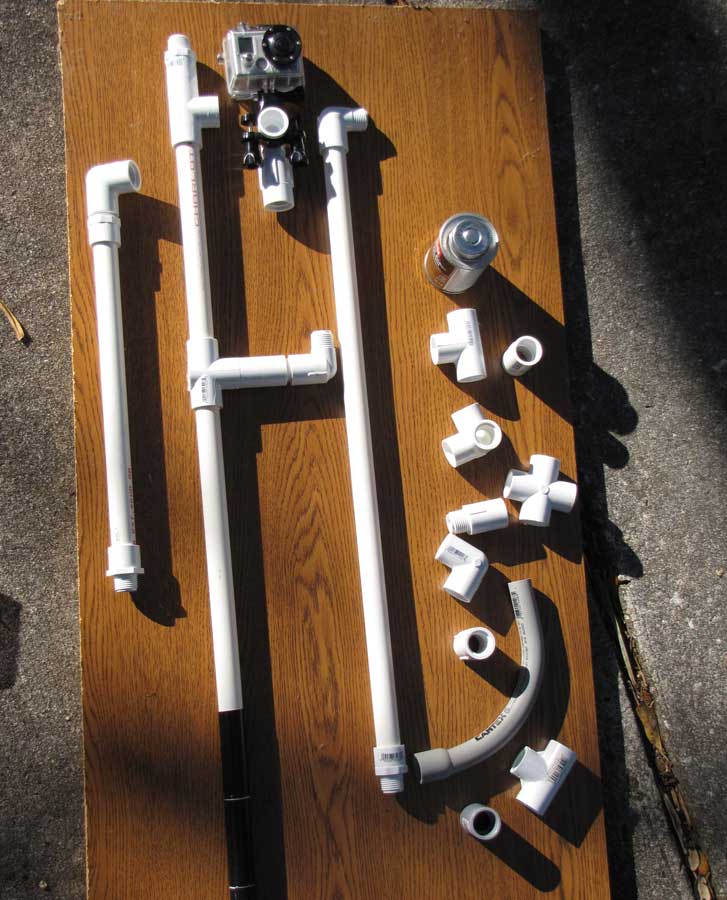
The “building blocks” of this system are PVC fittings. Not knowing what to expect, and since most of them cost only two bits to 75 cents, I bought more than I ended up needing – in fact, not a bad idea since some extras came in handy. The fitting on the lower left – a threaded male adapter with an unthreaded socket female end (to fit on the pipe) will be glued permanently to the end of each length of PVC pipe; onto this, then, various straight or 90-degree fittings can be fastened.Doug Olander
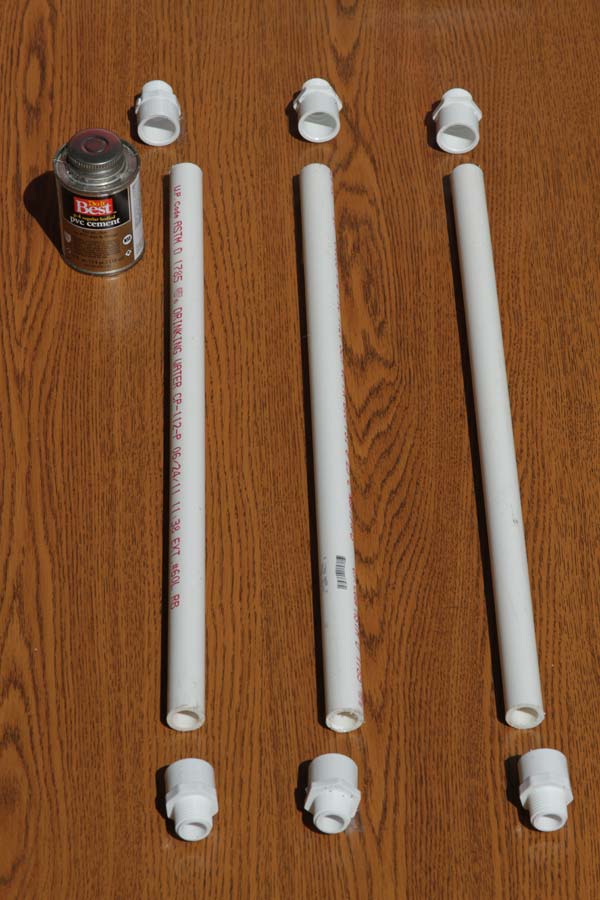
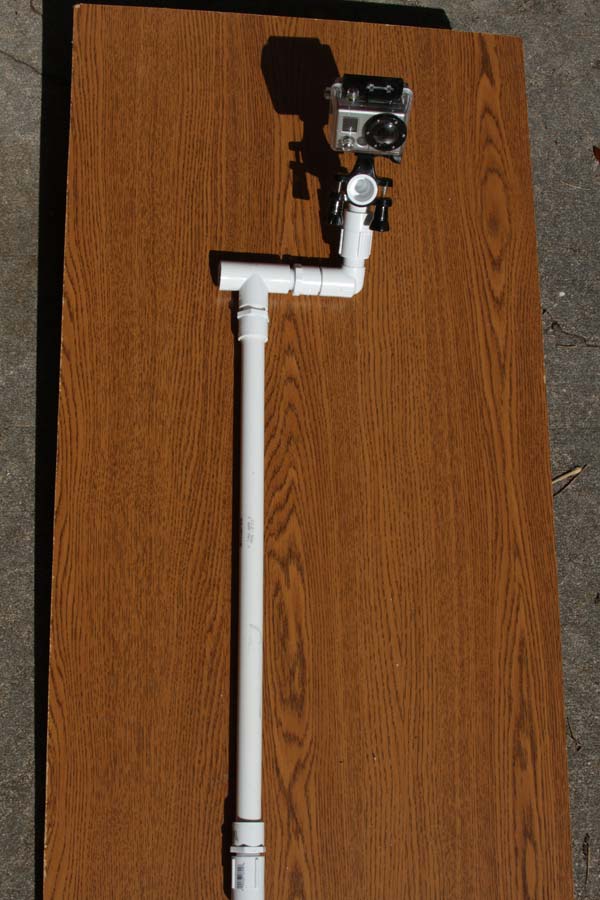
The next couple of photos show how I made a 5 ½-foot pole in three sections so it’s easily airline-transportable in any carry-on or checked piece of luggage. Here, I’ve cut ½-inch pipe into three 18-inch sections. Into each adapter fitting, I swabbed a dollop of PVC cement and quickly (the stuff starts drying damn near instantly) put on the adapter and tapped it down firmly to seat it. (Note: you may end up using only five adapters, not placing one on what will be the bottom of your pole.)Doug Olander
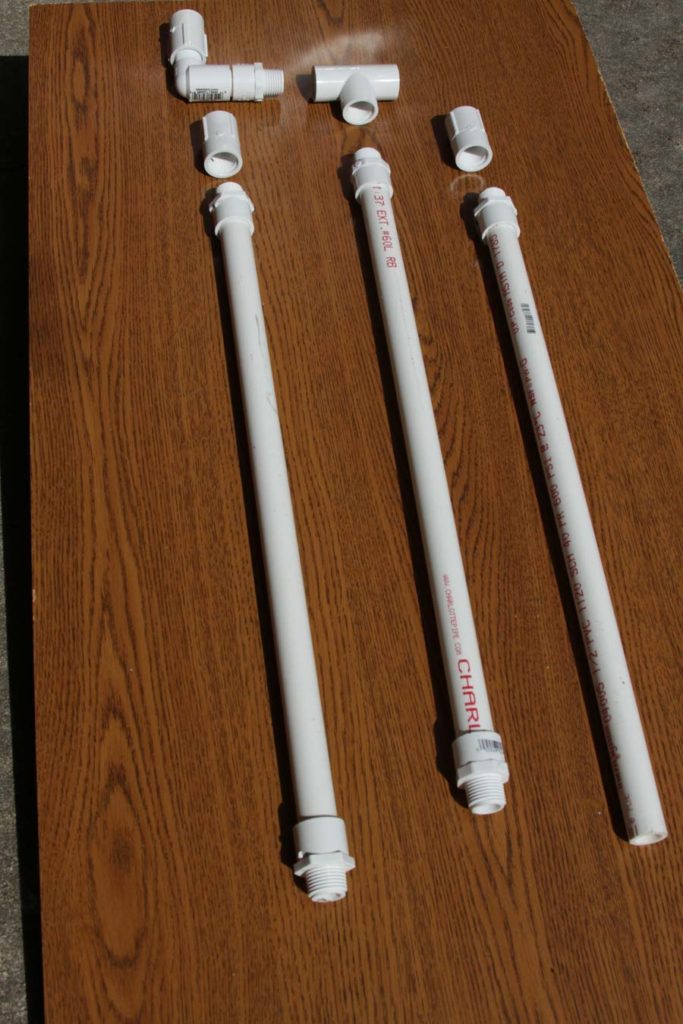
At this point, you’re done with the “building” process. Now, it’s simply a matter of connecting the three pieces by screwing the threaded ends into threaded couplers like those shown. On what will be the top of your pole, you can attach (screw on) your GoPro directly (see next photo) or, as I’ve done here, screw on a T-socket fitting threaded at both ends which gives me more varied ways to mount the camera – such as the 90-degree arm I created with three fittings (a male threaded/female socket adapter, a 90-degree elbow socket threaded on one end but not the other, and a coupling threaded on both ends). (Note: Onto a piece of PVC only an inch-and-a-half or so long, I glued both the socket adapter and the unthreaded end of the elbow, the two pieces pushed up tight together.)Doug Olander
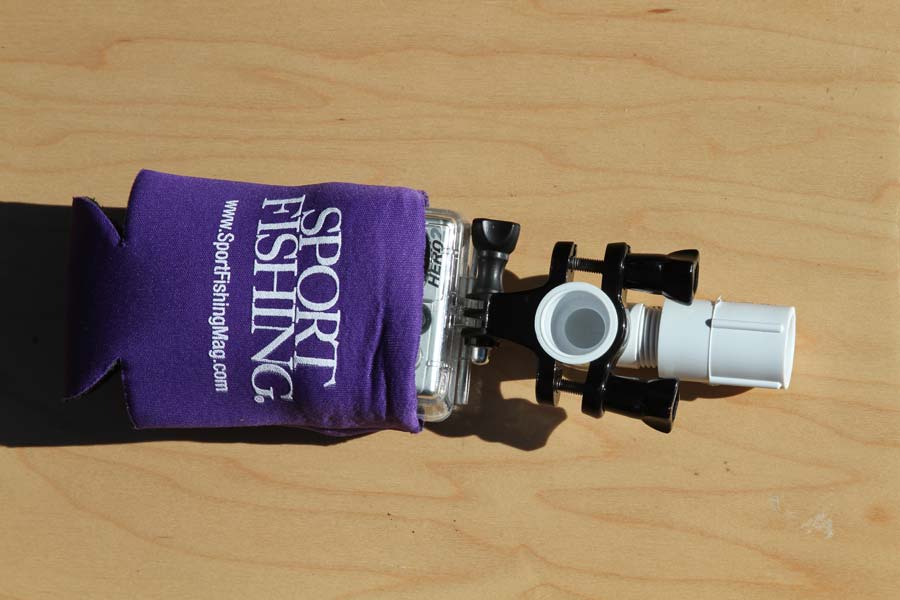
I clamped the standard handlebar mount for the go pro to a simple threaded elbow and screwed in a double-threaded coupler. Now I can twist that quickly onto any threaded adapter. I can also unscrew the coupler if I want to attach the GoPro to a threaded female end of any fitting. Flexibility is the key. (Note: I customarily keep a drink koozie over my GoPro at all times unless in use. It keeps the convex dome over the lens from getting scratched and also keeps it from getting spotted or dirty.)Doug Olander
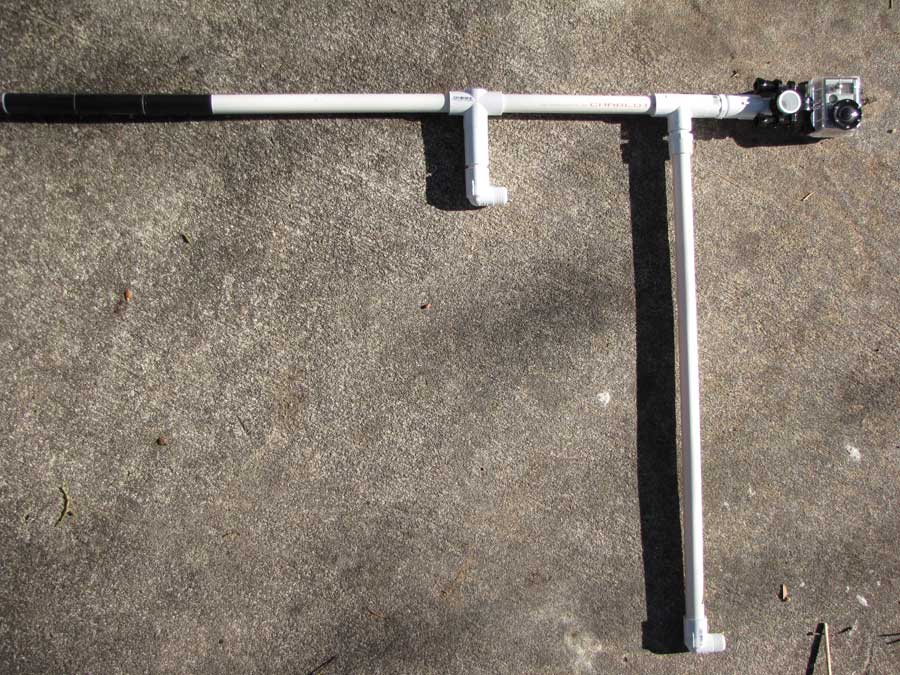
The GoPro, attached. I can set it to start shooting video or stills and hold it out from the boat, to catch the subject/action AND the boat as well. (See next three photos.) (Note: When shooting stills, you can set the camera to take a shot every X seconds. I’ve set 2 seconds as default, so when it’s on and I push the top button, it keeps shooting at that pace until I push the same button to pause it.)Doug Olander
This shot appears in the April issue of Sport Fishing. I took it holding my GoPro mounted on the pole away from the boat and looking toward the bow. (Ironically, the same sort of camera is mounted on the mate’s gaff stick and he has yet another GoPro suction-cupped to the underside of the T-top, video rolling on that one also.)Doug Olander
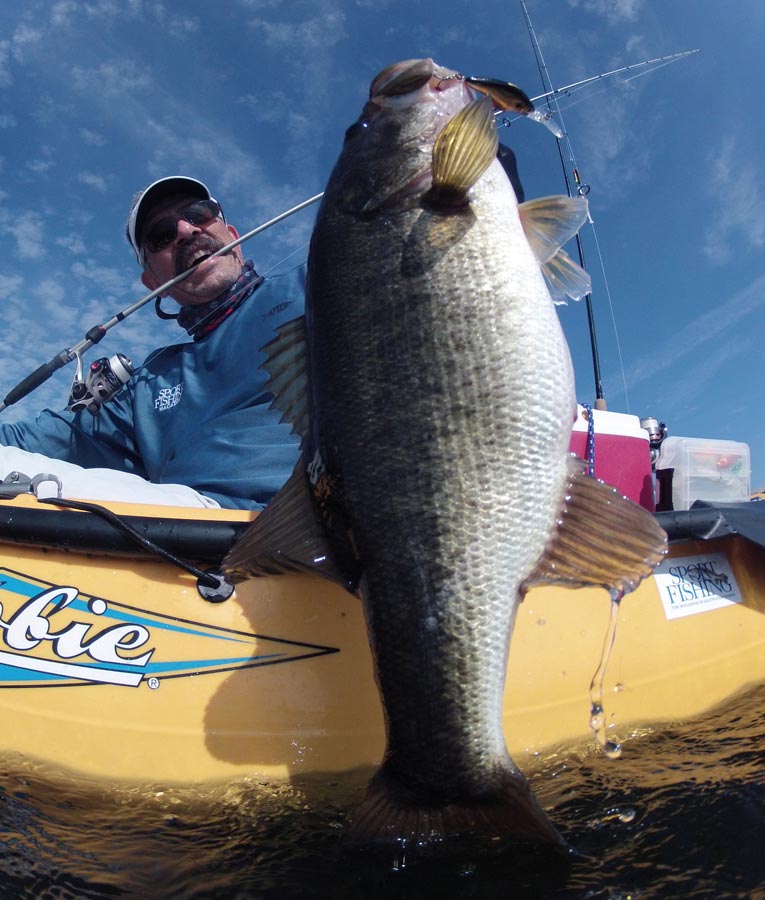
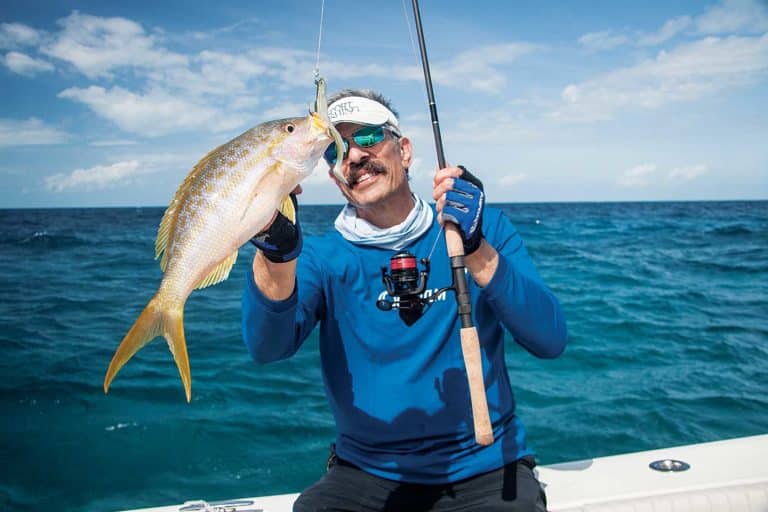
I didn’t go swimming to snap this one. It just looks that way. It’s a great example of the GoPro’s versatility when mounted on a pole with various fittings enabling you to shoot horizontally or vertically.Doug Olander
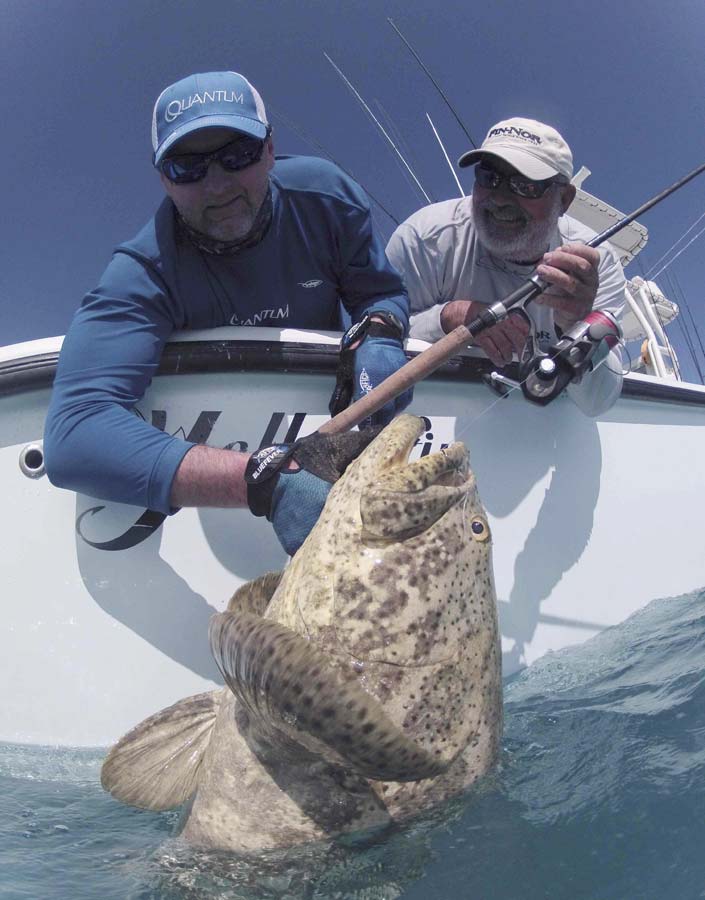
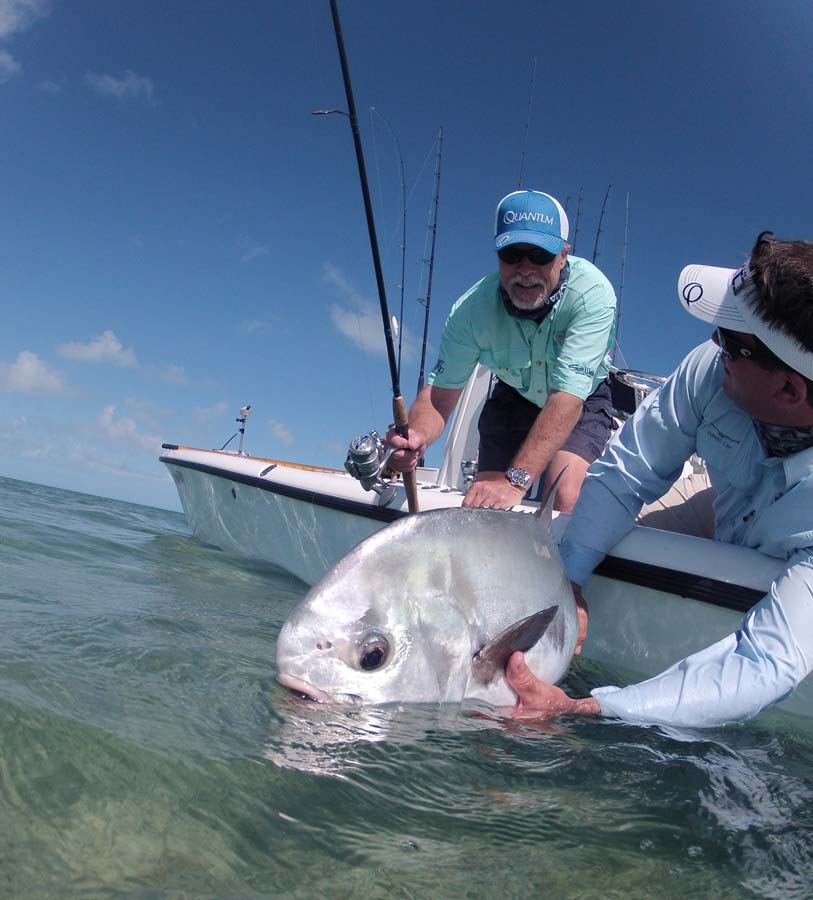
Similarly, this permit release shot allows the camera to take in the scene from a perspective outside the boat; it also makes the fish the in-your-face center of attention, as I intended.Doug Olander
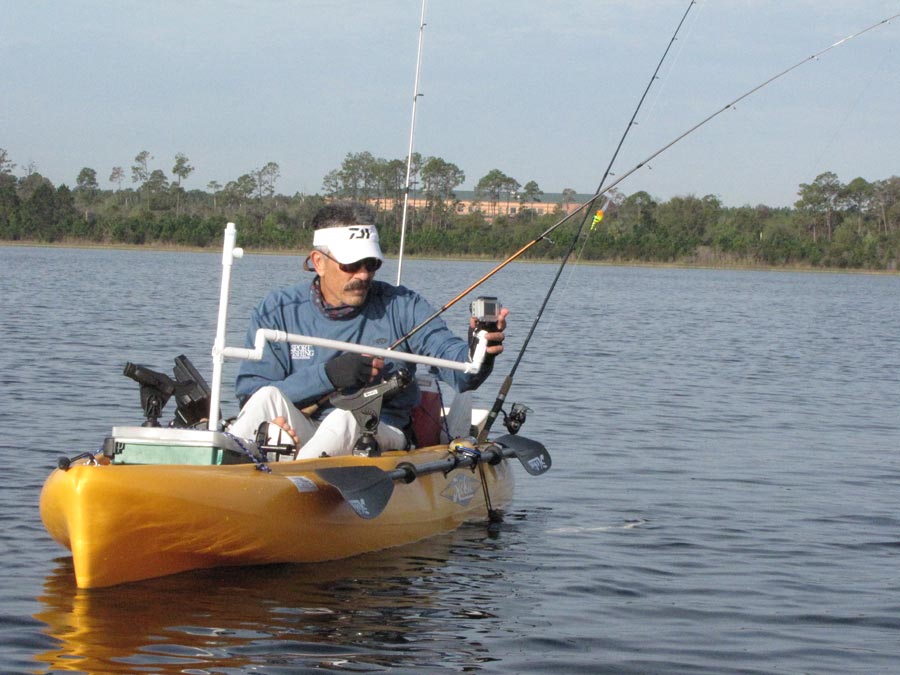
I ended up creating three pieces for use in my kayak. The main pole (the tallest) fits into a hole in my Hobie Outback available for a sail mast. It then looks toward the stern and down. When ready to shoot, I screw the GoPro directly onto the threaded male end, and can then angle the camera down as I wish. I also created a lower option – I simply cut the pipe in two and spliced by gluing both ends into an unthreaded T-socket with a threaded T-end. I can screw the camera right onto that or use a threaded elbow. This offers a different perspective when at chest level vs. top-of-my-head level. The piece at the far left I simple use as an extender which, for example, allows me to take shots looking down the side of my kayak. Also, I can attach to the end of it the long piece at the right so the GoPro is looking at me from outside the kayak, as you’ll note in subsequent photos. The key is that all these take up little space in the kayak and there are many different ways I can attach and configure the set up.Doug Olander
One variation of the system.Doug Olander
The system in use. I have caught a bass for a shot; typically, I’ll put the fish into a holding pattern, the BogaGrip attached to the kayak, while I get the “studio” ready. Here, I’ve got the camera running and am just watching for confirmation of that.Doug Olander
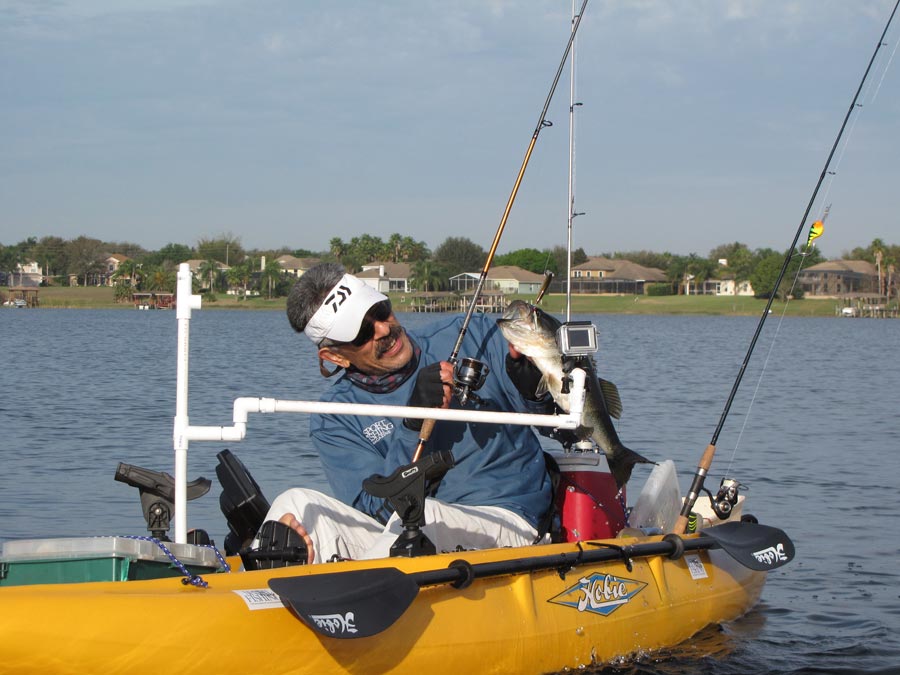
What a poser! Let the thespian in you out and get animated for the camera! Note that the GoPro is pretty close: Keep in mind this is a fish-eye wide angle so it will shoot lots of space around me (also, everything near/far should be in focus).Doug Olander
The result. One of several good shots in the series. Normally, when the camera is mounted and running I’ll hold the fish (and myself) in various poses, knowing it will give me more to choose from once I’m home. (I also often try tilting the camera up and down to change the angle a bit.) Following are a few more, recent images taken with the GoPro PVC system.Doug Olander
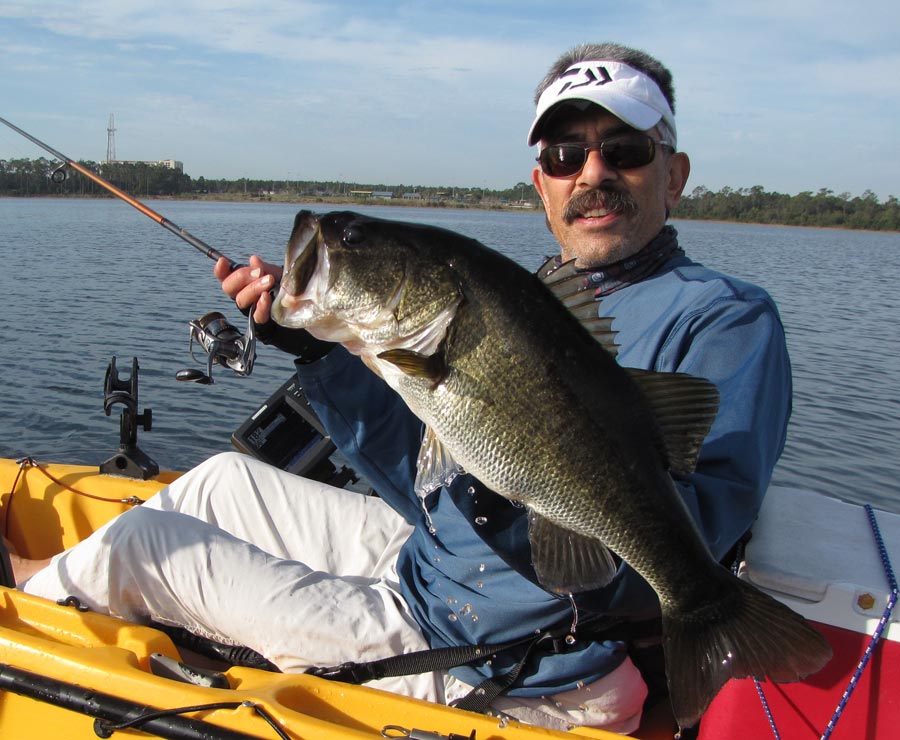
World-record largemouth? No, but the wide-angle lens at this angle definitely puts the fish in your face. Sometimes if I’m in a hurry and don’t want to mount the camera on the kayak, I’ll just hold out the pole in one hand and photograph myself that way, as here. Very quick and easy, and it works. Main downside is that you have only one hand available (to hold the fish) so if you want your tackle to show, time to bite down.
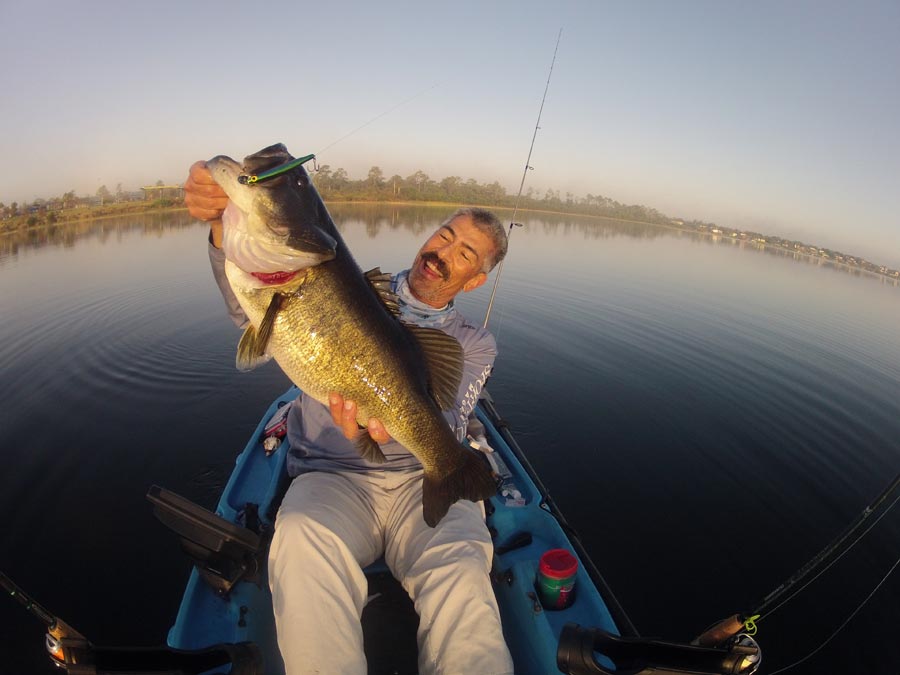
It’s really nice to have a system you’ve designed, so you know it works. I would hate to have gotten home to find my photos of this 9-pounder sucked. This was taken using the pole in the sail-mast receptacle, with GoPro simply attached atop that. I did, btw (and always try to), position the kayak (easy with the Hobie’s pedals and rudder) bow toward the sun. Who needs a flash (which the GoPro doesn’t have)? (Note: on dark days or midday, though, lighting can be problematic.)Doug Olander
Another straightforward shot from the top of the pole mount, The super wide angle offers not only the catch but also a good sense of what sort of waters I was fishing.Doug Olander
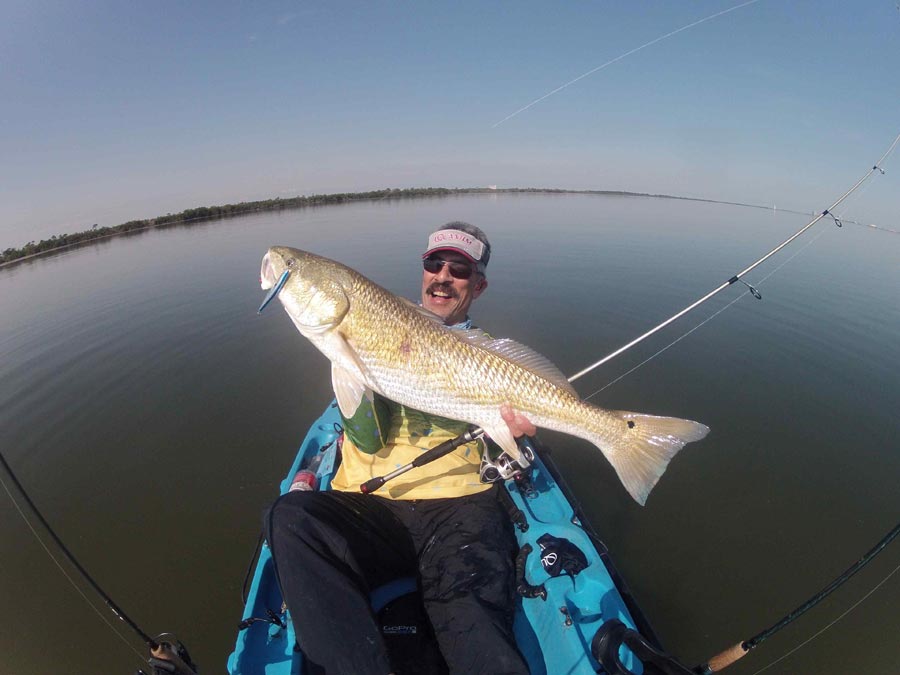
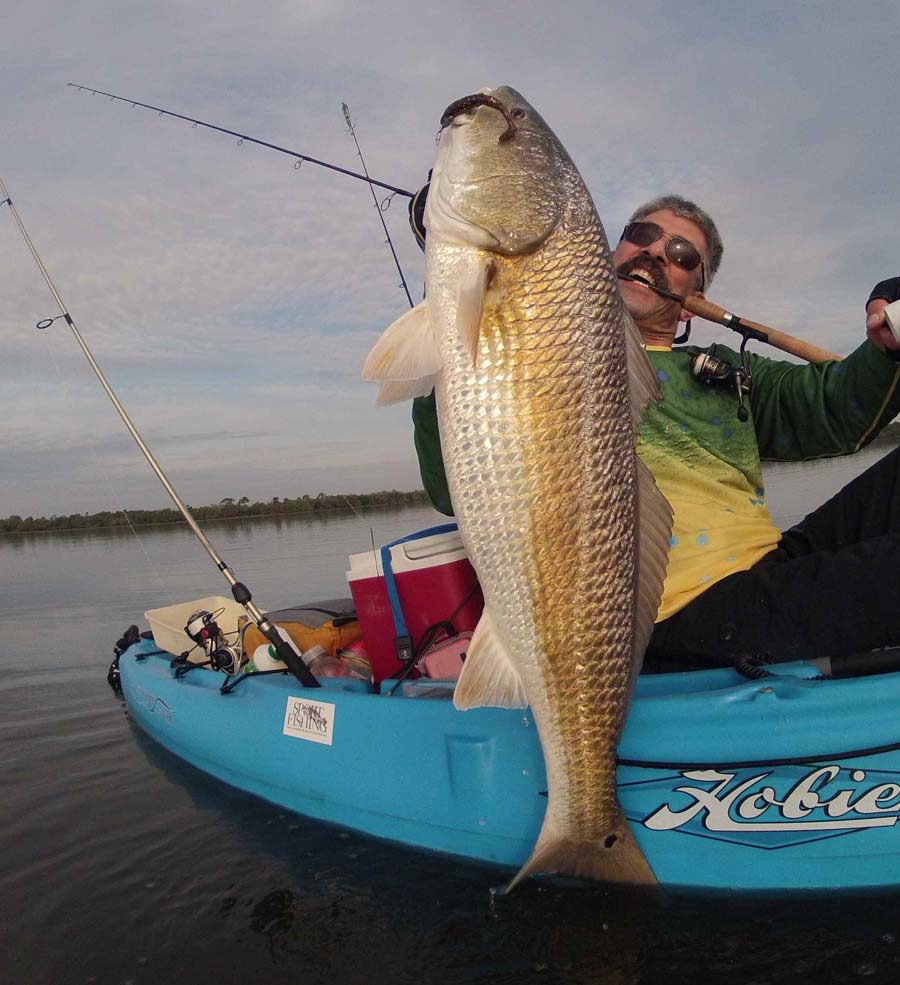
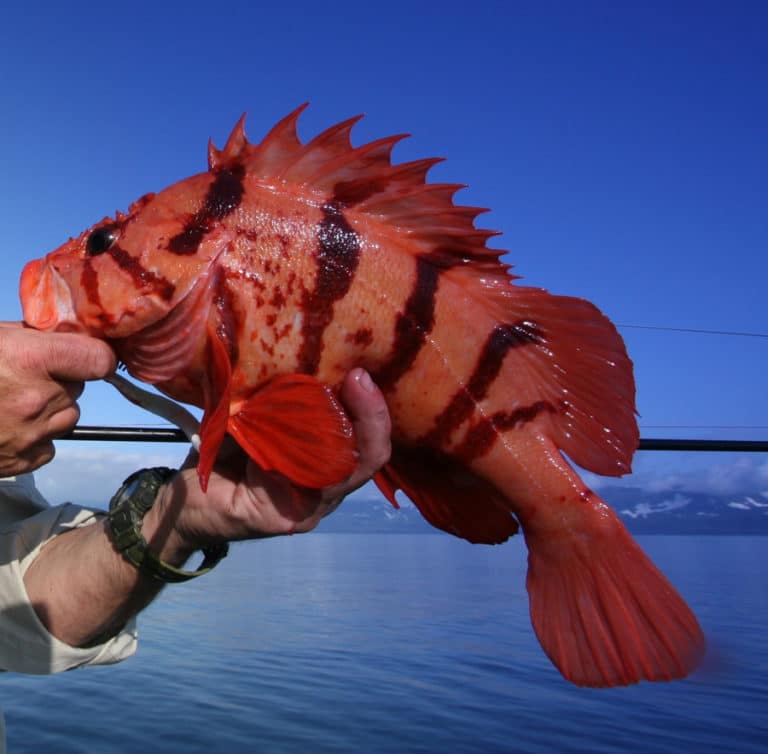
No visual trickery here. That red topped out at about 30 pounds (and was a tough catch on 8-pound braided line). Am I glad I took time to get this shot of it? You bet! So: What’s my left hand doing? I could have cropped that out but didn’t, and you can see (now that you know) that I’m holding my PVC pole. In fact, I had threaded that short extender onto the end to give me some extra length. If you’re going to catch big fish, well — you need a system that’s flexible!Doug Olander