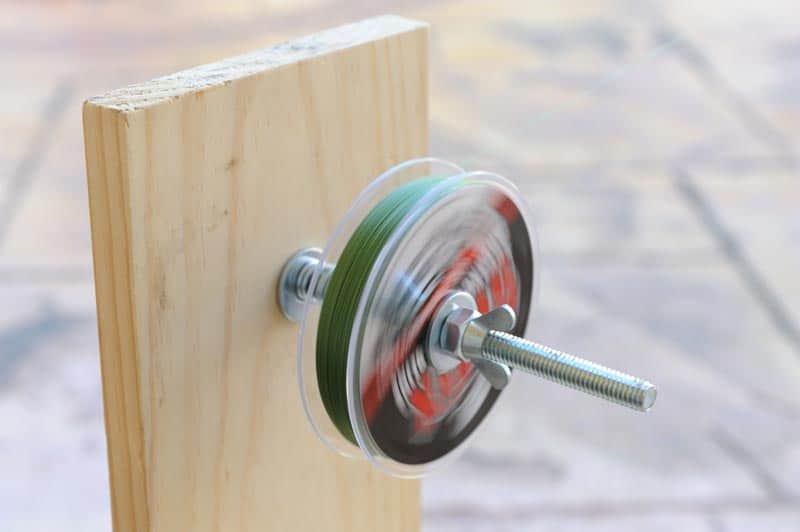
DIY line spooler main
Our angling brethren Down Under are full of good ideas. They’ve proven that to me once again with this very cool DIY line spooler. When I saw this at the Australian Fishing World web site, I asked the magazine’s publisher and my old friend, Jim Harnwell, if he’d send me the photos and captions to share with Sport Fishing’s audience on this side of the large pond.
The author/creator of this spooler, Sami Omari, writes at fishingworld.com.au:
“When it comes to spooling up, I often find myself grabbing a screwdriver and poking it through the center of a fresh spool, then roping in family or friends to hold the spool and apply tension. The tension on the spool isn’t the only tension that builds, and after a few boring minutes of telling them to apply more pressure, the relationship with my volunteers can often strain. There had to be a better way!
“This project was borne out of necessity. I had recently picked up some braid and was home alone, contemplating how to effectively spool up a few reels for an assault on the local fish population the following day. I couldn’t wait for a volunteer who probably would have balked at the prospect of one reel let alone three, so I decided to put pen to paper and sketch something that might help accomplish the task solo.
Armed with a sketch and a rough shopping list, I wandered down to my local hardware store and picked up the necessary bits and pieces required.
“A DIY line-spooling device is a relatively straightforward gadget to build — there are also a number of similar devices commercially available. “As with any of these DIY projects, you can obviously dial the complexity levels up or down. However, anyone with some tools and a little initiative should be able to knock one out relatively quickly.”
Omari’s list of what’s required:
A drill and a jigsaw, circular saw or hand saw; a 3/8-by-6-inch bolt and suitable hex nut; and a few washers plus a 3/8-inch wing nut. You’ll also need a compression spring that will fit over the bolt plus some wood adhesive and wood screws. Omari used a couple of pieces of 1- by 6-inch pine, though he says cuts of similar size will do.
CLICK FOR A STEP-BY-STEP GALLERY