I’ve heard marine-electronics manufacturers and anglers delight that today’s sounders function on automatic incredibly well. Indeed, the units’ computerized brains certainly evaluate and adjust, given a host of algorithmic circumstances. Plus, manufacturers work extra hard to produce a user-friendly experience for all boaters — witness the emergence of Apple-type interfaces on multi‑touch screens.
But to get the most out of a sounder, whatever its brand or sophistication level, we asked manufacturers to offer some suggestions on tweaking the machines for better fish-finding performance — suggestions that focus more on the newer features these units tout. Click through all the images above to read their suggestions.
Remember, while these tips might help you make some immediate adjustments to your own sounder, there’s no substitute for time spent on the water watching the display. “My best tip is to practice,” says Alden Thornton, sales rep for Nor-Tech boats and a Garmin user. “When you capture a target (fish) and actually know what it is, the better you will become at understanding what the sounder is telling you.”
Furuno
Furuno Tip 1: Determining Seafloor Hardness
NavNet TZtouch offers two different methods to determine the type of bottom beneath the boat. Bottom Discrimination mode, which comes with the DFF1-UHD and BBDS1 network sounders, can display the bottom in four different categories: rock, gravel, sand or mud. You can also determine bottom hardness by using Bottom Lock and looking at the double or triple bottom returns — the darker red the return, the harder the bottom.
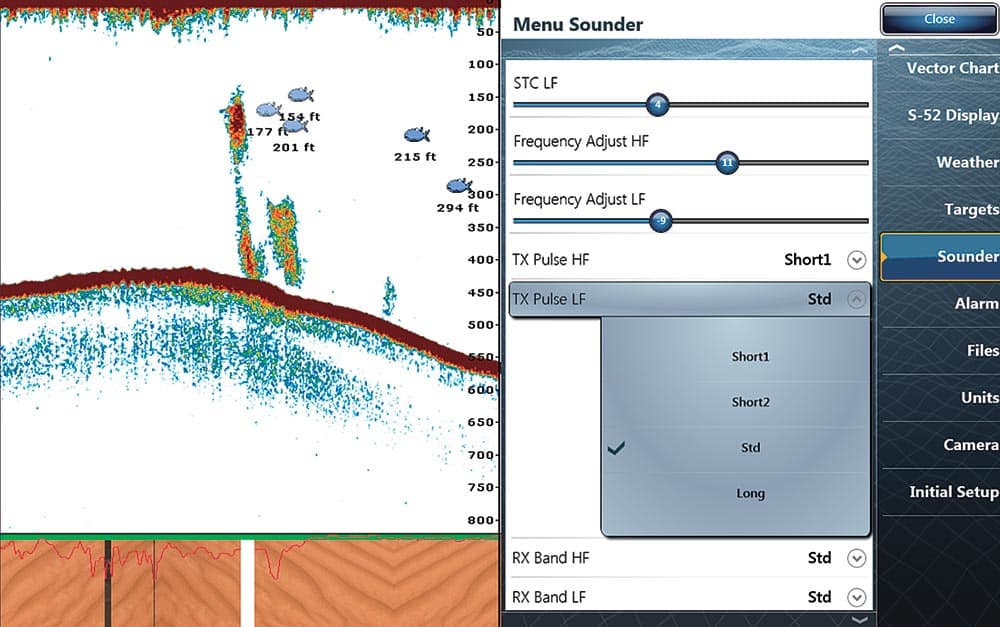
Furuno Tip 2: Pulse-Length Variation
With the DFF3 network sounder connected to a NavNet TZtouch, you can set your pulse length to help separate individual fish targets. Shorter pulse lengths allow the echoes to return to the display without interfering with each other. The result is separate and defined targets.
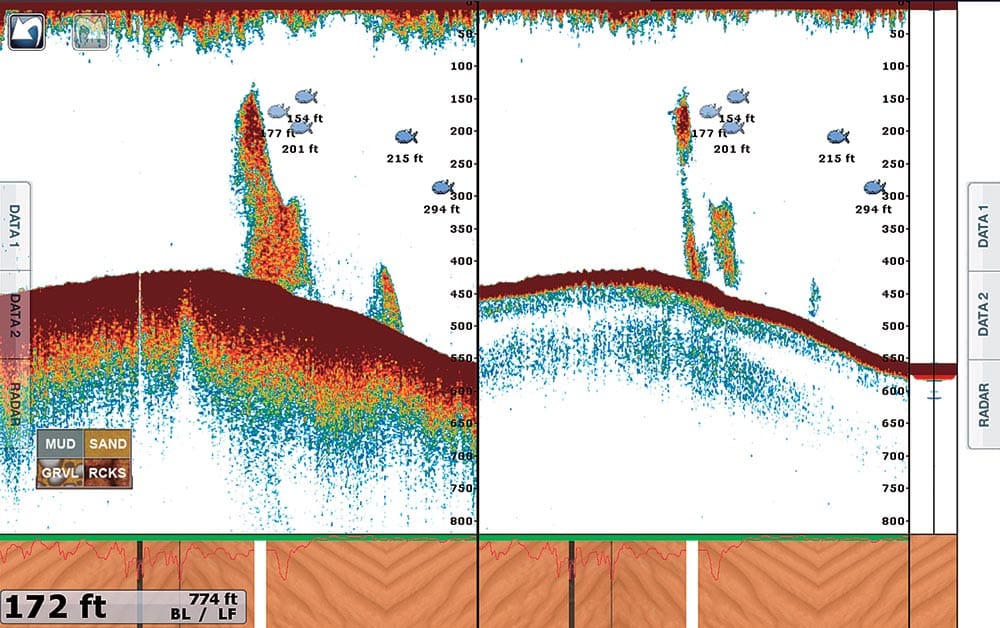
Furuno Tip 3: Use White Line for Bottomfishing
The bottom on most fish finders shows in a dense color like red or brown. A large bottomfish might show as a similar color, making it hard to distinguish the two. With the white line on, a unit like the FCV-295 draws the contour of the bottom in white, allowing you to easily see a separation of the bottomfish from the bottom. This function is not only useful for discriminating bottomfish, but it is also valuable for judging fish-school density.
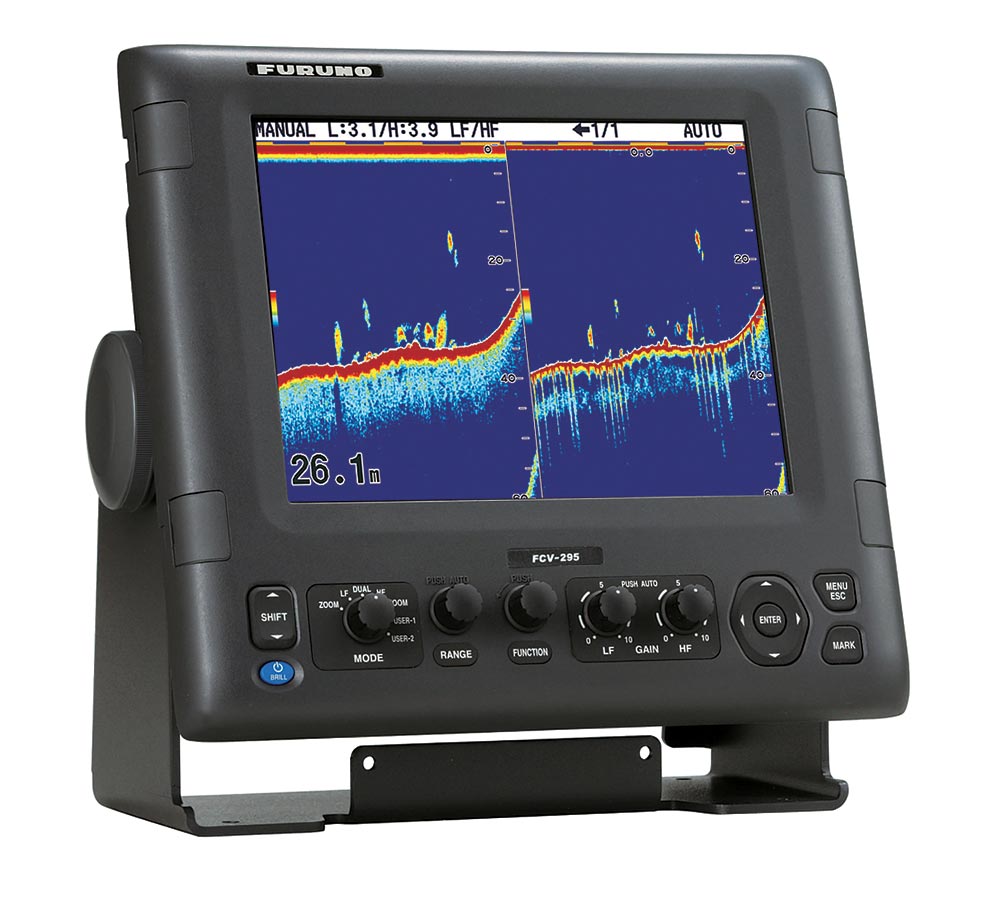
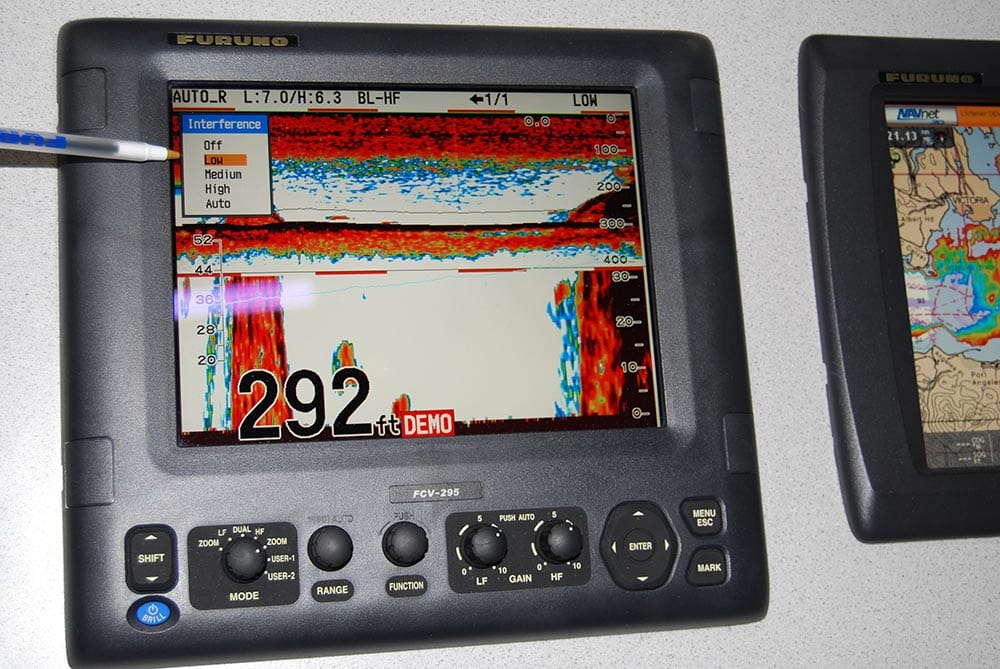
Furuno Tip 4: Three Steps to Clutter Control
Several settings allow you to clear up the screen from unwanted echo returns, which makes it easier to find fish. First, reduce interference from other nearby equipment by going into the interference menu (FCV-295 pictured) and selecting the level of suppression needed. Next, reduce low-level noise caused by stuff like sediments in the water by adjusting clutter. Finally, erase weak echoes like sediment or plankton reflections by using the STC feature, which removes weaker echoes sequentially.
Raymarine
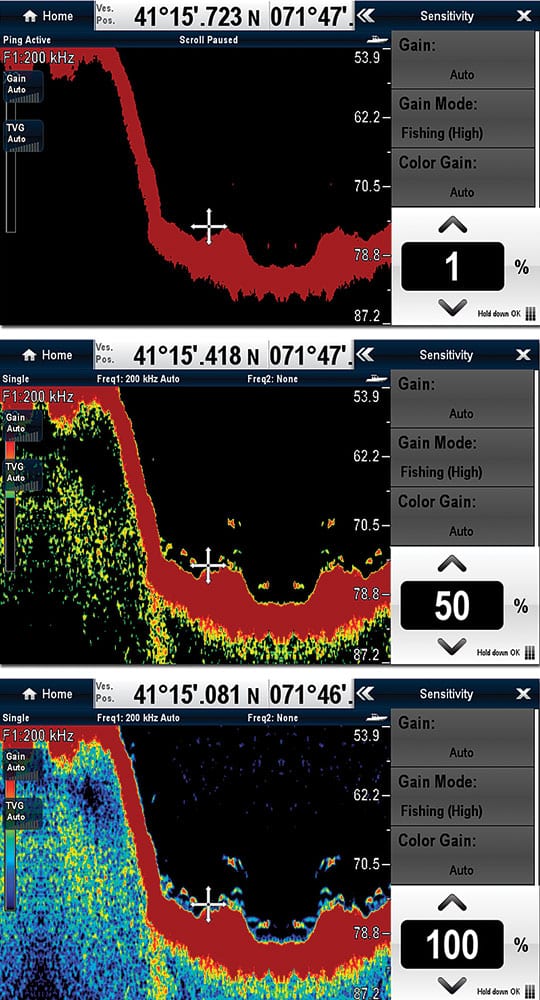
Raymarine Tip 5: Color Threshold for Clutter Control
Today’s sounders use a bold palette of colors to represent signal strength. Normally, to cut through unwanted clutter, you might adjust the sounder’s gain or time-variable gain. But the downside is you also reduce the receiver’s sensitivity, which degrades the image of the fish targets. Another approach is to use the Color Threshold control. Now you’re simply removing undesirable targets, such as plankton or suspended sediments, based solely on their color.
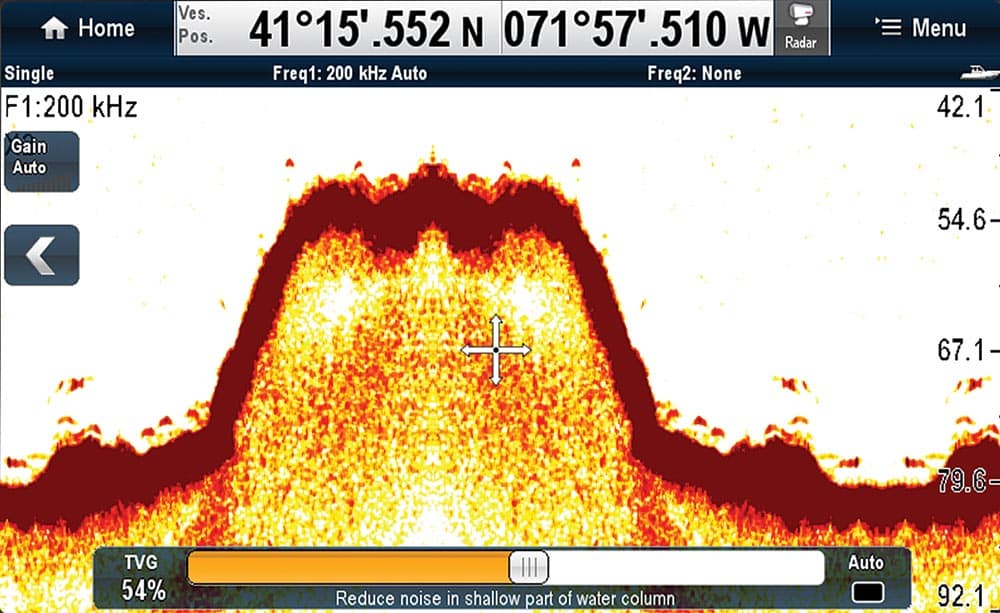
Raymarine Tip 6: TVG Enhances Shallow-Water Clarity
Imaging targets in shallow and deep water at the same time can be challenging because targets close to the transducer reflect a stronger echo than those that are deeper. To overcome this effect, time-variable gain (TVG) can be adjusted to reduce the sensitivity to shallow targets while increasing the sensitivity to deeper ones. Many sounders do an excellent job of automatically managing TVG, but give it a try. You might be surprised by how it enhances the overall viewing of the water column.
Raymarine Tip 7: Use the Sounder and Plotter Together
One of the most powerful things about marine electronics is their ability to share information. By combining sonar imagery with GPS and charts, you can mark a large fish return as a waypoint and return to that spot. In some cases, you might even predict the movement of a school by dropping waypoints each time a fish strikes to develop a track, showing a pattern.

Lowrance
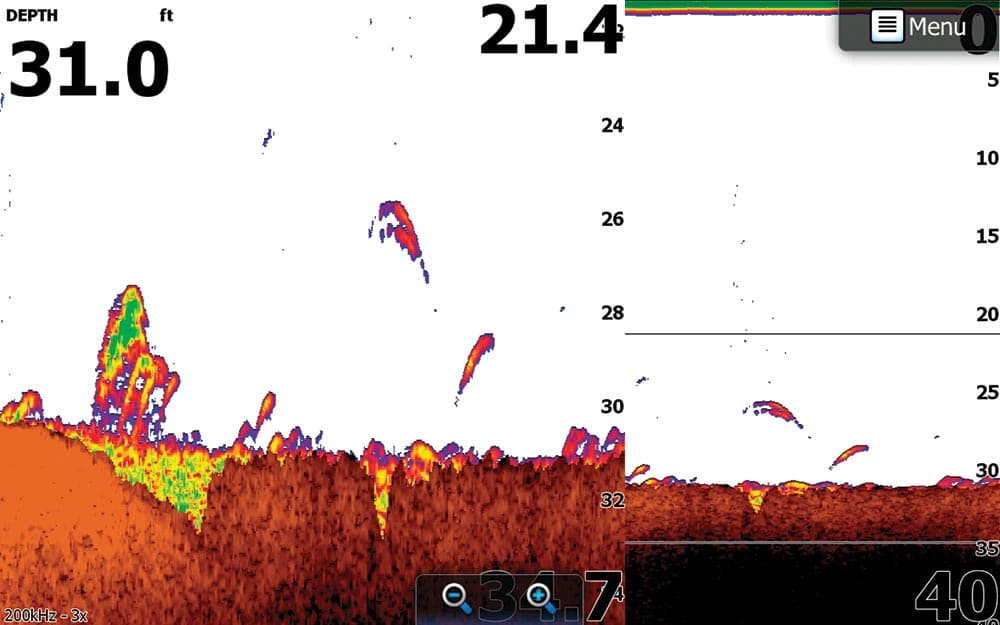
Lowrance Tip 8: Color Palettes
Most sounders now offer an expanded variety of color palettes. A white background works best in direct sunlight. This palette also provides one of the best views for determining bottom hardness.
White background with brown for bottom and green for the strongest sonar returns is ideal for marking fish holding closely to the bottom.
When using StructureScan HD, the sepia palette provides the best target detail.
The blue palette offers the best view for determining bottom hardness. With StructureScan HD on HDS displays, color palettes can be enhanced further by using the DownScan overlay feature and customizing the palettes of both. The combination provides a high-contrast view where target confirmation is extremely important.
Humminbird
Humminbird Tip 9: Water Type
A number of units have this kind of setting. If you select Salt (deep), it looks at the average definition of that water type, and changes sensitivity and filtering automatically. Then you can manually change things, adjusting settings up or down slightly. You might be dropping a diamond jig in 200 feet of water and you’re seeing it down to 70 feet, so you jack up the sensitivity one notch.

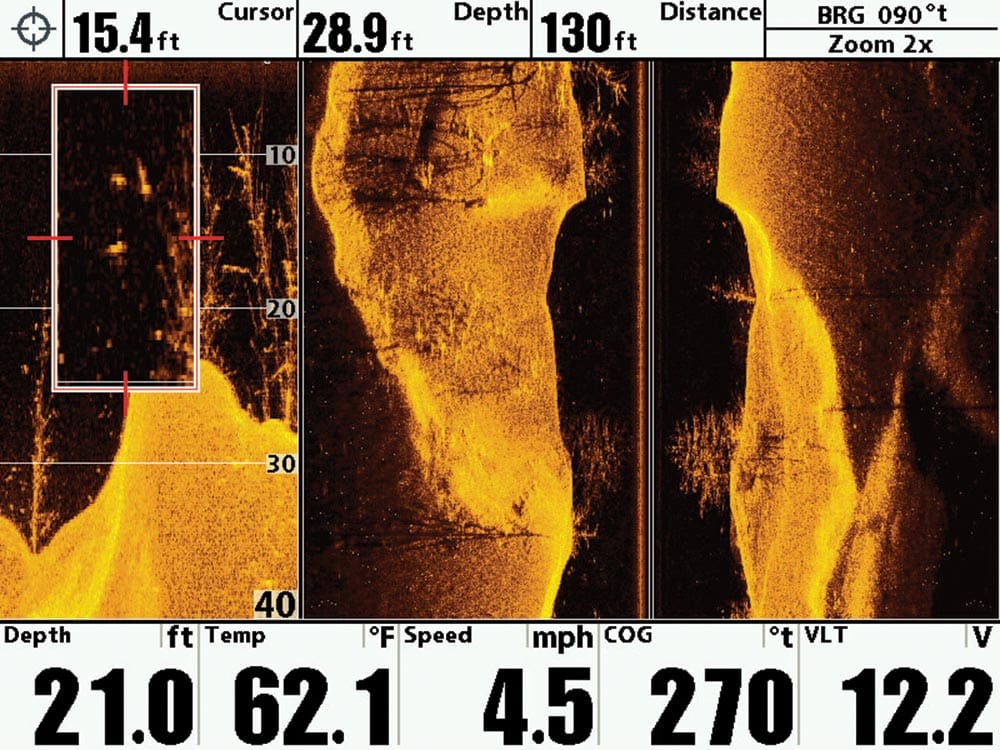
Humminbird Tip 10: Freeze Frame
With side-imaging, you can move the cursor over the top of an object and hit zoom. Like a rifle scope, the unit focuses on the area around the cursor with a pop-up box. Then you can inspect it and mark that object as a waypoint.